Machines that Make - Instructions and .stl Files

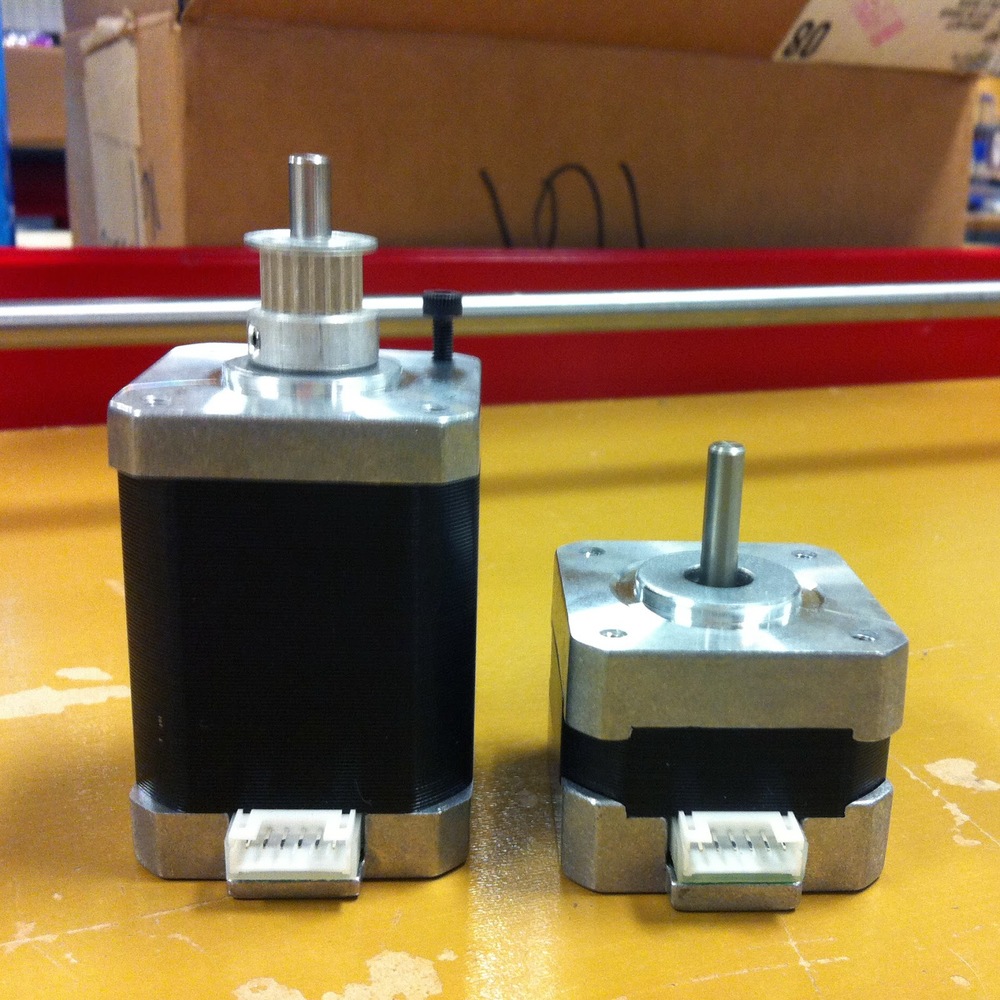
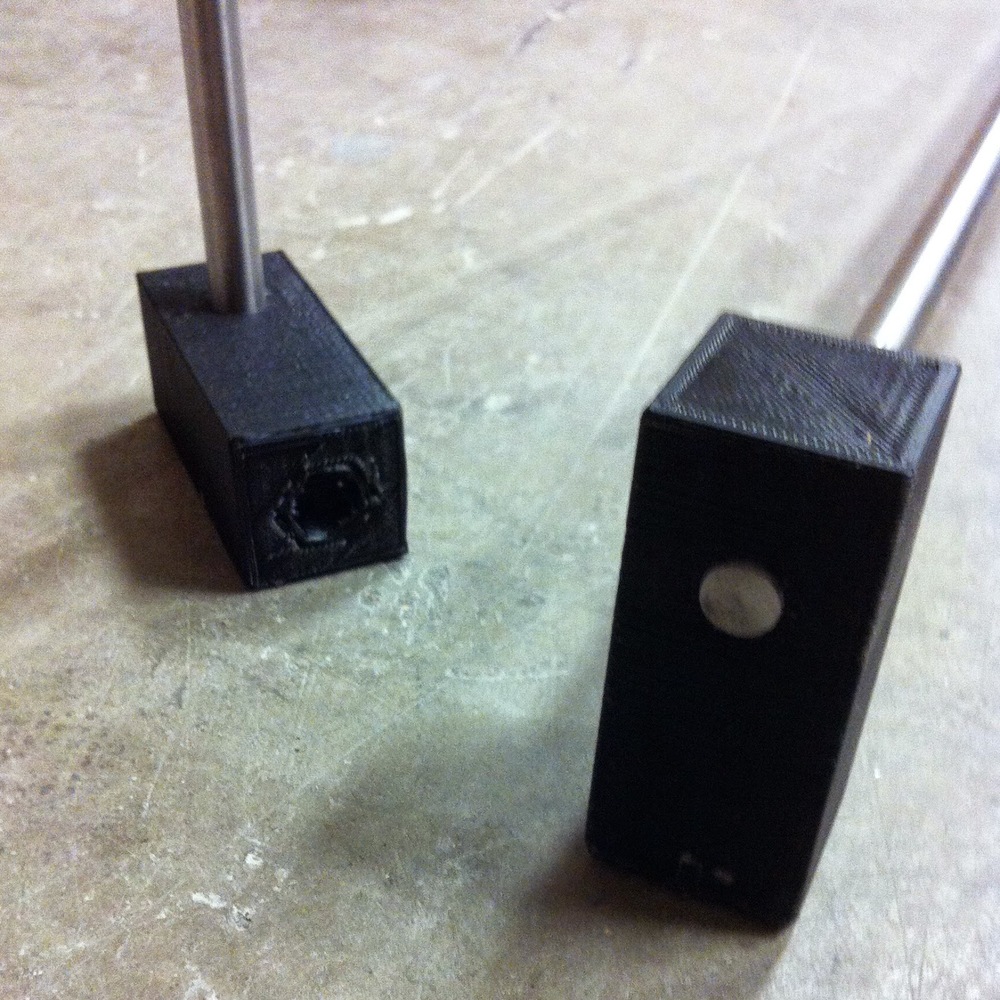
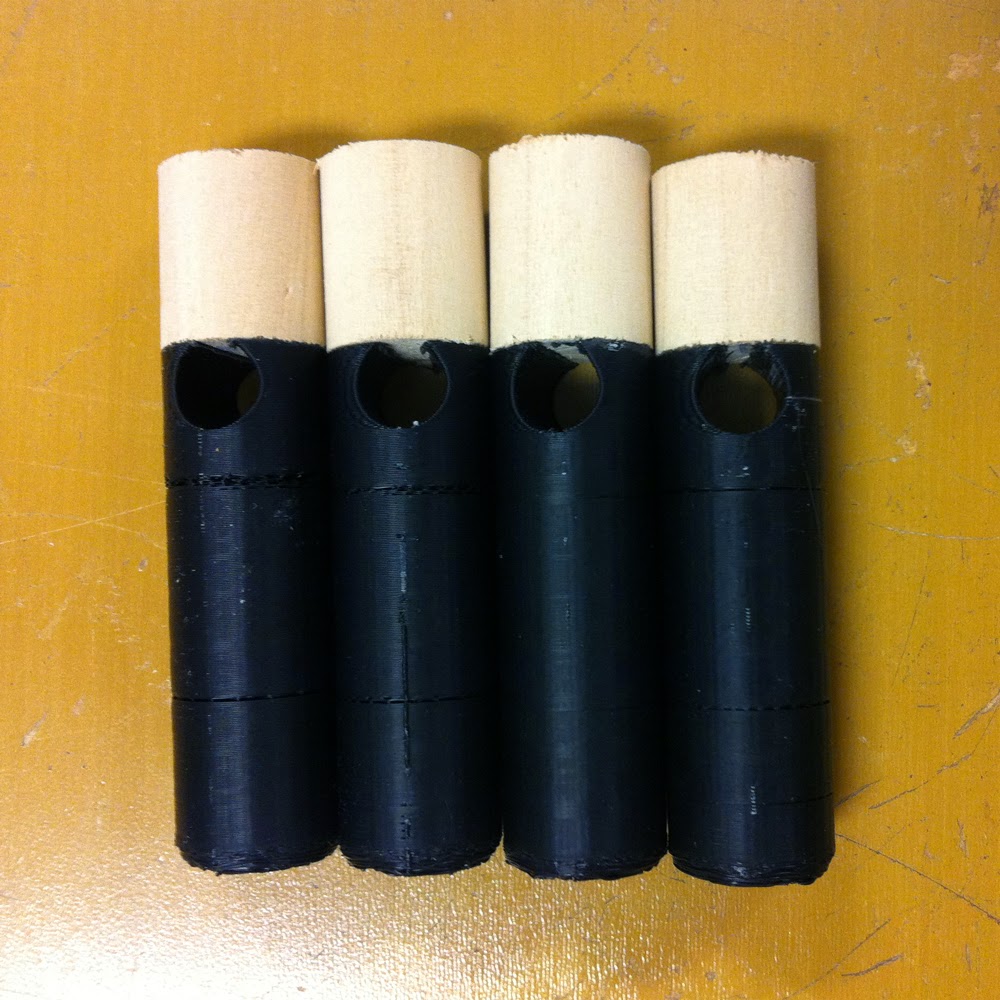
Throughout the creation of this Machine I have utilized numerous online resources and have borrowed (in some cases - borrowed and modified) lots of open source knowledge, parts and code. Without the information that is available through websites like Thingiverse, github, Instructables, and the RepRap Wiki, the creation of my machine would have been imposible in the amount of time I've completed it.

So, in the spirit of the open source community - I encourage you to download these files and create your own "wall mounted cartesian light machine." (If you want to of course.) OR, make a derivative!

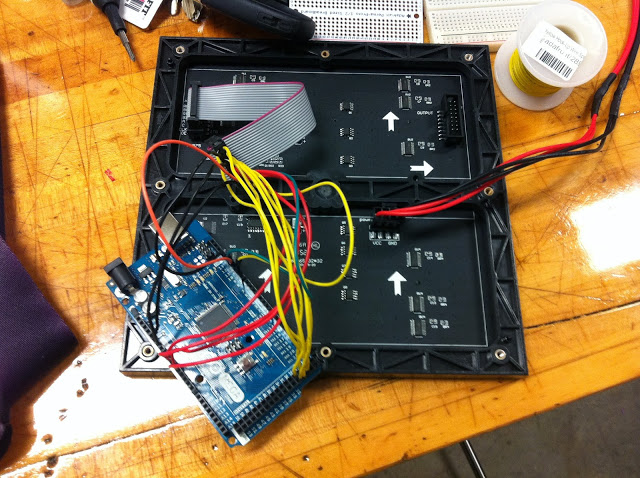
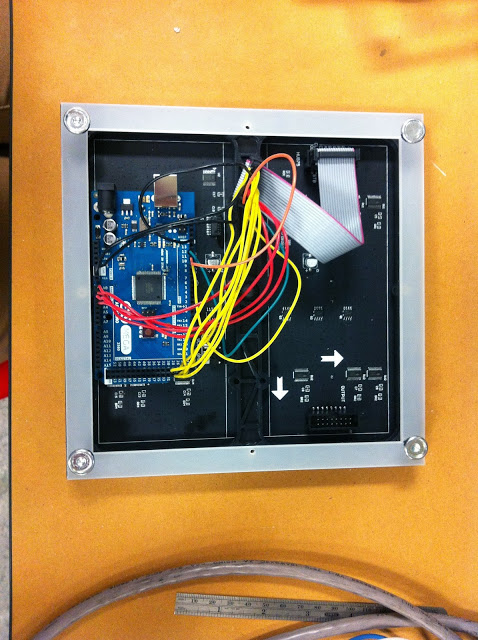
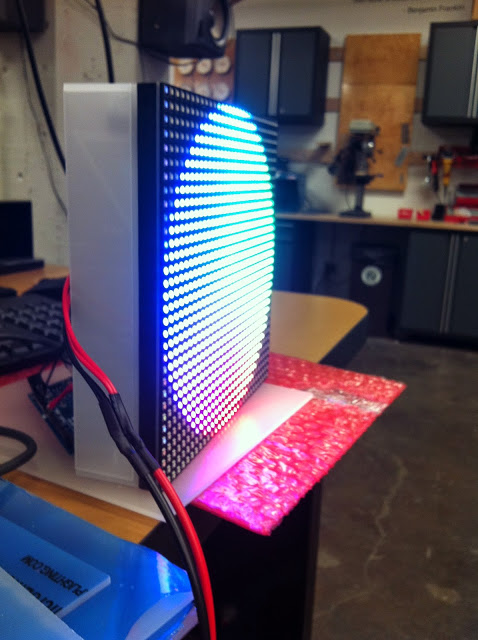
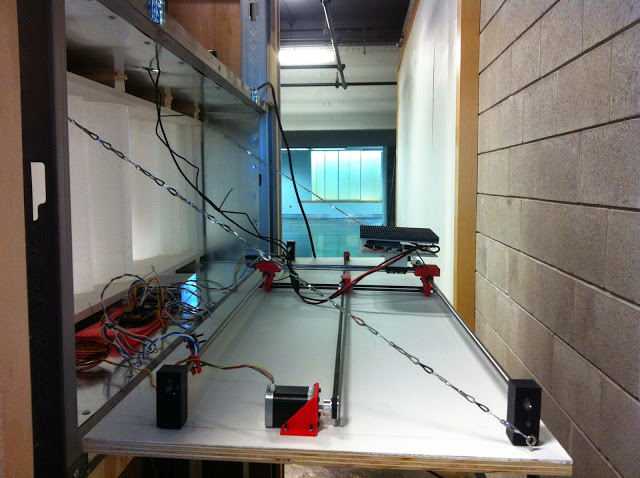
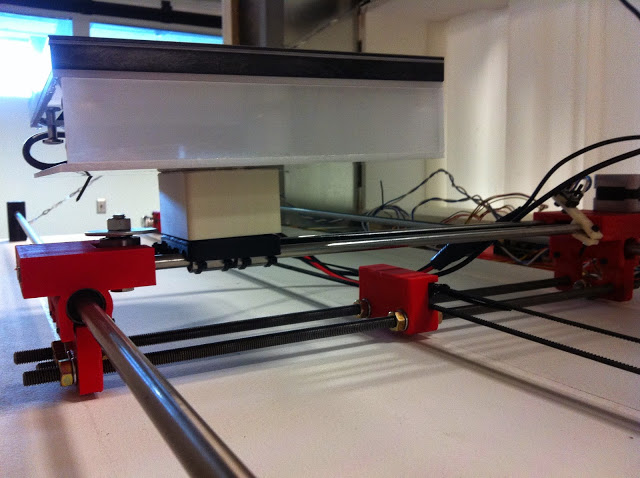
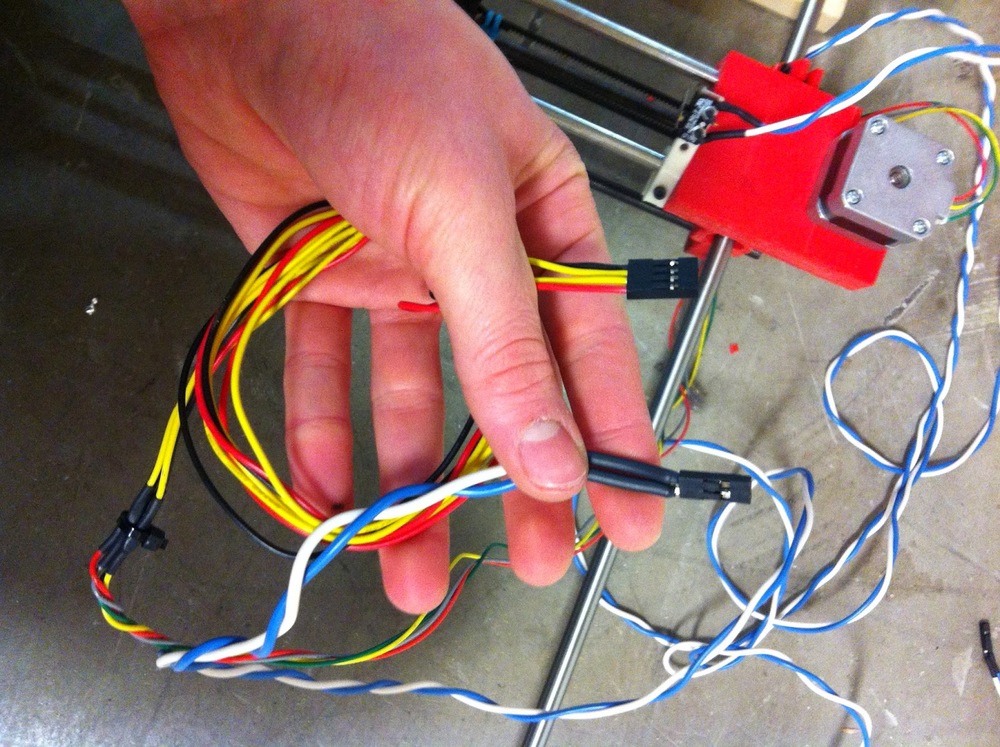
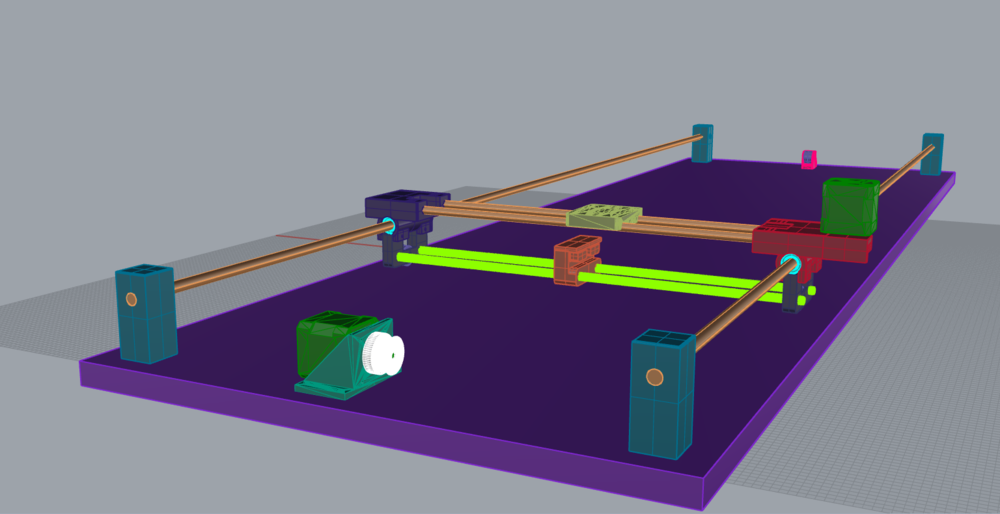
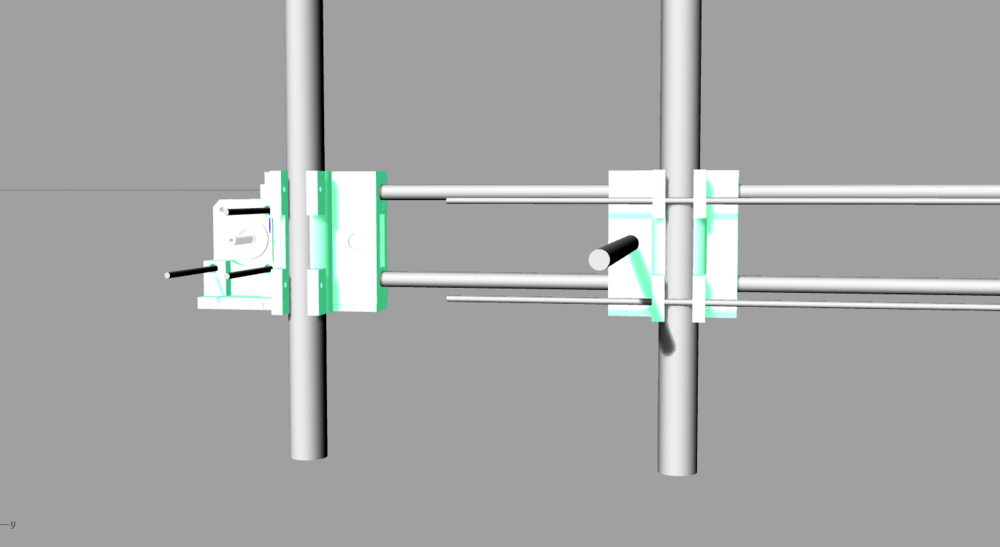
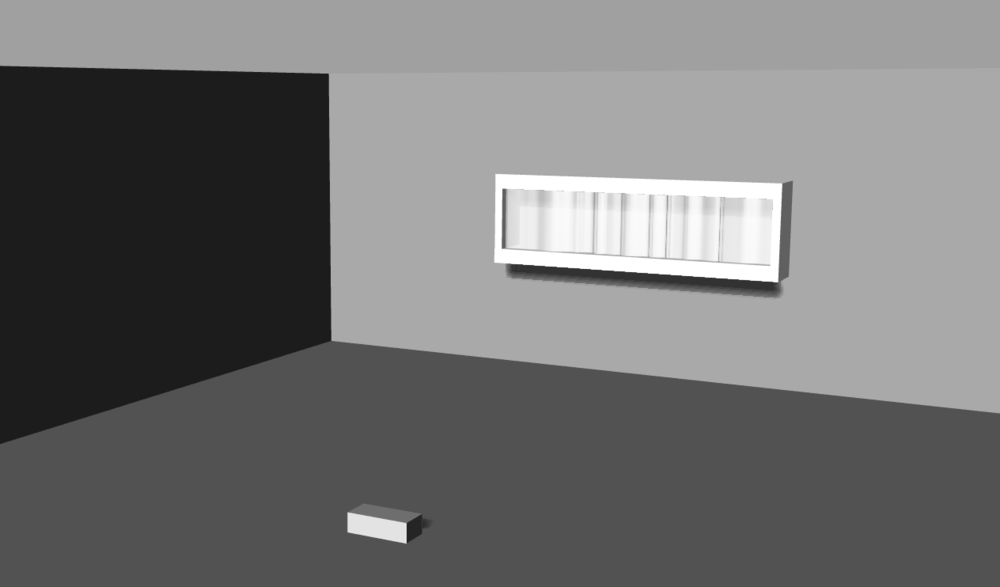
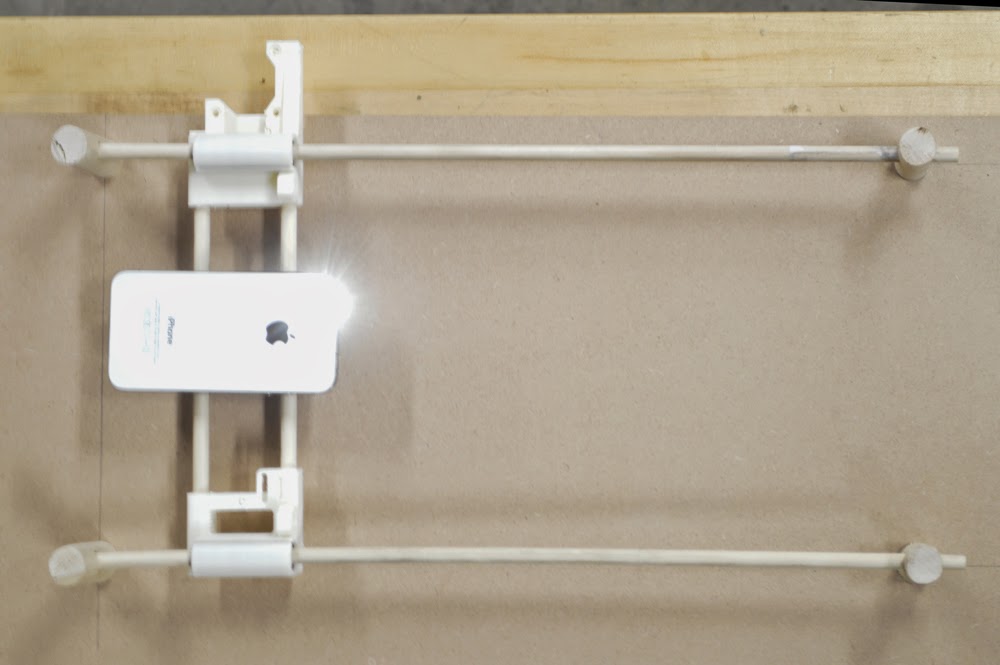
Here is a link to all of the .stl files that have been used in the creation of the "Wall Mounted Cartesian Light Machine." In that folder, you will also find a brief instruction sheet, detailing all of the other components of the machine. Enjoy!

Machines that Make - Carriage

Today, I wired up the LED Matrix for the short axis carriage and designed the mount. The mount is made out of 1/8" acrylic that I laser cut to size. I tapped screw holes for the 2mm screws that came with the LED Matrix for constructing. I welded all of the acrylic parts together with Weld On. I then designed a space for the light to sit further elevated off of the carriage - so that I get the maximum travel distance out of the short axis. The new modified mount works well with the endstop. I've also uploaded a couple videos of the machine in action from when I was testing out code for the movement and the light pattern. I'm pretty happy with the progress... Even though it is doing something completely different than what I envisioned it would do. 


Machines that Make - Mechanism Install

This weekend I installed the mechanism onto the structure of the machine. I've added a 40 teeth pulley to the long axis that I am using with a high torque 60mm Nema17 and a 16 teeth pulley to the short axis that is attached to a 34mm Nema17. I'm using GT2 belts for both axes. 


Machines that Make - Endstops

Today, I added end-stops and finished all the ends of my wire with sockets. 
The end-stop design came from thingiverse, but I drew a new version to hold a 10mm rod (below). Also, preparing wires to go into sockets is hard. If I were to do this again.... I think I would make a machine that doesn't require any wiring... AH HA just kidding, I am getting better at it slowly.   


Machines that Make - Structure

Over the weekend I started to build the wall that will house my Machine that Makes project. There is a steel stud frame, plywood, sheet metal, lots of metal screws, more plywood etc. I added a hinge to the back panel that will hold the steel rods that make up my machine, for easy access. Eventually, I will also add some trim over the shims that surround the acrylic. Next step is to fill the screw holes in the plywood, sand and paint. 


Machines that Make - Making Parts - Part 2


Mocked up X Idler
Mocked up X Idler

In addition to the corners, I also designed new X axis parts this week. Taking cues for the Prusia i3 parts I had already printed, I made a few modifications to allow for 8mm and 10mm steel rod. I started by printing a few test pieces at 2% infill and 2 shells, on Fast.
  
New Part designs - with modifications after test prints:
 The take a LONG time to print at 45% infill and 3 shells! 


Assembly and testing with the motors: 


 There is a bit of sag in the rod - so hopefully I will be using the smaller, 34mm Nema 17's, instead of the higher torque...


Machines that Make - Corners v2

I designed and printed new corners for my machine this week. They will hold the ends of the rod for the y axis. The strength of this design is far superior to the original round version.  You may ask, "Well, why didn't you just cut a piece of wood and drill a hole in it?" My answer - because it would have been much harder to counter-sink a bolt in the bottom. Is the counter-sunk bolt necessary? No, but it will make it much easier to align and tighten the corners to the mounting material. 


Machines that Make - Construction Plans

Ever since I heard a story on NPR about Thad Starner,
Thad
I haven't been able to get the idea of social cognition and collective intelligence out of my head. My obsession has been inspiring me to talk more about my work with whoever will listen, in hopes of feedback or ideas.  Lately, my inquisitiveness has lead to many talks about the construction plans for the false wall that will house the mechanism for my machine...

A grad colleague that worked in construction for a while, gave me some good insight on how to construct and deconstruct a possible 3 sided room for the installation... and introduced me to gator board, among other things... Here are some drawings from that chat:

Last weekend when I visited my family for Easter, I also chatted with my Dad about my machine and he gave me some helpful suggestions and drew me a sketch of what he recommends I construct out of metal studs and plywood... 

 While I know I'm probably a little too old to get help from my Dad on my school projects, it sure is fun to collaborate with him, especially since we hardly get to see each other.  We have planned to team up next weekend for the construction...  to be continued!

Machines that Make - Making Parts

Over the past couple of weeks I've been working on sourcing all of my parts for the Machine that Makes project. In addition to the metal, wood and plastic that makes up the facade, I've been 3D printing a few components that will aid in assembly. I have borrowed some of the open-source parts available for the Prusia i3, and am designing a couple of new ones.

Frankie helped me design a part to hold the ends of my rod, which I have pictured below. The MakerBot only successfully printed 92% of the design, so I decided to try and make it work... Long story short - my attempt failed, so I will be printing new parts as soon as possible.


Machines that Make - Fitting in

Graduate reviews was a great opportunity to step back and look at the progress I've made this academic year. I am happy with the direction all of my pieces have taken in terms of technology, and I am happy to see that I've made large strides in learning new technology and collaborating. Here is a small snippet of video from my set up for graduate reviews... the Compact Mirror (wip) project is on the left, Pulse Operated Mirror in the middle and the Machines that Make (wip) project is on the right.


Machines that Make - Digital Renderings

For graduate reviews, I created a digital rendering of the machine I am creating this semester to help communicate my ideas and work-in-progress. I enjoyed working in Rhino to create a model of what I am envisioning in my head. I also really enjoyed learning more about how to use the lighting features in Rhino to create a more realistic rendering. 
 I am thinking that the materials that construct the "lamp shade" will be drywall or wood, painted to match the wall. The box across the way will house the Kinect, that will track the movement of the viewer and initiate the movement of the motorized gantry that holds the end effector (light).


Machines that Make - Samples


In my quest to create a novel machine, I've become a hacker. I never thought I would say that... but I'm starting to think I might have always been a hacker — splicing bits and pieces of this with that, to modify this or to make that better... I think it's all innovation anyway (depending on how you look at it).  For the creation of these mocked-up models, I've borrowed some Prusia i3 parts to make my mechanism... I'm pretty happy with the ease of assembly. The printed parts slide along the dowels with ball bearings. The dowels will eventually be replaced with smooth steel rod. I'm trying out two different orientations for the axes. I think I'd like to test it out with the electronics before I settle on an orientation.  (The cell phone eventually will be replaced with a light — just there on the carriage for "effect.")


Machines that Make - Ideas & Inspirtation

Over the past few months, I've been working on a series of pieces that are broadly inspired by my interest in the human body, existance and our understanding of being alive.  I've finished one of the pieces in the series, find more about that piece here. Below are some of my sketches for potential machines that will follow in these concepts... the sketch on the left is the one I am going to go with for the "Machines that Make" project. It will fit nicely into my current body of work. Next week I will be posting some images of the models and test pieces...

  
AND some books that I've been inspired by the last few months... Check them out!


Machines that Make - Visual Research

This semester my studies have landed me in a course called "Machines that Make," an introduction to  the rapid-prototyping of rapid-prototyping machines; history, theory and practice of digital fabrication and design. Our main project in this course is to design and create a novel machine that makes. Using our previous understanding of process and newly acquired knowledge of the machines from the class - research, design, fabricate and produce a machine that makes... 

As an artist, with a background in jewelry and metalsmithing - I've always had an interest in objects that either adorn the body, or require the body to be activated, and machines are no exception. So, I begin my research... Follow my progress here.