Compact Progress - Laser Cut Acrylic Insets

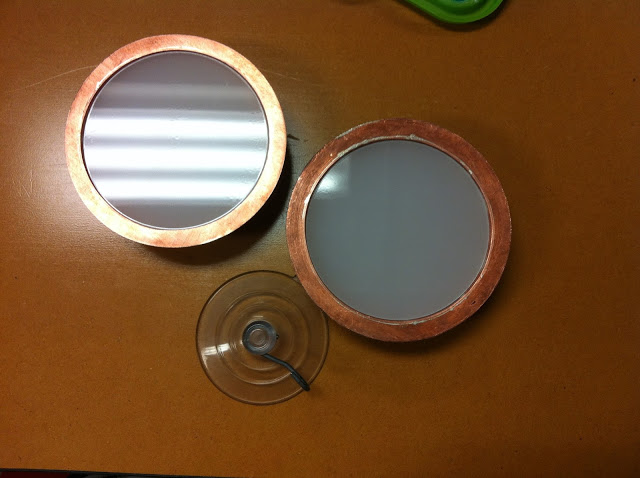
I laser cut some acrylic to inset into the compact to diffuse the light of the neopixels. I got the top lid measurement perfect, it fits snug and needs the suction cup to remove it, but the bottom is a little off. I will cut a revised inset for that section. I might switch to a thicker acrylic, but for now I'm going to stick with the two layer approach and sandblast one of the layers for softer light. 


Machines that Make - Carriage

Today, I wired up the LED Matrix for the short axis carriage and designed the mount. The mount is made out of 1/8" acrylic that I laser cut to size. I tapped screw holes for the 2mm screws that came with the LED Matrix for constructing. I welded all of the acrylic parts together with Weld On. I then designed a space for the light to sit further elevated off of the carriage - so that I get the maximum travel distance out of the short axis. The new modified mount works well with the endstop. I've also uploaded a couple videos of the machine in action from when I was testing out code for the movement and the light pattern. I'm pretty happy with the progress... Even though it is doing something completely different than what I envisioned it would do. 


Machines that Make - Mechanism Install

This weekend I installed the mechanism onto the structure of the machine. I've added a 40 teeth pulley to the long axis that I am using with a high torque 60mm Nema17 and a 16 teeth pulley to the short axis that is attached to a 34mm Nema17. I'm using GT2 belts for both axes. 


Machines that Make - Endstops

Today, I added end-stops and finished all the ends of my wire with sockets. 
The end-stop design came from thingiverse, but I drew a new version to hold a 10mm rod (below). Also, preparing wires to go into sockets is hard. If I were to do this again.... I think I would make a machine that doesn't require any wiring... AH HA just kidding, I am getting better at it slowly.   


Machines that Make - Making Parts - Part 2


Mocked up X Idler
Mocked up X Idler

In addition to the corners, I also designed new X axis parts this week. Taking cues for the Prusia i3 parts I had already printed, I made a few modifications to allow for 8mm and 10mm steel rod. I started by printing a few test pieces at 2% infill and 2 shells, on Fast.
  
New Part designs - with modifications after test prints:
 The take a LONG time to print at 45% infill and 3 shells! 


Assembly and testing with the motors: 


 There is a bit of sag in the rod - so hopefully I will be using the smaller, 34mm Nema 17's, instead of the higher torque...


Machines that Make - Corners v2

I designed and printed new corners for my machine this week. They will hold the ends of the rod for the y axis. The strength of this design is far superior to the original round version.  You may ask, "Well, why didn't you just cut a piece of wood and drill a hole in it?" My answer - because it would have been much harder to counter-sink a bolt in the bottom. Is the counter-sunk bolt necessary? No, but it will make it much easier to align and tighten the corners to the mounting material. 


Machines that Make - Digital Renderings

For graduate reviews, I created a digital rendering of the machine I am creating this semester to help communicate my ideas and work-in-progress. I enjoyed working in Rhino to create a model of what I am envisioning in my head. I also really enjoyed learning more about how to use the lighting features in Rhino to create a more realistic rendering. 
 I am thinking that the materials that construct the "lamp shade" will be drywall or wood, painted to match the wall. The box across the way will house the Kinect, that will track the movement of the viewer and initiate the movement of the motorized gantry that holds the end effector (light).