Sheila Ring - Finished - it's about time!

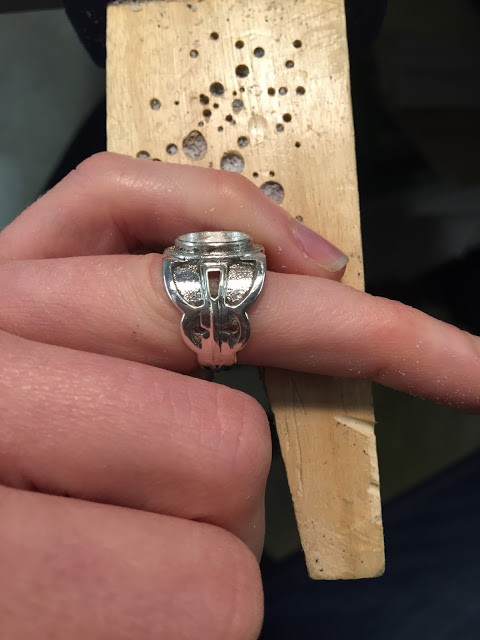
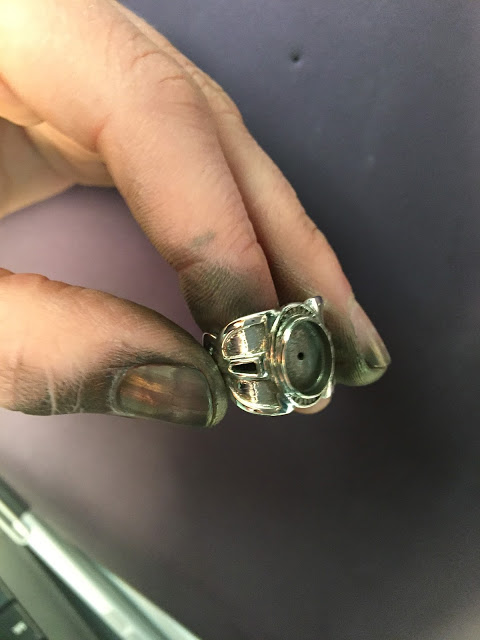
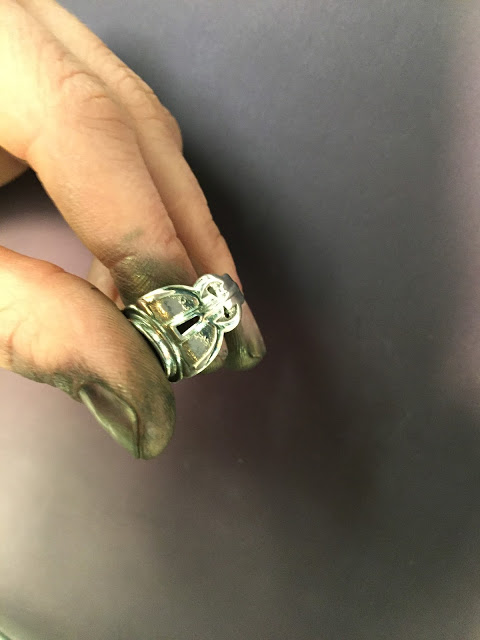
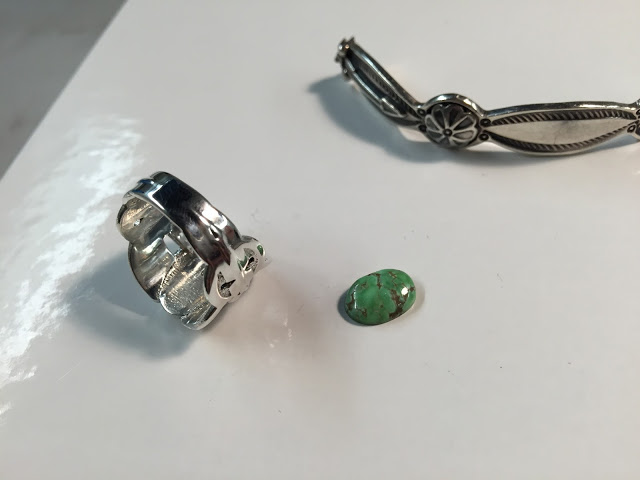
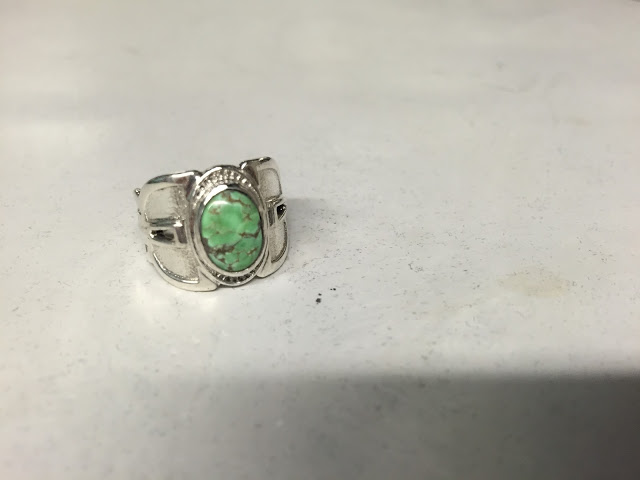
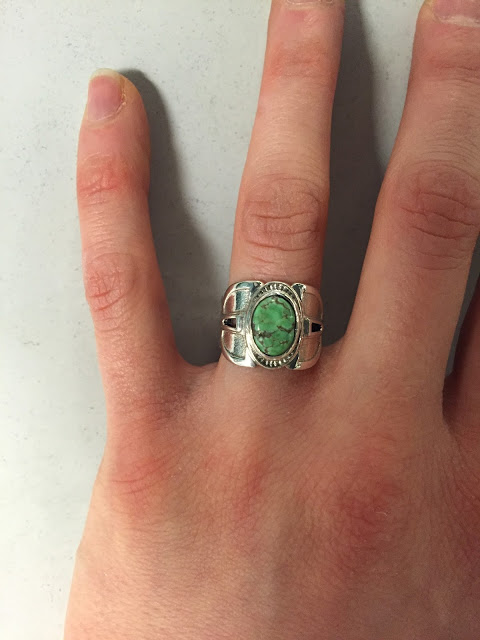
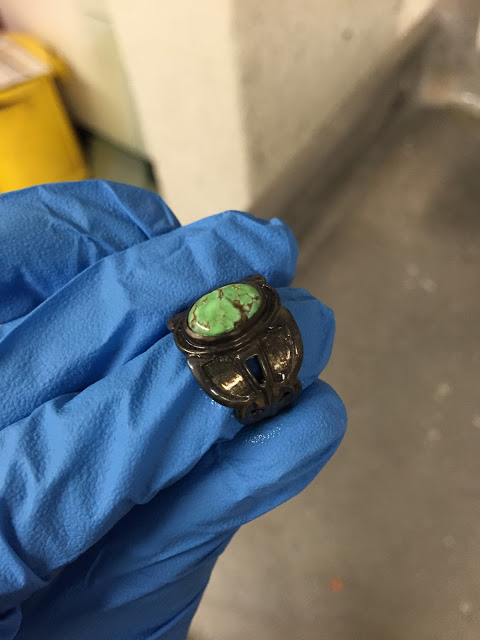
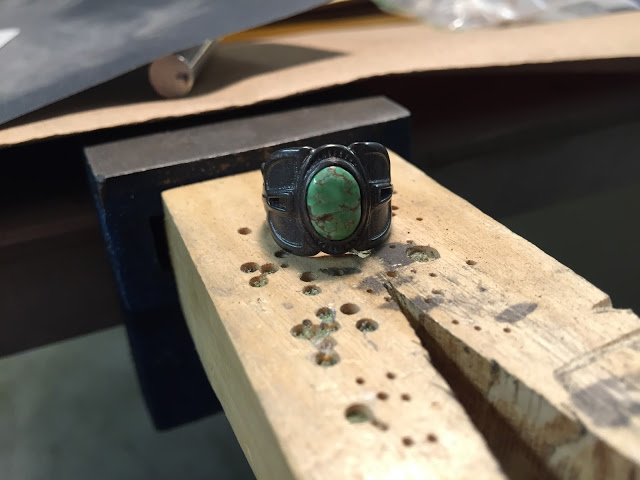
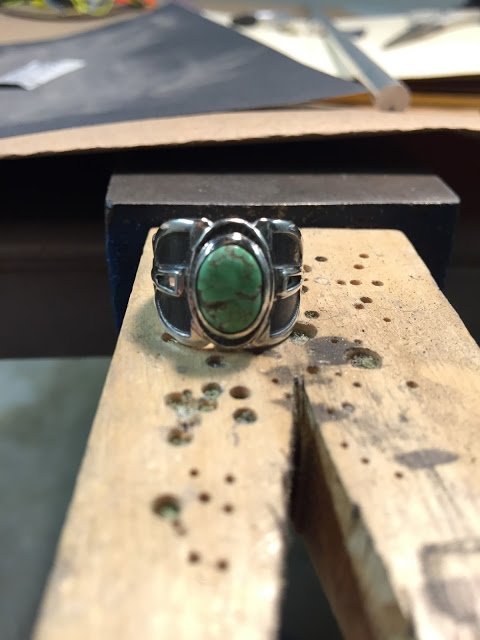
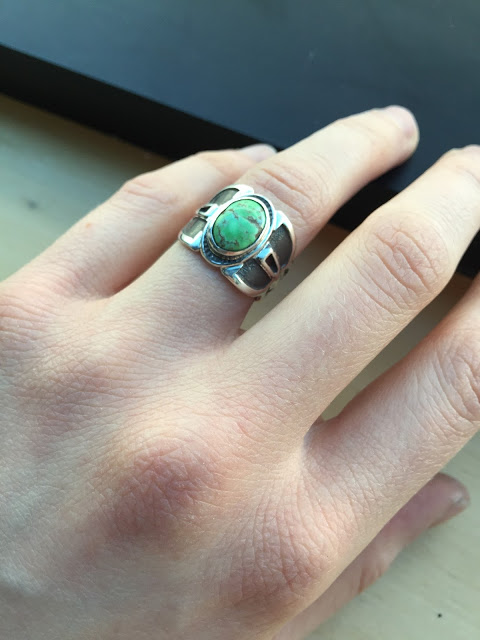
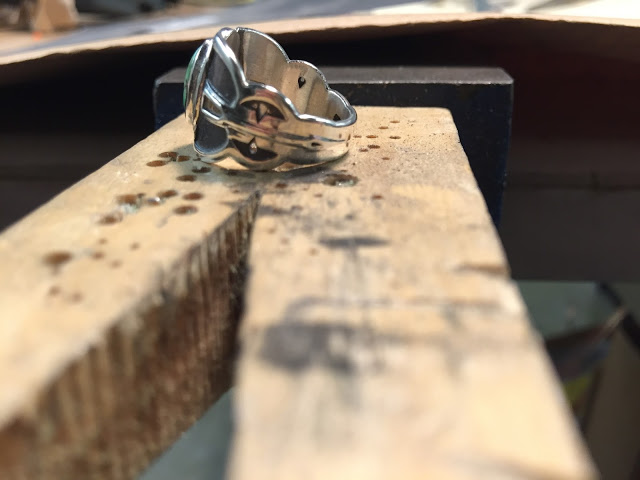
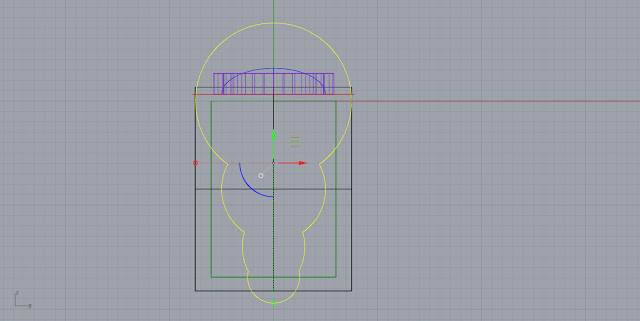
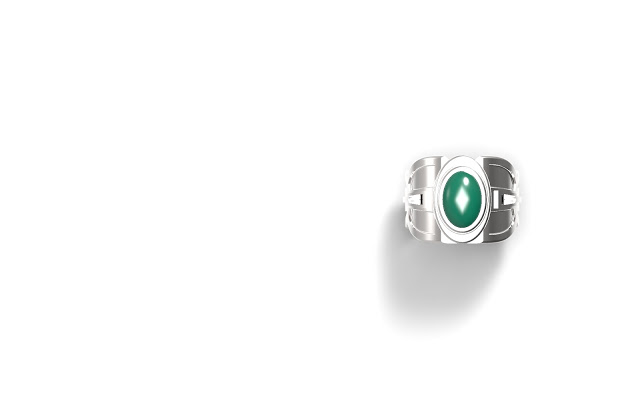
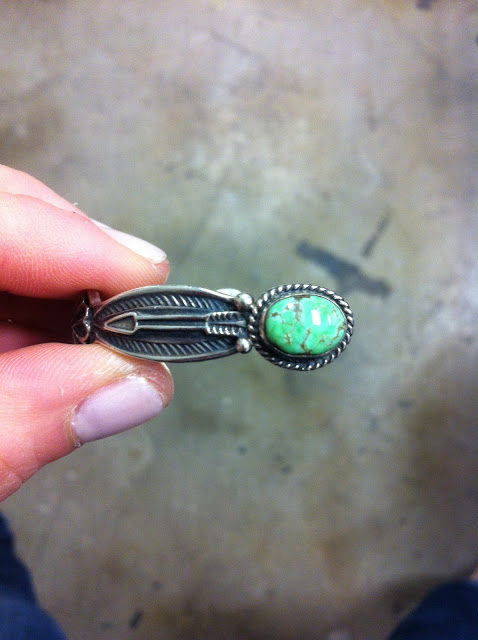
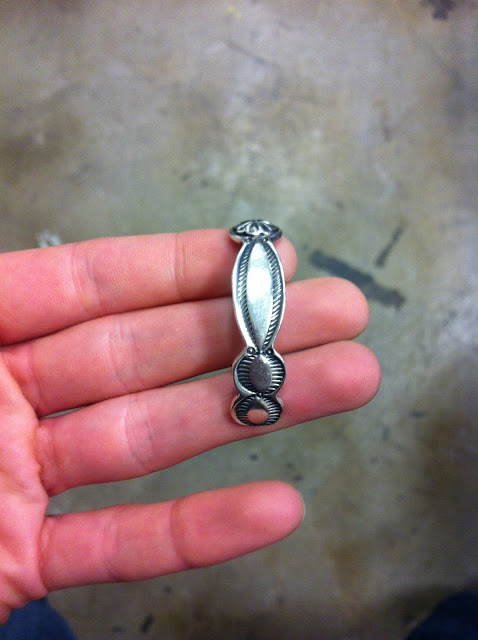
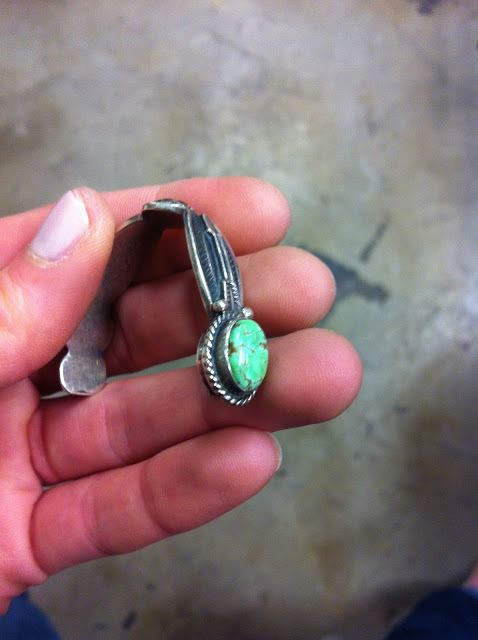
So, I finally finished up the ring to bracelet redesign. I am super happy with how the whole process turned went - from designing my first 3D modeled ring, to using a casting service and then post-processing myself. I definitely would get other objects cast in silver through Shapeways. While the cost was only $50.00 to get the design cast in silver, I did spend a considerable amount of time designing, cleaning up the ring, finishing, and setting the stone... so if I had to price out the piece for production, I would probably need to sell this particular ring design starting at around $175.00 to make a profit.  $50.00 for casting, 3 hours for post-processing labor per ring @ $20.00/hr and packaging, plus %60 mark up for profit, with design hours being paid for after the first 2 sales. Compared to a company like Skydog, price is right on par... And their paying rent in LA, which means their jewelry is a steal - GO SHOP NOW!


S100 - Rhino Gold - Bracelet to Ring - Progress

I finished up my sample Shapeways print today - working with my friends bracelet, transforming it to a ring... There were a lot of possible ways to take this design, I just tried to do a bunch of different techniques to test out the service and quality of the company's silver prints. I ended up ordering the final in raw silver, so I will do finishing and patina when the piece comes, as well as set the stone after I take it out of the bracelet. The final design is kind of clunky looking in the rendering... but I'm hoping it won't be so once it's printed... But, worse case scenario I just hack into it to feminize the form a litte more. 


Compact Progress - Pouring Neoprene

So, basically you pour the neoprene that's already mixed into the mold, let it settle for a few hours while water evaporates out of the mixture, and then you can top it off. You can also make hollow-skin like casts with the neoprene if you cast in plaster... I have no idea if this will work in the 3D printed mold without a mold release, but it specifically said on the website not to use mold release, so I'm giving it a shot! This weekend, I think I'll try and pour some neoprene into a plaster mold and see how that goes.


Compact Progress - Internal Hardware Holder

For my compact, I am using (2x) 24 count LED Neopixel Ring from Adafruit, a Gemma microcontroler, and a LiPo Battery.

I took measurements off of each of these items and designed an internal hardware holder for inside both sides of the compact. The bottom has a more complicated holder because it is in charge of the battery and the microcontroller, while the top is simply holding one ring.
TOP of BOTTOM - neopixels & gemma

BOTTOM of BOTTOM - lipo & gemma
TOP - neopixels

Compact Progress - Laser Cut Acrylic Insets

I laser cut some acrylic to inset into the compact to diffuse the light of the neopixels. I got the top lid measurement perfect, it fits snug and needs the suction cup to remove it, but the bottom is a little off. I will cut a revised inset for that section. I might switch to a thicker acrylic, but for now I'm going to stick with the two layer approach and sandblast one of the layers for softer light. 


Compact Progress - 3D Printed Molds

I designed a couple different size molds for my compact's insulation... There are slight variations that account for the shrinkage that occurs during 3D printing and the shrinkage of the neoprene.... The molds are super simple, but if they work, I may think about creating more interesting molds to cast into.
I'm using a neoprene that I brought through critical coatings. It says on their website that painting the neoprene on is an option for creating a mold, this is something I might consider when doing the final piece and/or future pieces.

Compact Project - Progress Part 2

 I still have to clean up quite a bit of the exterior and patch a few pits in my solder joints before the piece is finished, but I'll save that until after I solder on the hinge - just in case more pits occur during that process.
Test hinge 1 - I am going to make another test hinge today with a design revision. 

  - Filing, making sure everything lines up - looks like I just missed one spot on my last big seam.
I ordered some rod from McMaster Carr today because the tubing I have isn't quite thick enough. Frankie is going to help me make thicker walled tubing out of the rod when it comes on Thursday.

S100 - Guitars for Vets - Patterns

I am preparing to do some experimentation with the laser cutter, engraving designs onto sections of the guitar... here is a sample pattern that I will be trying. It's a dense design, so I'm unsure if it will turn out as clear as I'd like.

I am finding a lot of inspiration from baroque guitars. The rosettes were traditionally made with hand carved layers of wood and parchment.

Compact Project - Progress - 'smithin' is hard

I've made some significant progress on the construction of my compact mirror-like project... While it's been nice to flex my metalsmithing muscle - my actual muscles are definitely feeling it after two days of going hard at the bench. So, I took the day off of metalsmithing today to finish a few other things and hang out with my dad since he was in town. Here are some pictures from the last couple days...


Safety is not taking a selfie. 


Yes, I realize I should have done this first - but why not really test that smith-muscle and make it ten times harder and do it second ;). 


I've got to make the second one of these rims for the inset acrylic and then add a bottom flange-like thing so I can micro bold down the acrylic. 


I've also been working on a practice hinge - it's crooked, but its proving worth it (had to melt something today).  


TBC...

S100 - Guitars for Vets - Progress

Broc and I sketched out some possible compositions for our sculpture on Friday and started cutting some pieces of the guitar up.

Frankie recommended we put some tape over the cut part so we don't get fume marks from when the poly burns. Also, it looks like underwear. 


Teamwork. 


The laser didn't cut all the way through, but it was convenient to have a nice guideline to sand to. 

S100 - The Arduino Stater Kit - Project 12

Knock Lock - This project was fun! I had to trouble shoot the knocking a lot but eventually got the lock mechanism to work. In this project a piezo is used as an input. Depending on the number of knocks the piezo hears it will move the servo to "lock" or "unlock."


I really like the serial monitor, it makes the transition between tech and real easier to understand.

S100 - The Arduino Stater Kit - Project 11

Crystal Ball - These tutorials just keep getting better and better - I loved this one... it's so easy to customize. I also really liked the tilt switch... You just move the switch upside down and a little bearing inside of it activates a change in the switch state. I could see integrating this mechanism into another type of object like the compact mirror seamlessly.


And then the ego took control...............


S100 - Rhino Gold - Bracelet to Ring

A friend of mine asked me to do something with this a long time ago - and I think I'm finally going to put in some work on it. Her mom had gotten her this bracelet when she was little and it unfortunately broke. I did a 3D scan of the object the other day and took some preliminary pictures of the ring... My plan is to design a ring using Rhino Gold, get it printed through Shapeways in wax, cast, and set the stone after. I've never done a ring design in Rhino Gold - or printed from Shapeways before - so this will be a nice low risk experiment.


S100 - Guitars for Vets

I ran into MDB in the hallway and he mentioned he was working on a project with some found guitars... We got to talking and he said that the project is a fundraiser for Guitars for Vets - Each year, Beverly Belfer from the Music Department organizes the donation of guitars to be painted or reworked into sculpture by artists for auction at an event in support of Guitars for Veterans. The guitars are supplied. While she would like for several of the guitars to remain playable, there is an opportunity to transform some into sculptural objects. - Broc Toft, another graduate student at UWM and I have decided to collaborate on a guitar sculpture... It's going to be fabulous.

We met last week Friday and started tearing apart a guitar - I took all the hardware, and he took the neck from our "rock-starred" guitar. I'm going to experiment with surfaces and pattern on most of the pieces I've taken... will do some work on the dark part of the body too... TBC


S100 - UWM @ Morning Glory - FORM event photographs

Here are some images I took of the show this past weekend at Morning Glory. FORM was intended to showcase a cross-section of work from recent UWM alumni. Each object represents an aspect of their individual creative practice that was formed in the Jewelry and Metalsmithing program at UWM. Find more information at the exhibition website > here

We made all the displays custom for this show... which was a lot of work, but it surely paid off... I think we had one of the best looking booths at the event. There is still definitely room for improvement, but overall I'm impressed we were able to pull it off in essentially a week. 


S100 - Morning Glory Display - Part 2

 Frankie got a bunch of acrylic cut to size for our shelves. After laser cutting a few details into the small pieces, I started to bend all of the table/shelf accessories for holding rings, cuffs, necklaces etc. Each of these small displays took about 45 minutes to make... You've got to have a lot of patience to wait for the heating element to gently heat the piece, but be careful not to over heat the piece (so it's hard to multi-task while bending) and cause bubbling. The bigger pieces took longer - about 1 hour...