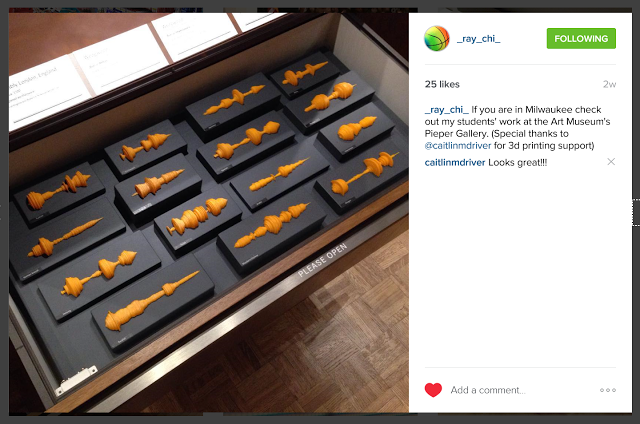
A couple weeks ago, I helped make some sound waves into 3D printable objects for a teen project at the Milwaukee Art Museum. Here's an excerpt from the museum's website about the installation; "Opening Feb. 20, The Collaboratory is a new and unique interactive gallery space co-created with local teen leaders in the Museum’s teen programs. This unexpected treasure trove of arms and armor and precious objects from around the world connects past and present in the Richard and Susan Pieper Family Education Gallery."
I love orange filament. Go check out the Pieper Family Education Gallery to see all of the work in The Collaboratory installation.
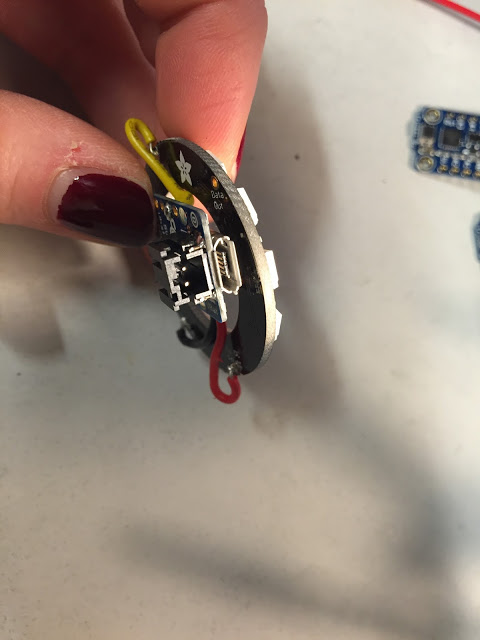
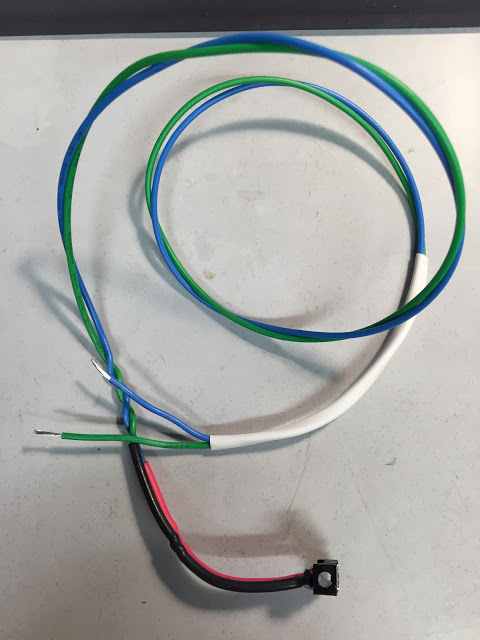
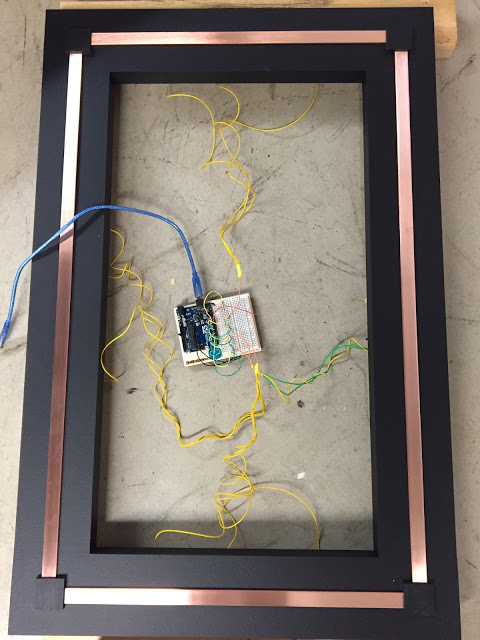
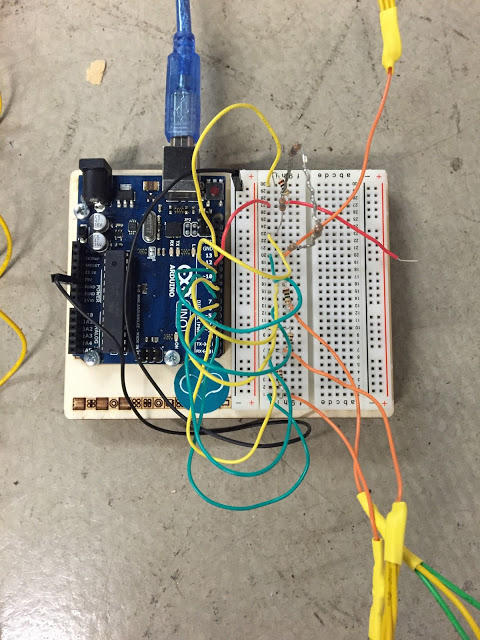
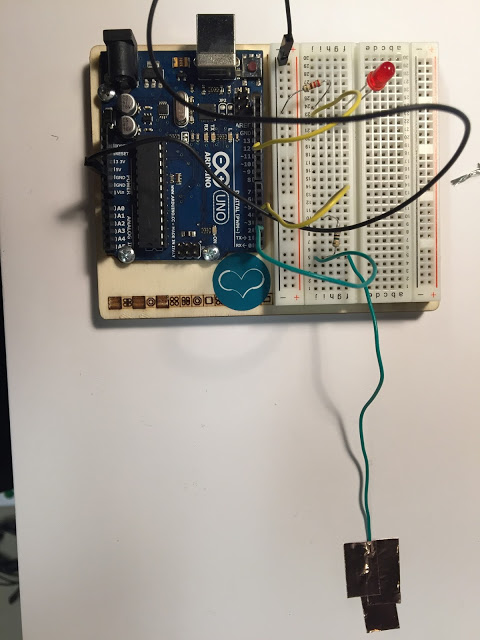
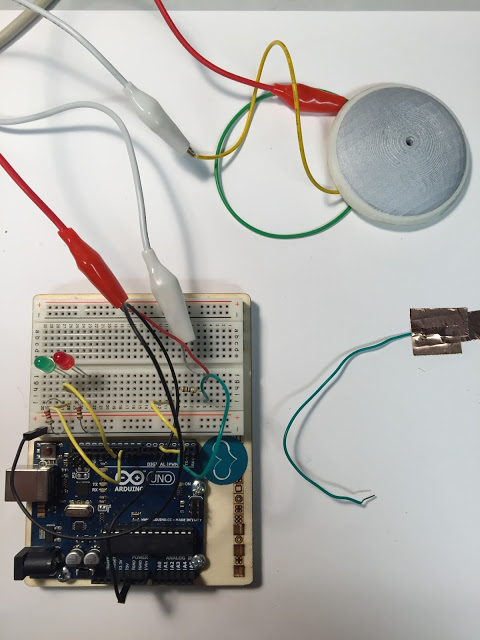
I wired up the electronics for the iAm project. I did an led test and they work perfectly. I just need to refine the code and wait for some epoxy on my connections to dry.
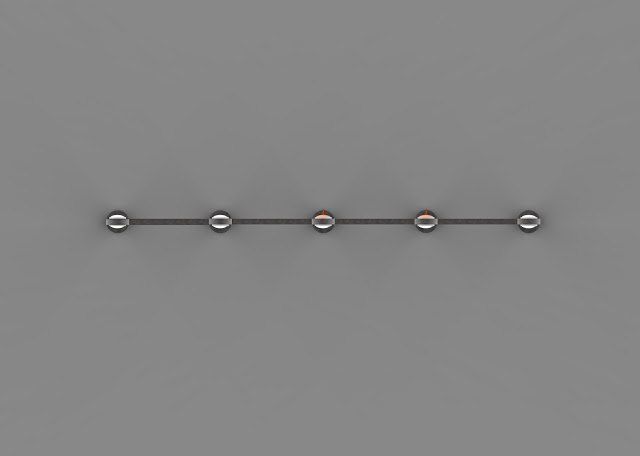
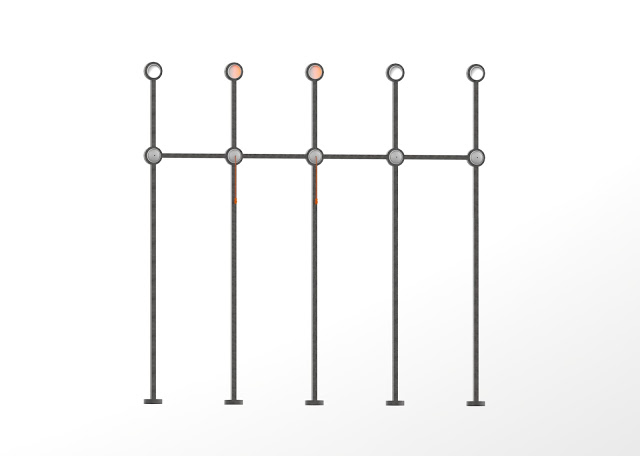
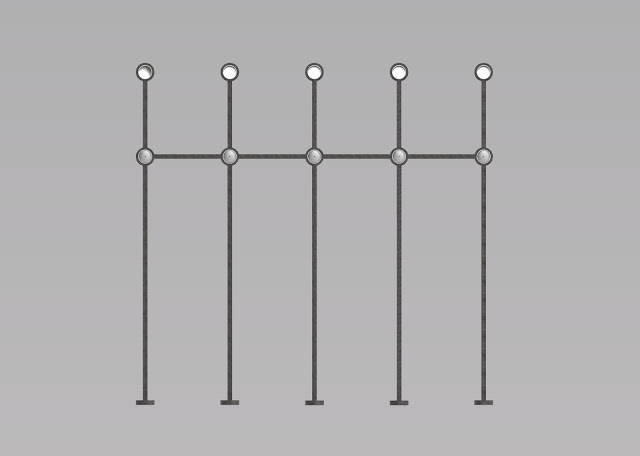
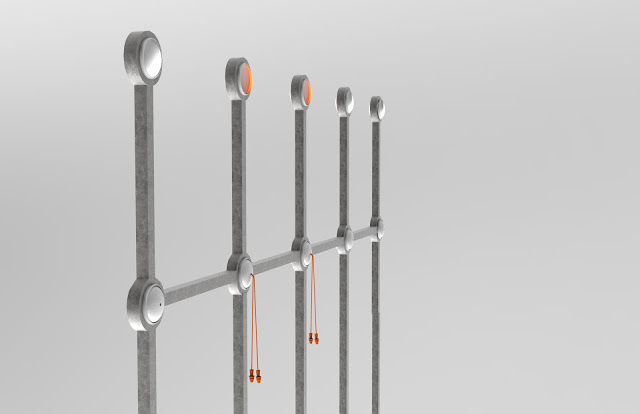
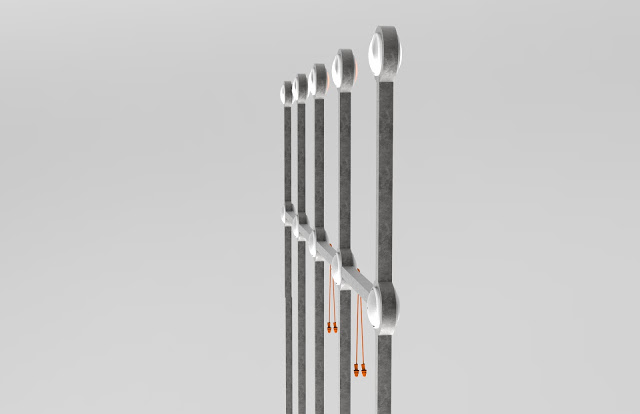
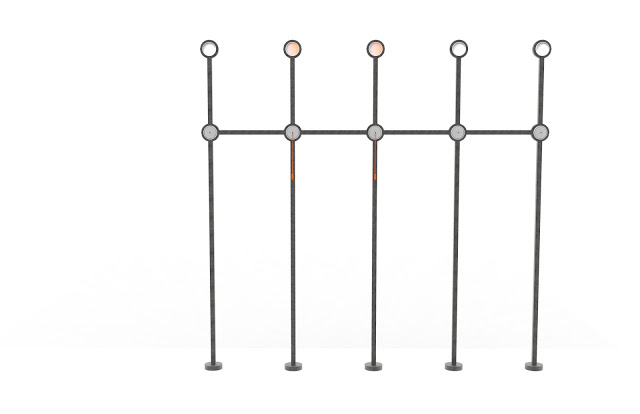
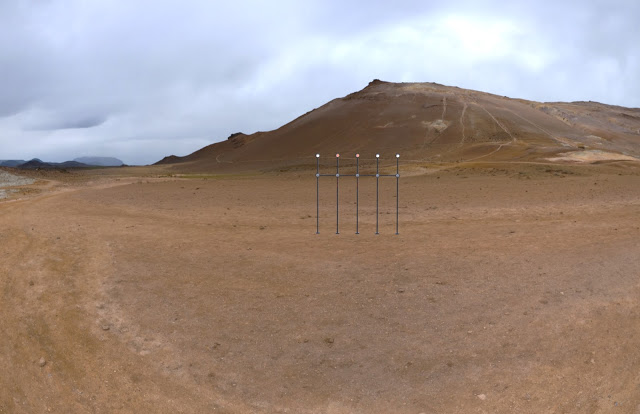
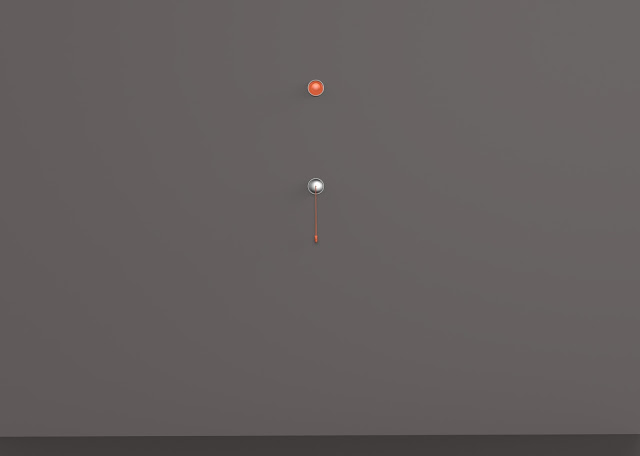
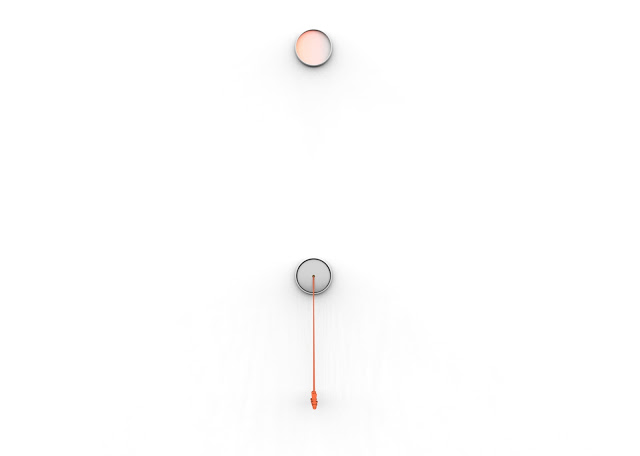
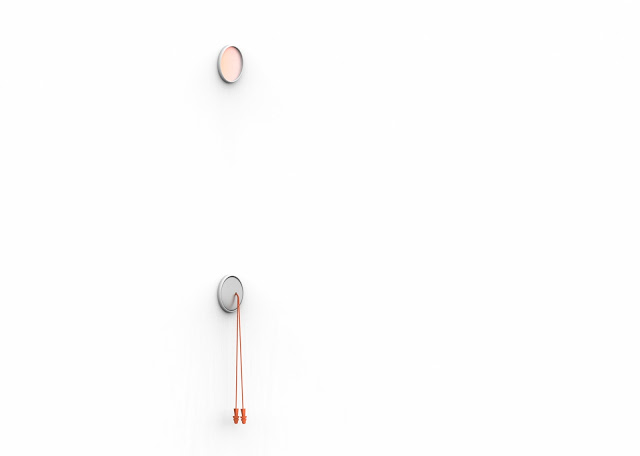
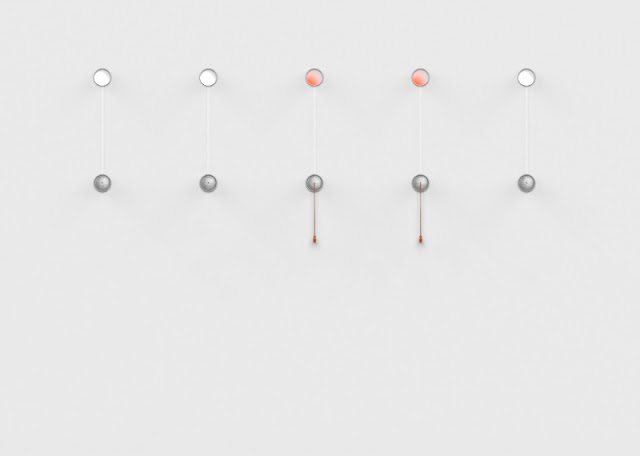
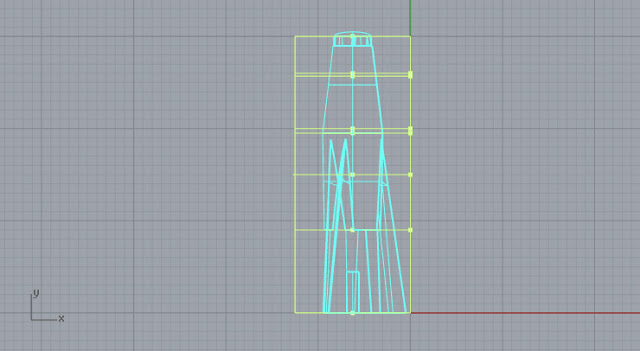
After rendering the pieces on the wall, I started to wonder what it would look like if they were all mounted onto a stand alone steel frame... I like how minimal the wall version looks compared to this... I wonder what this would look like suspended from the ceiling vs. coming up from the floor. The desert shot makes me chuckle.
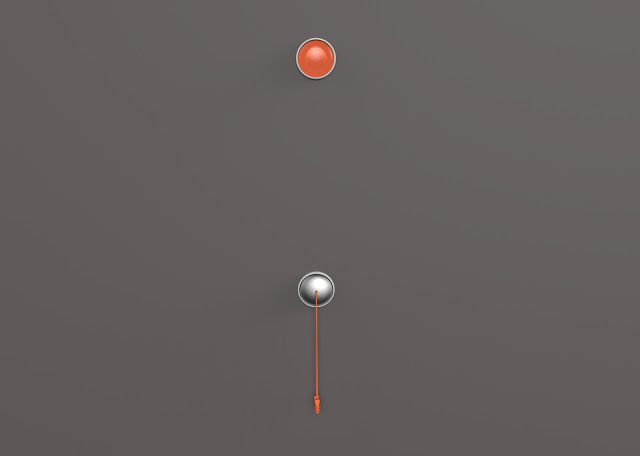
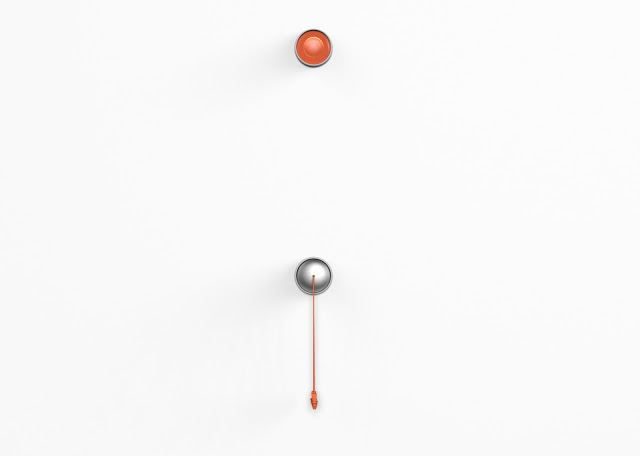
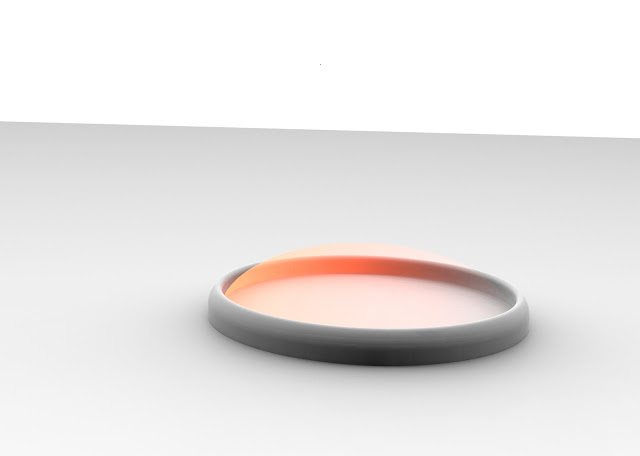
I rendered a few images of the iAm project to get a feel for how I'd like the light to work. It turns out you cannot animate light in Keyshot, so I will be taking some animation frames from Keyshot into After Effects.
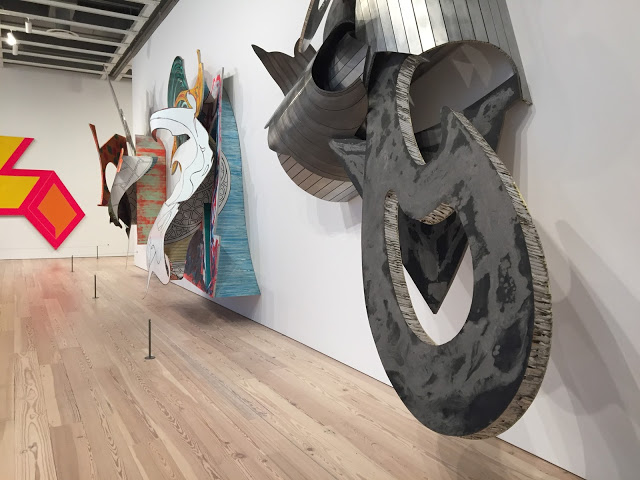
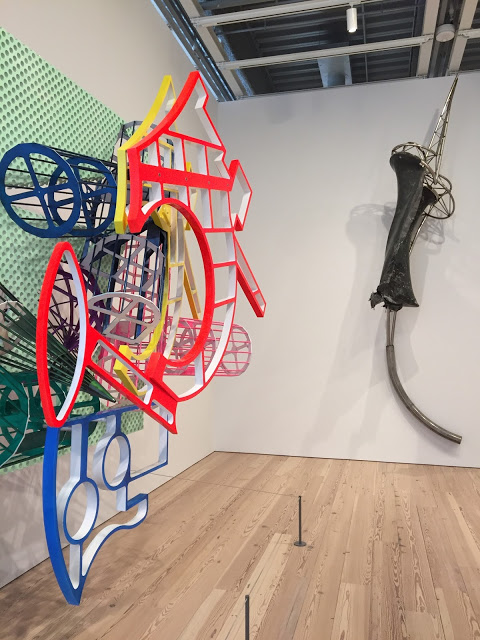
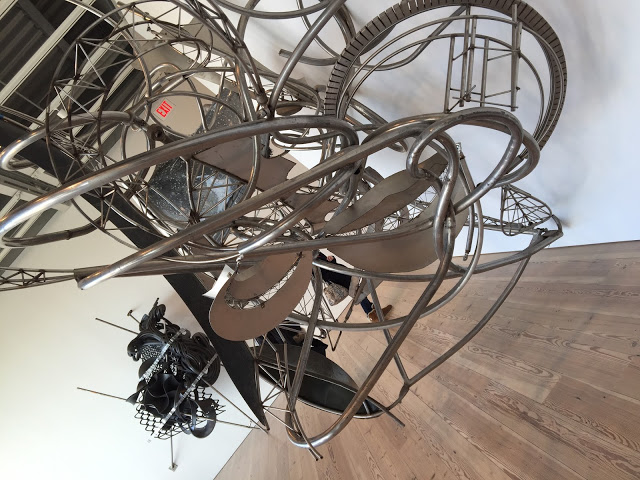
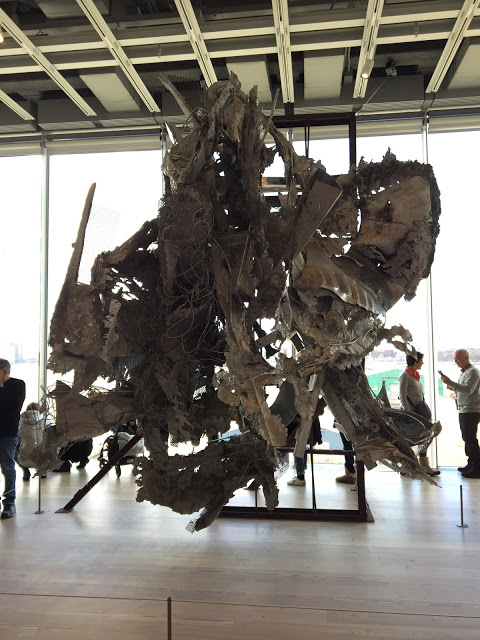
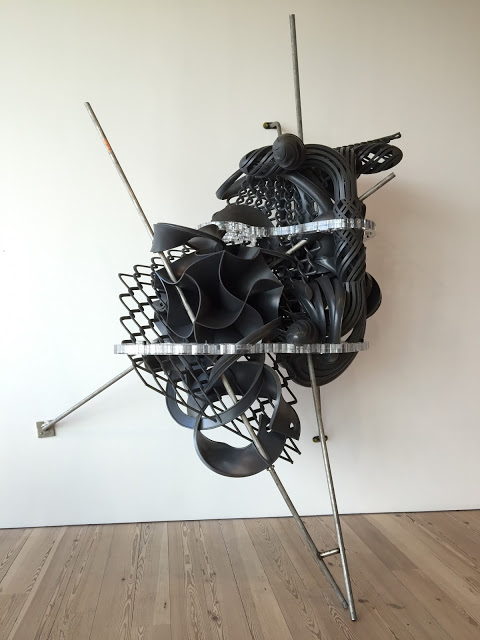
On the way back from Spain I had a connecting flight in New York, so I decided to stay for a night and check out the Whitney Museum since I hadn't been before. After viewing the collection I made my way into the Frank Stella Retrospective, and oh baby did I fall in love with his work. I had seen many of his paintings before in books, but had never seen his sculptural "paintings." I am so glad I got the audio guide -- Stella was influenced by architectural structures and tools, something I can definitely relate too. Here are a few of my favorite pieces --- and I am especially thrilled about the most recent body of work of gray-scale sculptures created using digital fabrication processes!!!
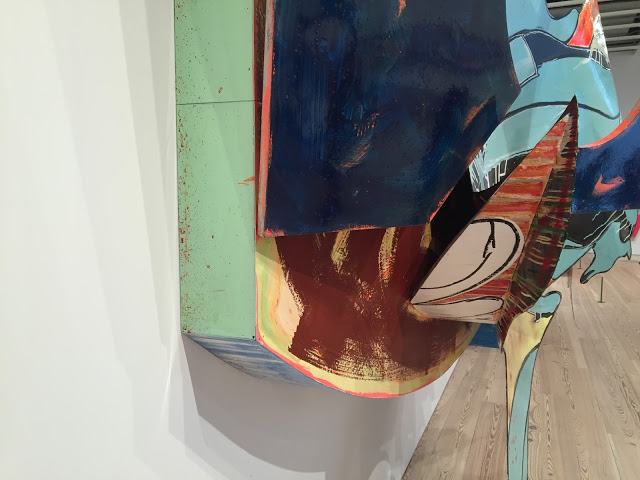
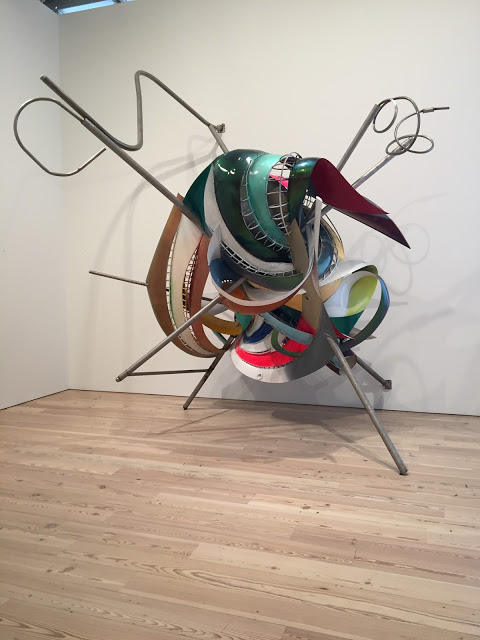
La penna di hu, 1987-2009 Mixed media on etched magnesium, aluminum and fiberglass
La penna di hu, 1987-2009 Mixed media on etched magnesium, aluminum and fiberglass -- Side View
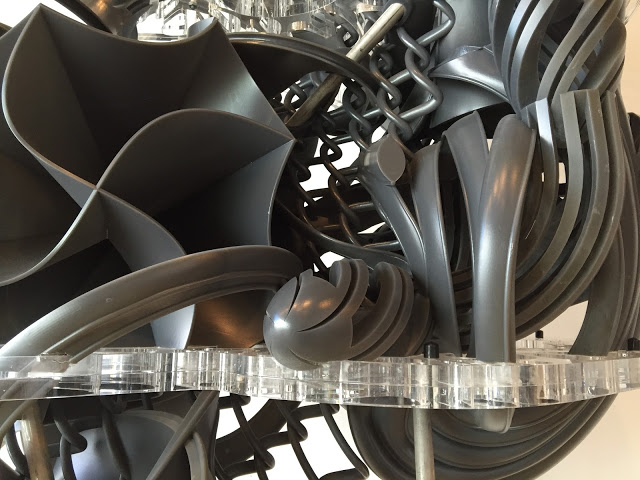
K.459, 2012 Tusk SolidGrey 3000, plexiglass, and steel pipe
K.459, 2012 Tusk SolidGrey 3000, plexiglass, and steel pipe
K.459, 2012 Tusk SolidGrey 3000, plexiglass, and steel pipe
K.459, 2012 Tusk SolidGrey 3000, plexiglass, and steel pipe
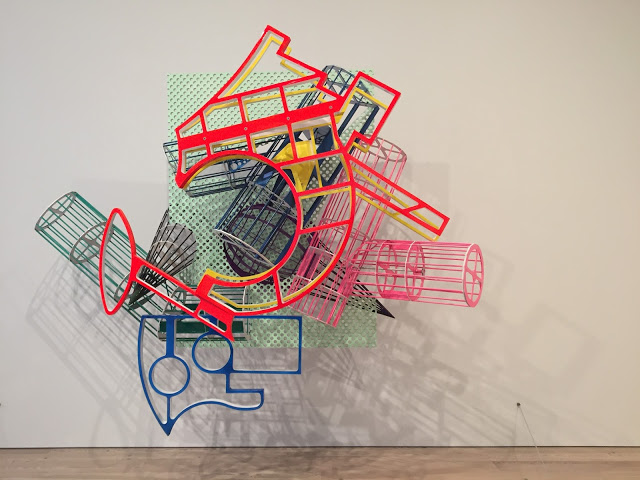
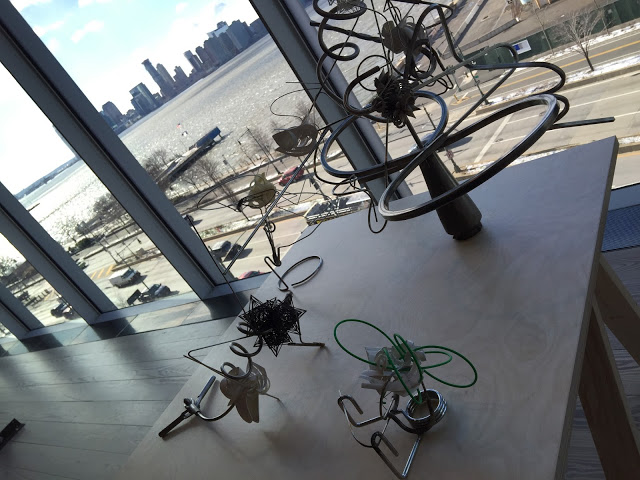
Circus of Pure Feeling for Malevich, 4 Square Circus, 16 Parts,2009 Stainless steel tubing, wire, Protogen RPT
Circus of Pure Feeling for Malevich, 4 Square Circus, 16 Parts,2009 Stainless steel tubing, wire, Protogen RPT
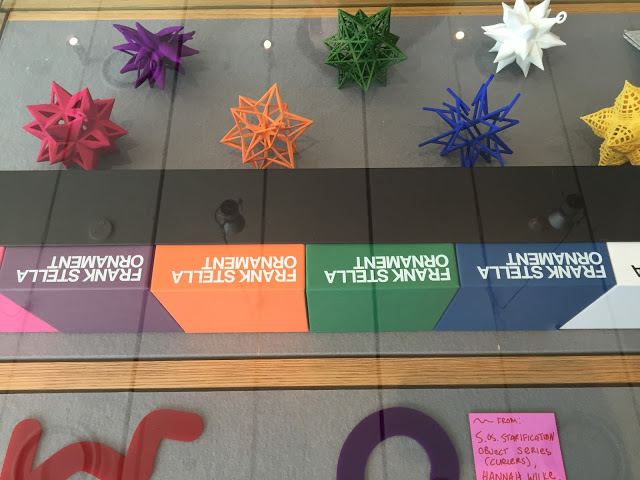
And of course, some 3D printed Stella ornaments in the gift shop -- Stella knows what's up.
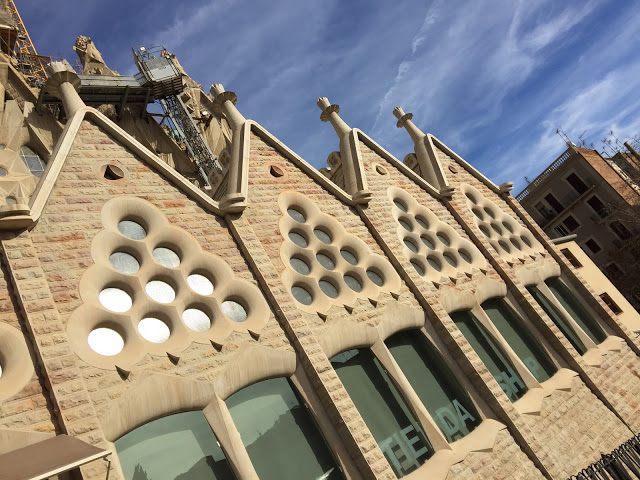
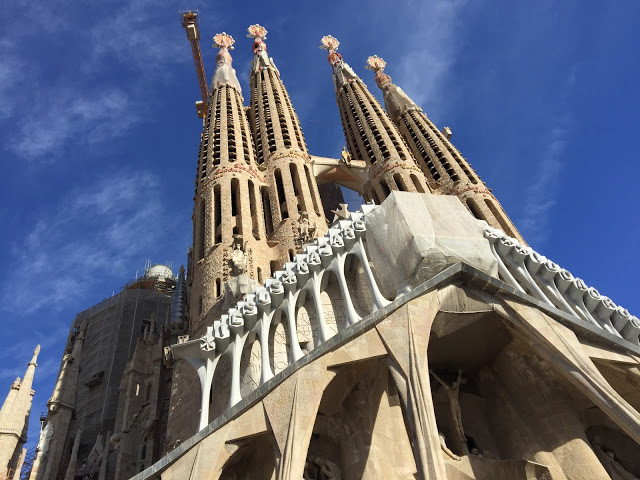
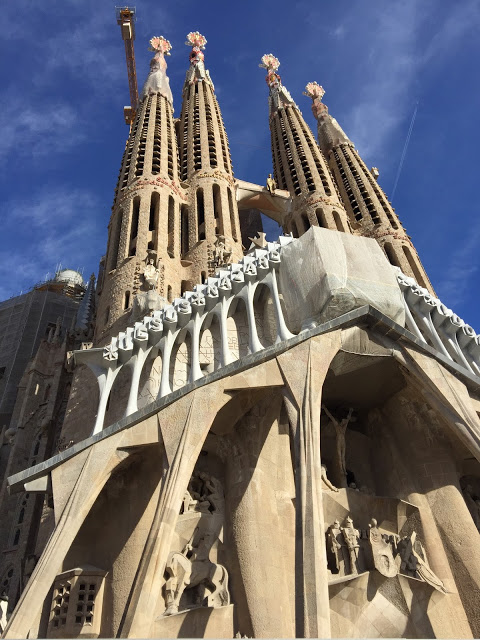
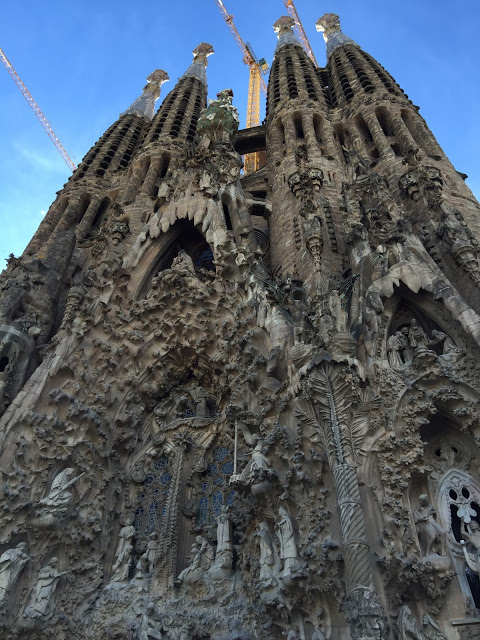
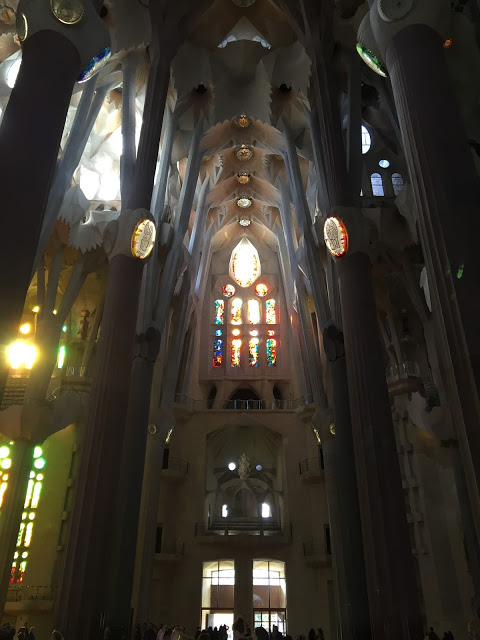
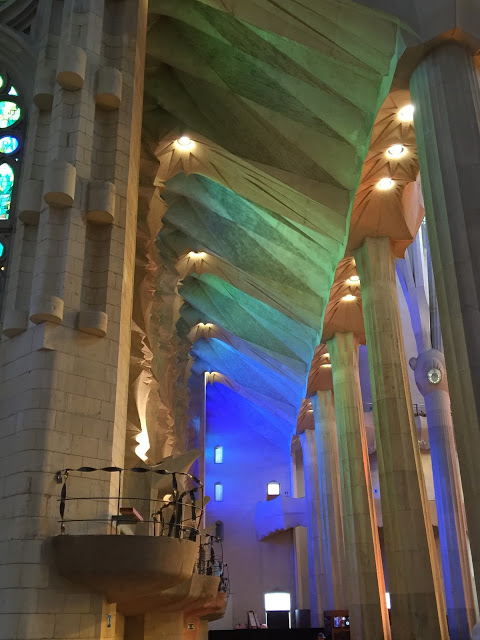
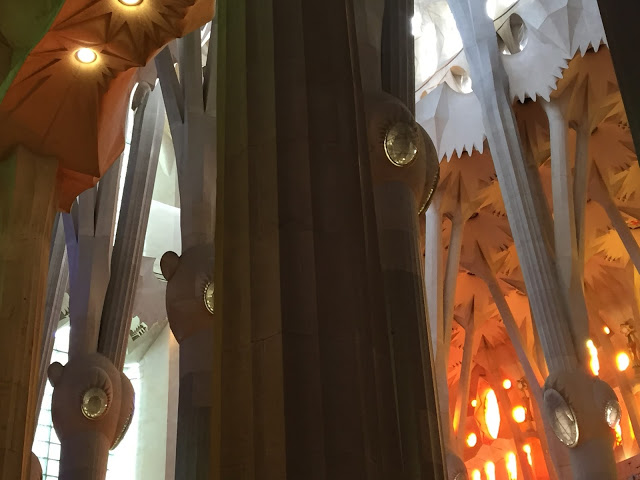
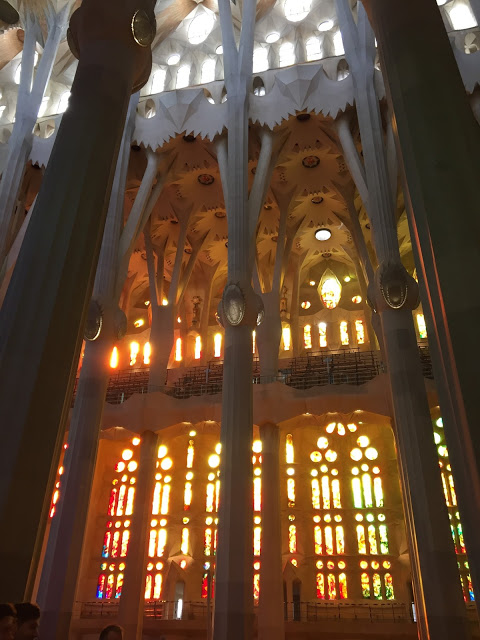
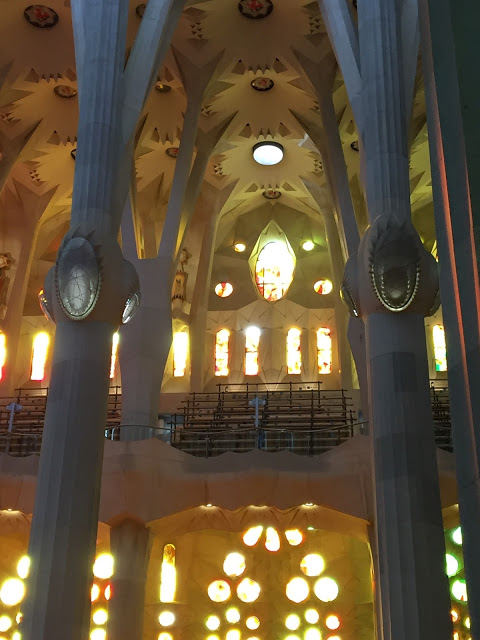
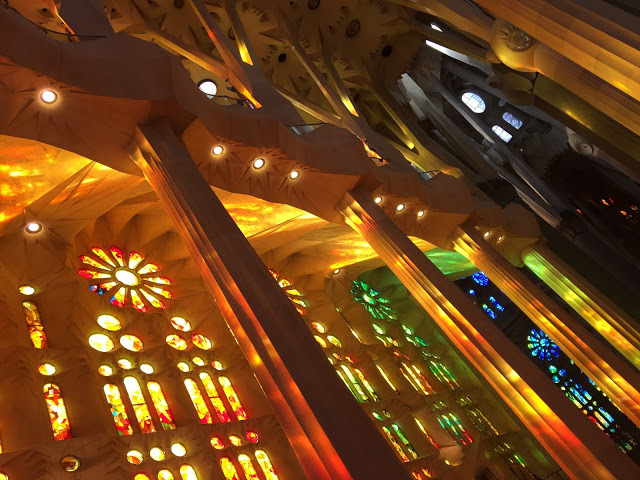
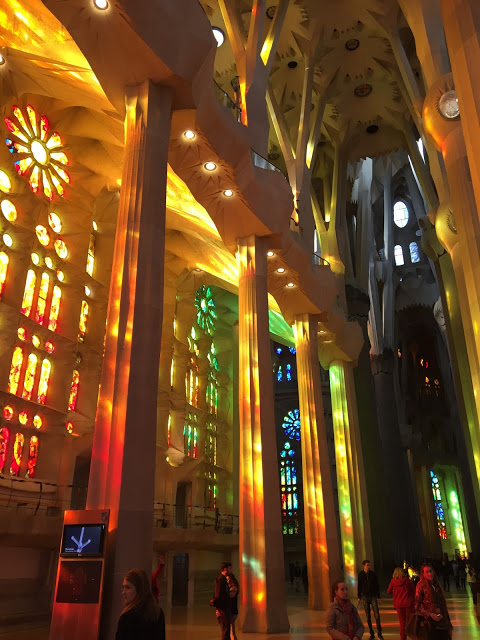
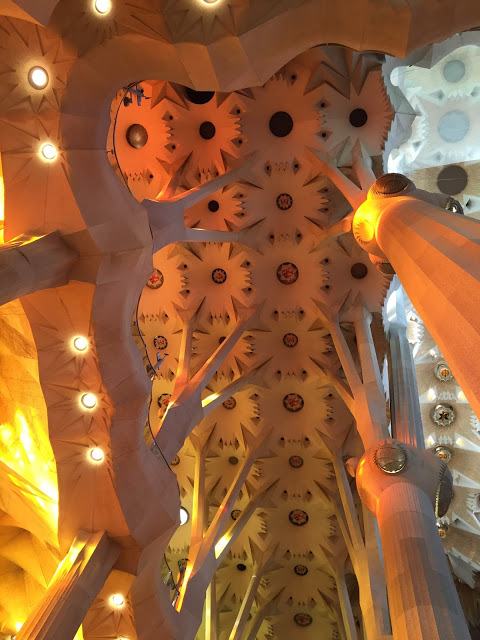
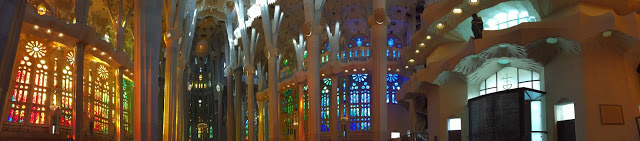
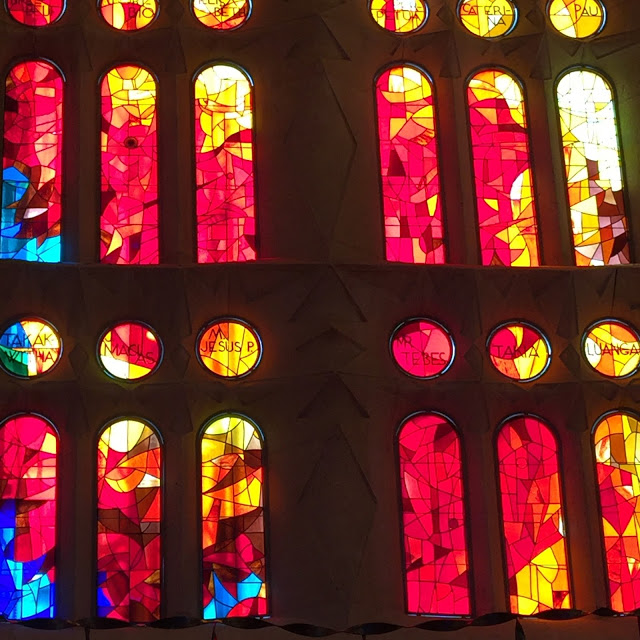
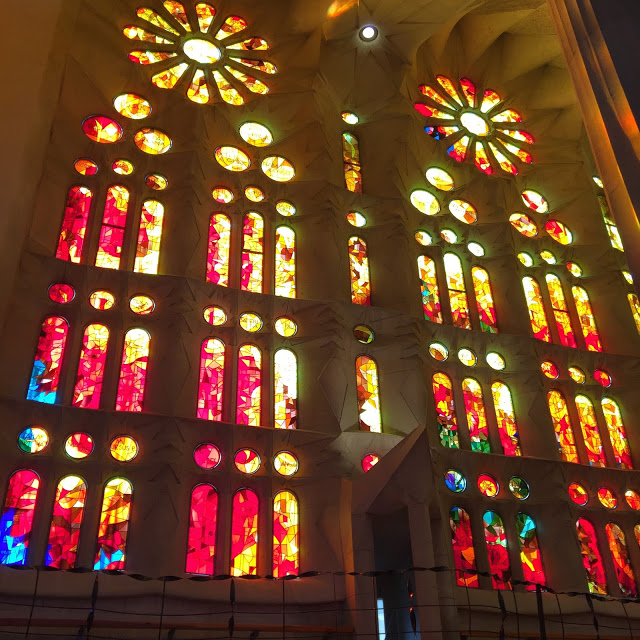
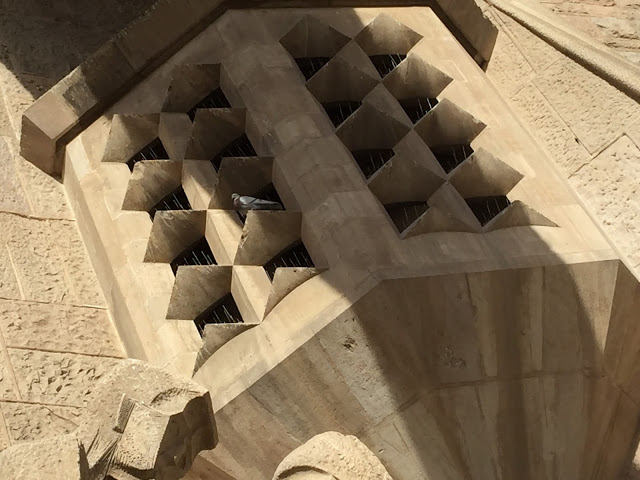
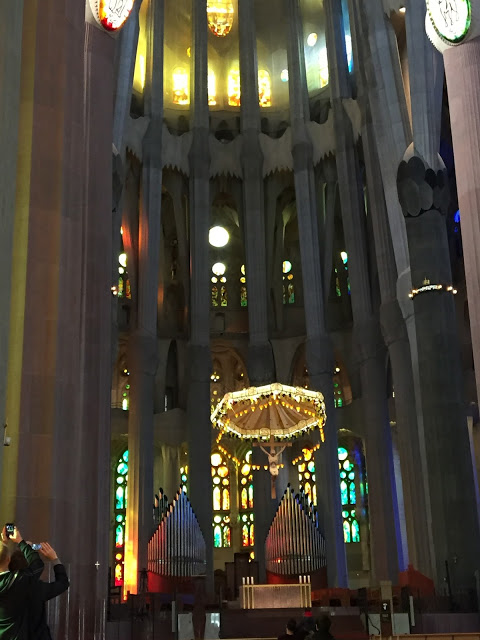
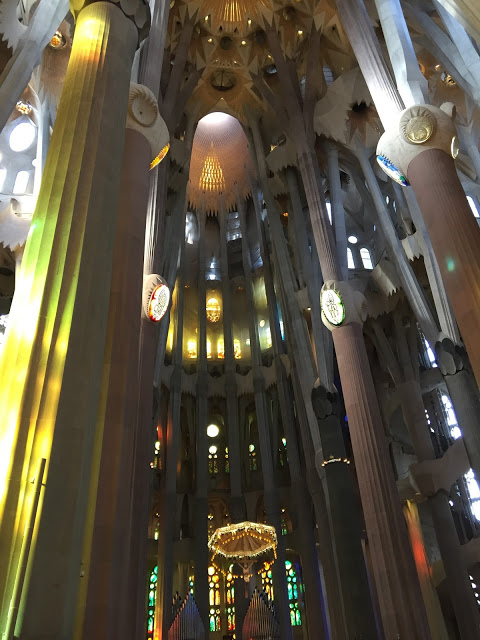
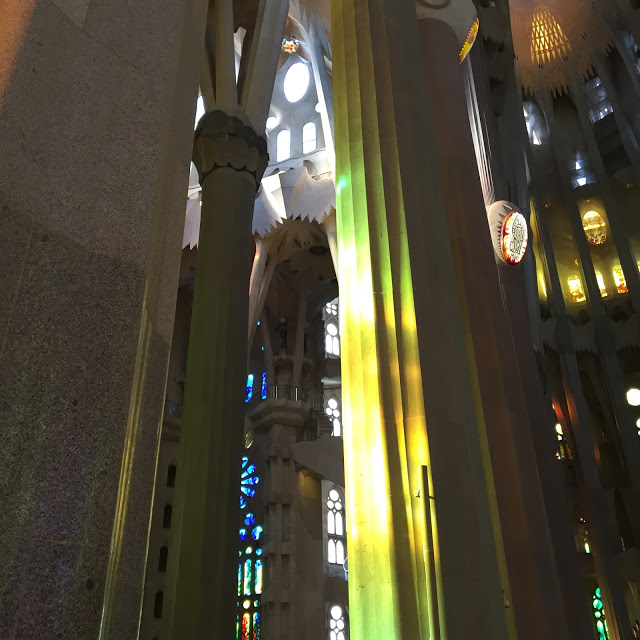
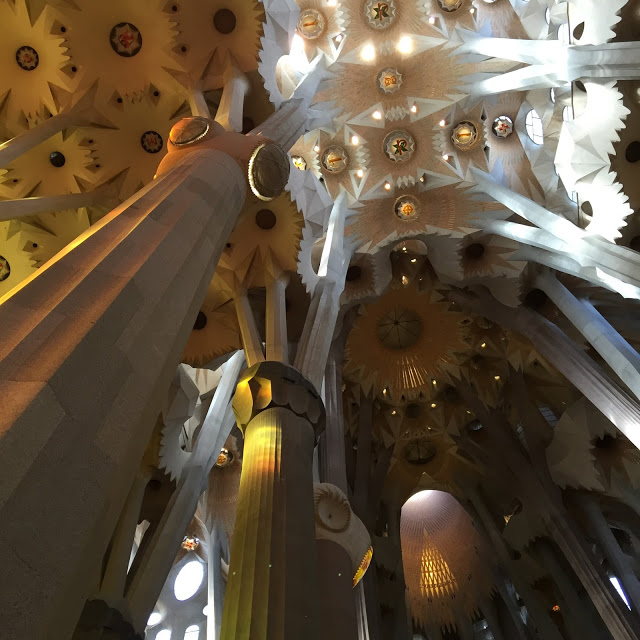
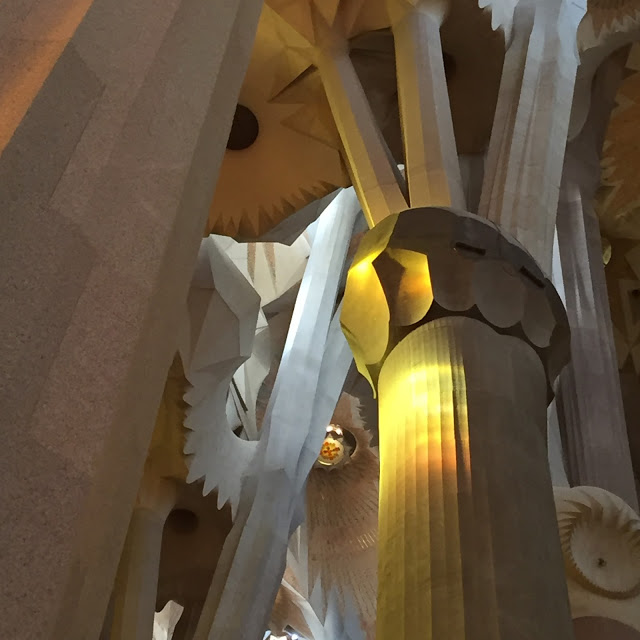
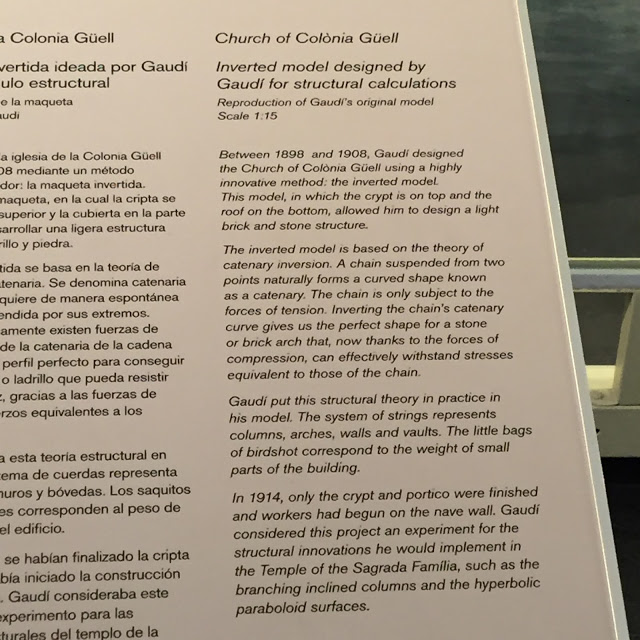
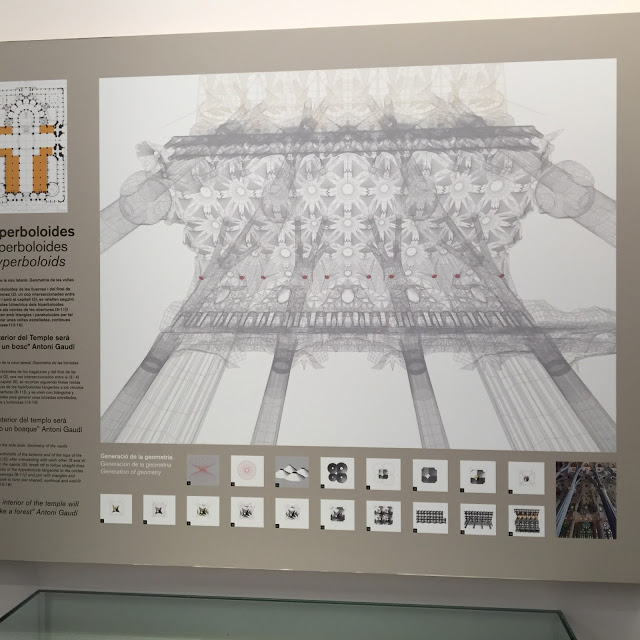
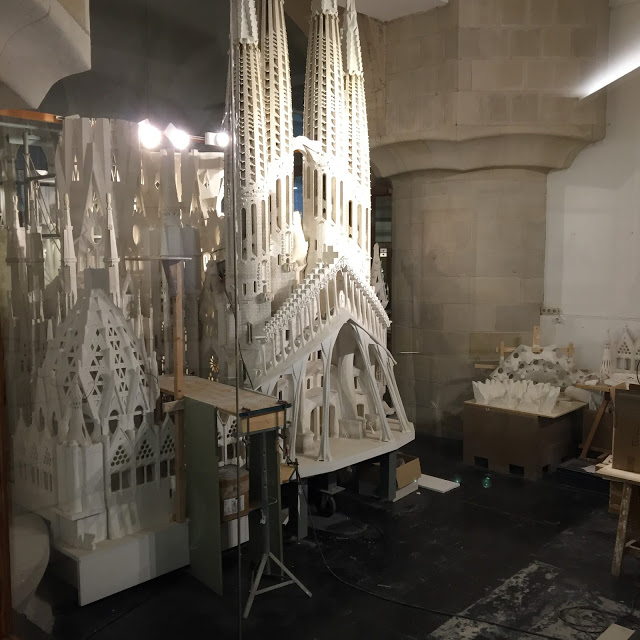
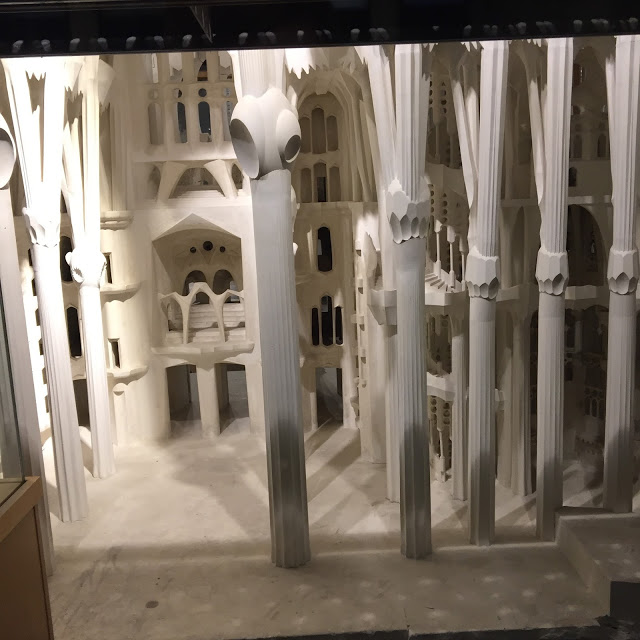
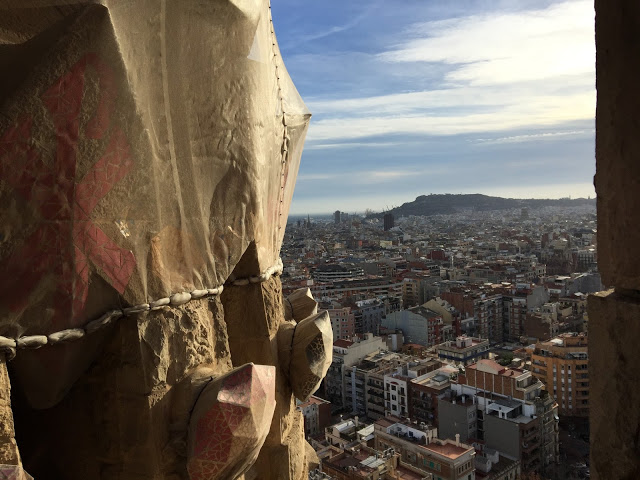
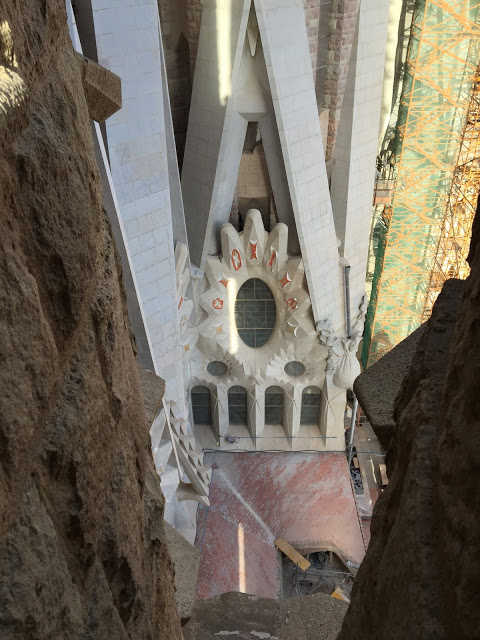
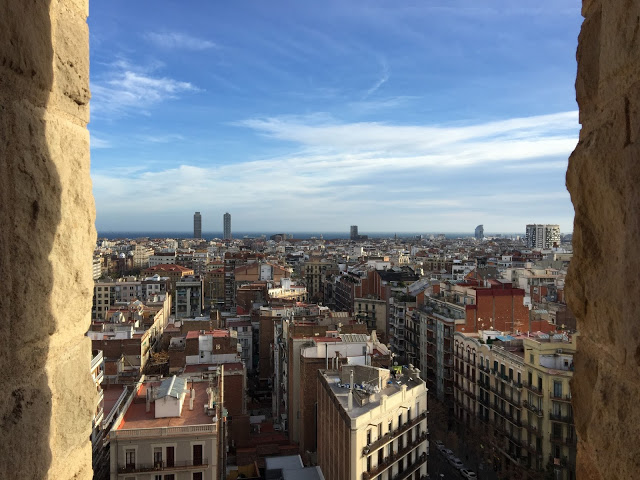
I visited the Basilica de la Sagrada Familia in Barcelona over winter break. I knew that I was going to be in awe of the architecture, but I hadn't considered the possibility of finding something so familiar. As I came upon the structure I started having the nerdiest thoughts, "I wonder if they did that with a CNC? I bet they did that with a CNC! I could do that. I can't believe this entire thing is being built with a CNC!" The entire thing hasn't been built with a CNC because they started construction in the late 1800's but, a lot of today's fabrication is... It's pretty amazing to walk around the outside and inside of the basilica and to be able to notice process in the aesthetics.
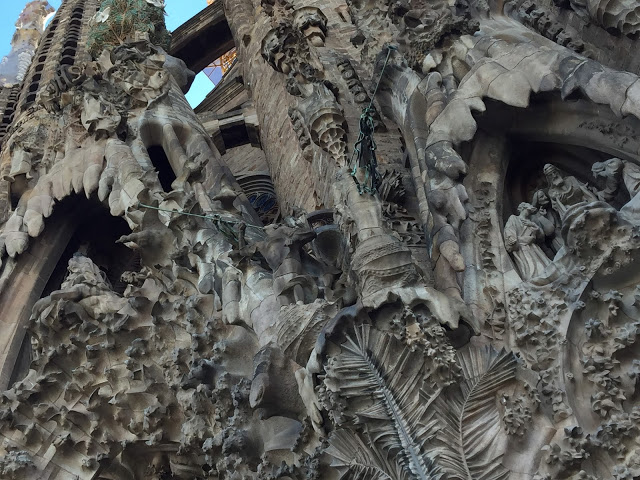
I absolutely loved how the lights on the capitals reminded me of cabochon jewels, but also fruit hanging from the palm trees.
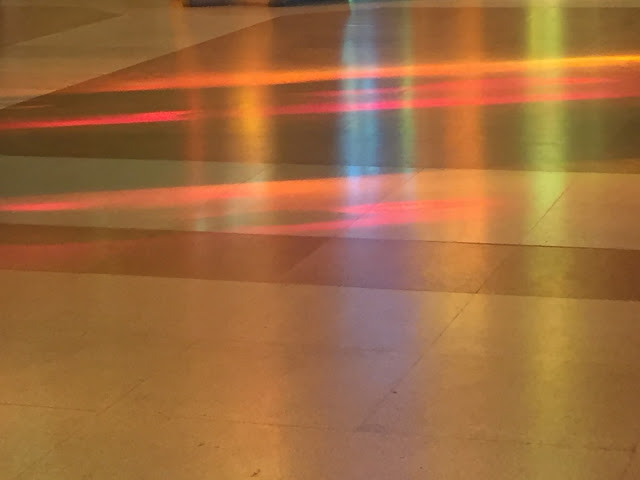
The light through the windows was absolutely stunning, these images don't do it nearly enough justice.
Every single detail has been considered.
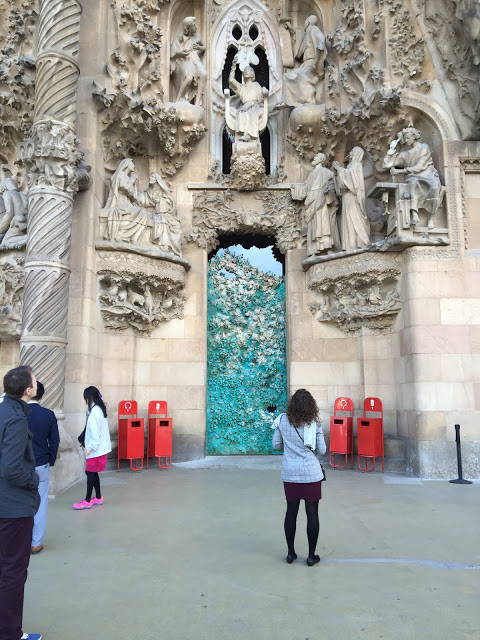
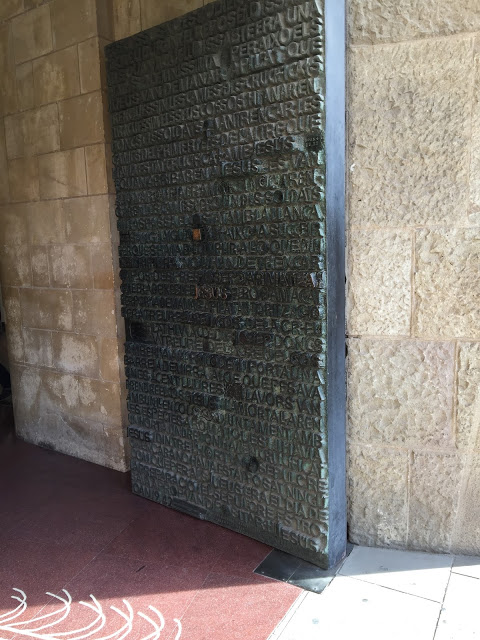
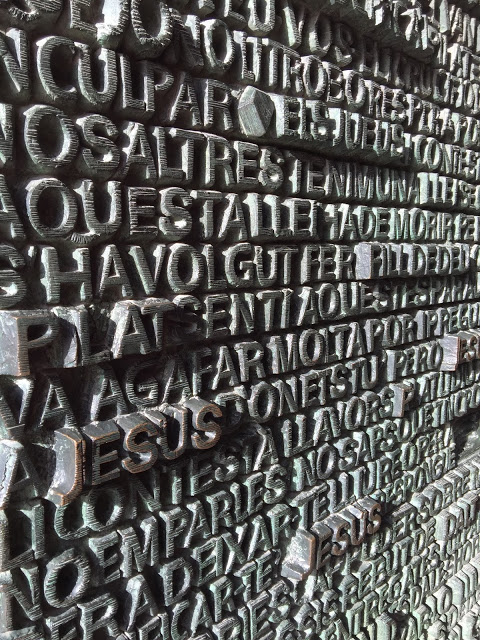
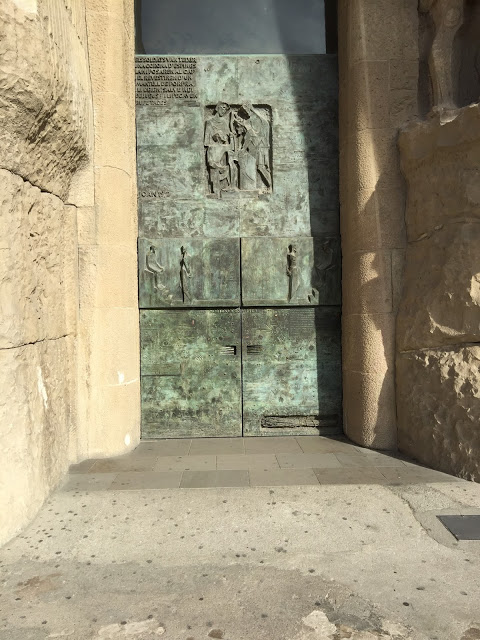
These giant metal doors made me drool.
THIS WAS THE ICING ON THE CAKE:
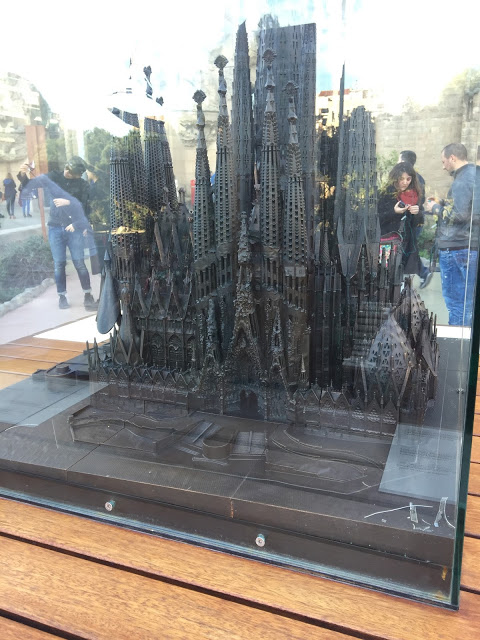
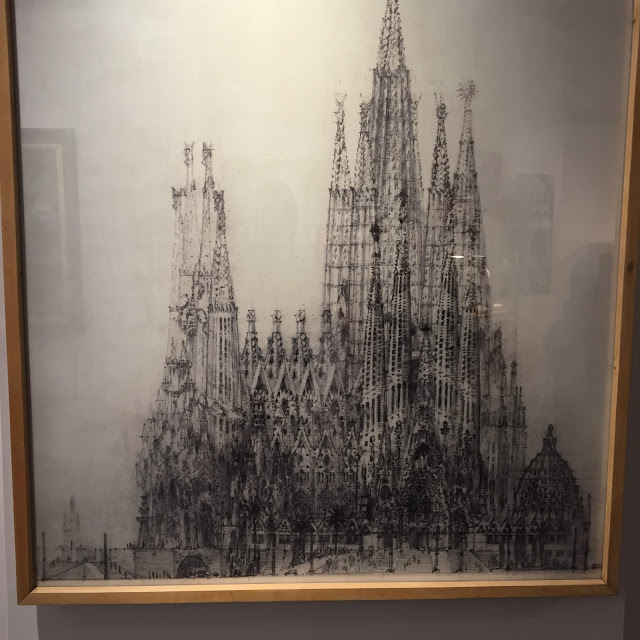
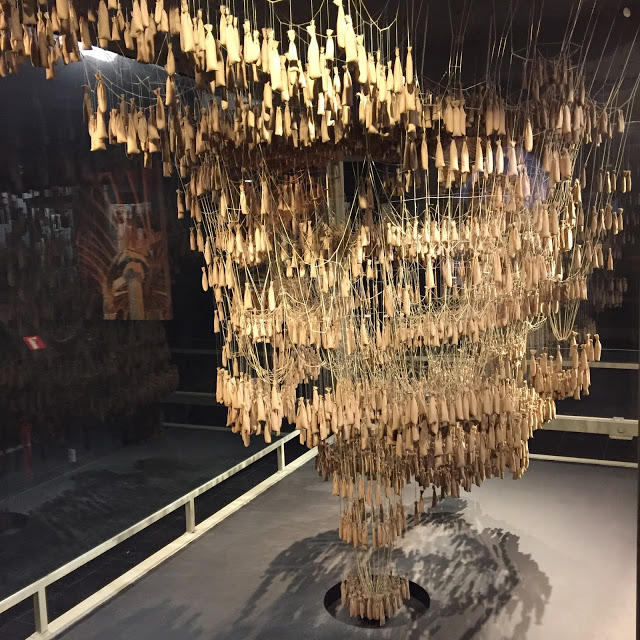
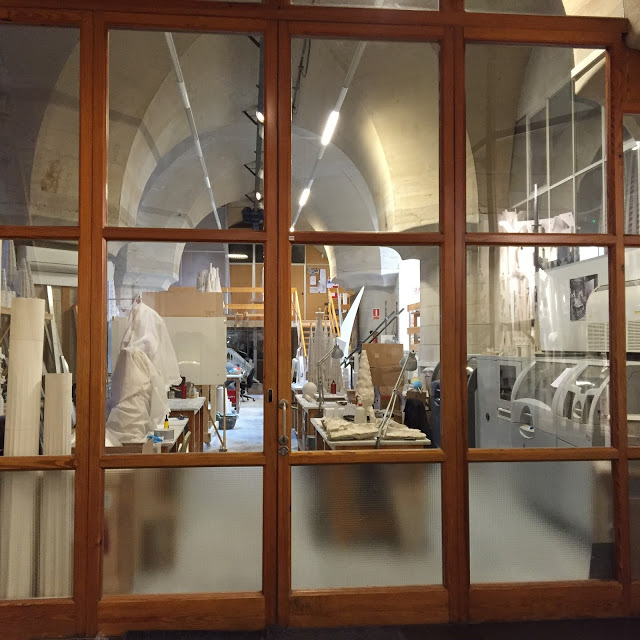
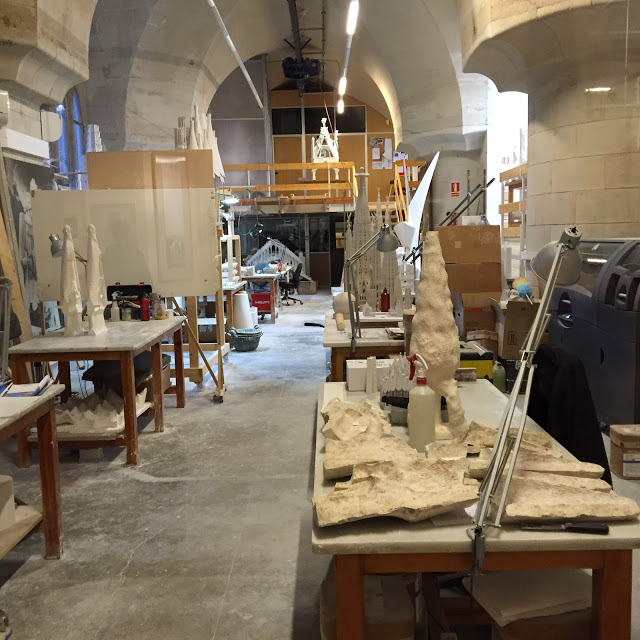
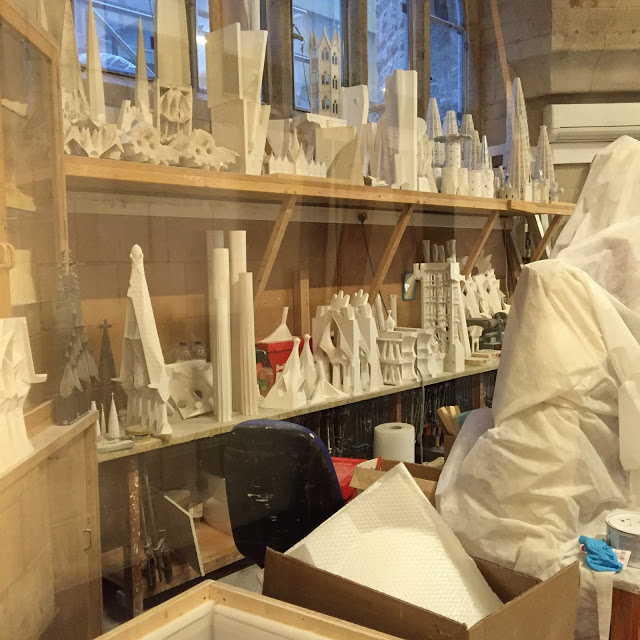
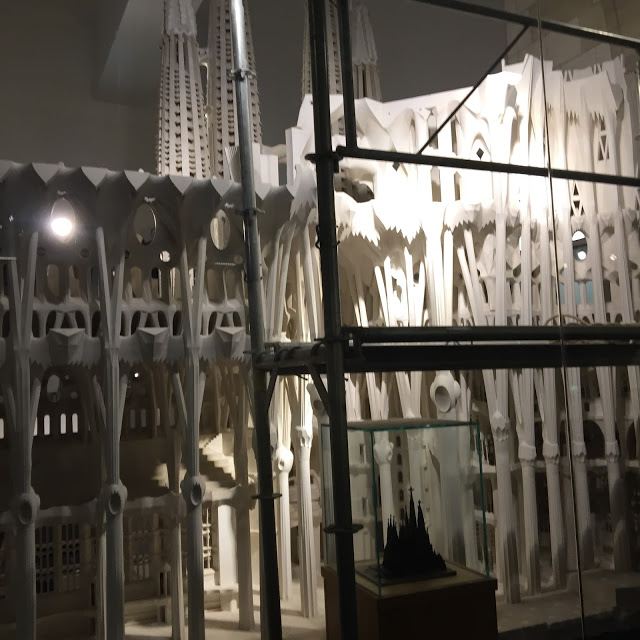
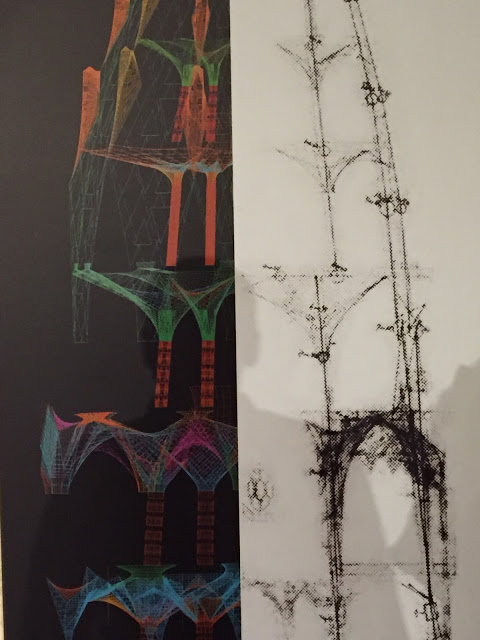
Below the Basilica was a whole museum dedicated to the process that housed many original architectural models, drawings and current models and drawings.
When we walked by this room Tom goes, "Look, their own DCRL!" Be still my heart.
I'd love to see the crew in action.
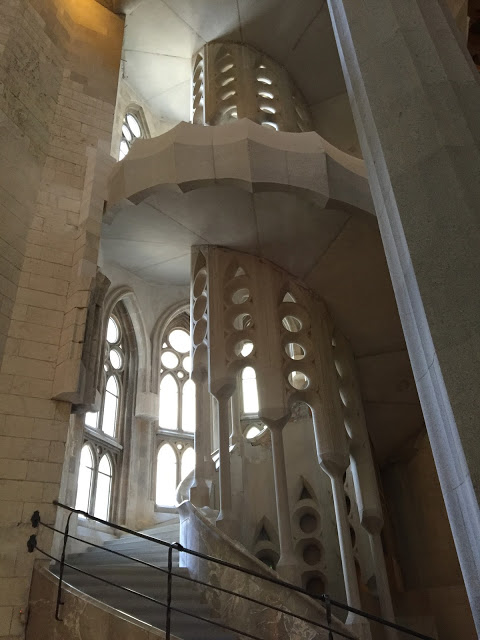
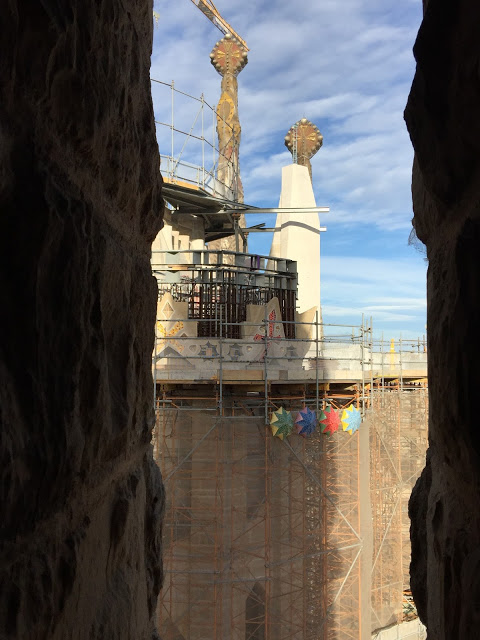
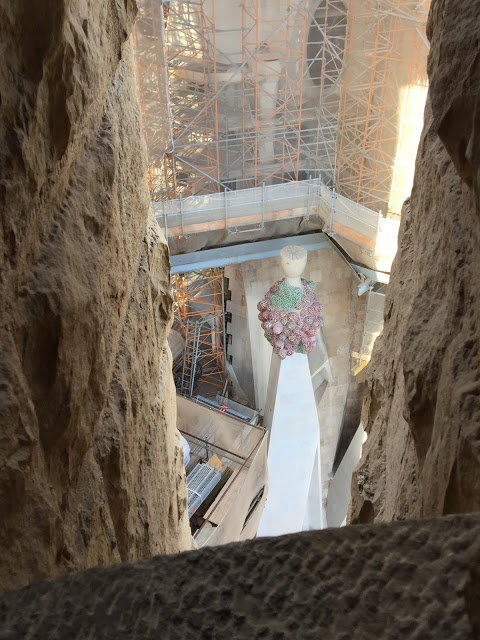
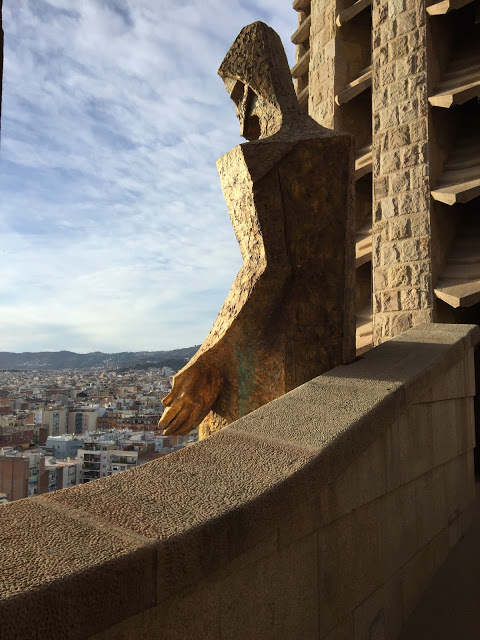
We rode the elevator up to the top of one of the towers and walked down the spiral staircase. It was actually terrifying because it was so windy, but the structure didn't move at all... so that was reassuring. The tops of the towers have mosaic "finial" type structures of fruit and vegetables. They catch the light just right.
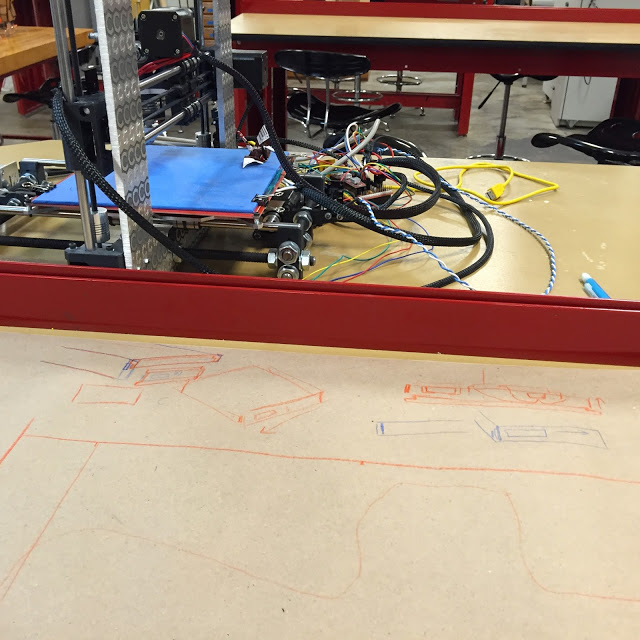
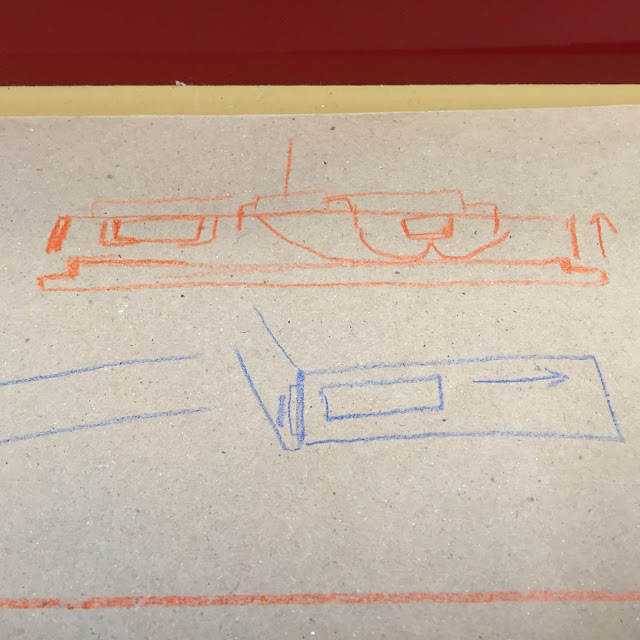
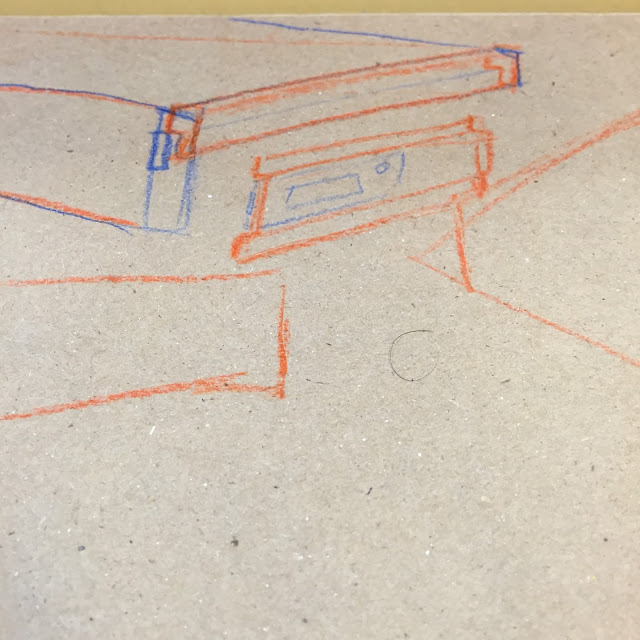
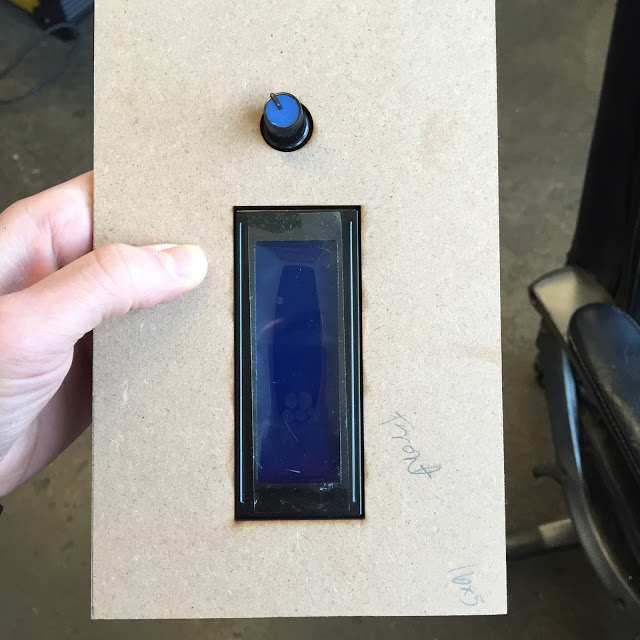
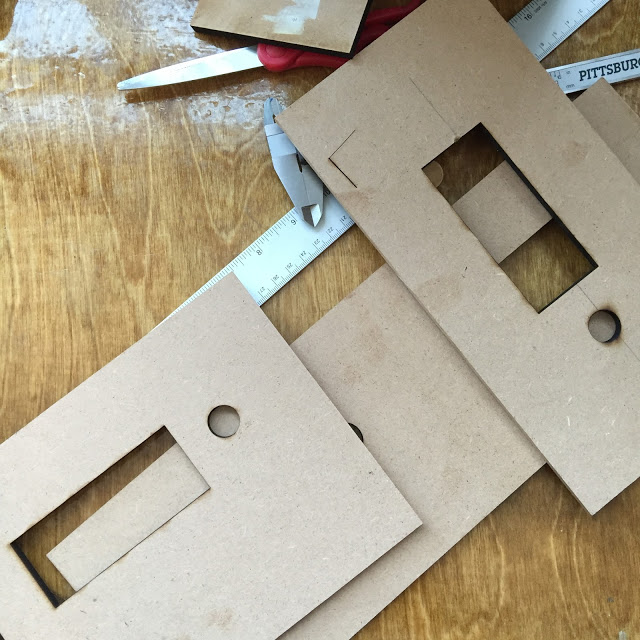
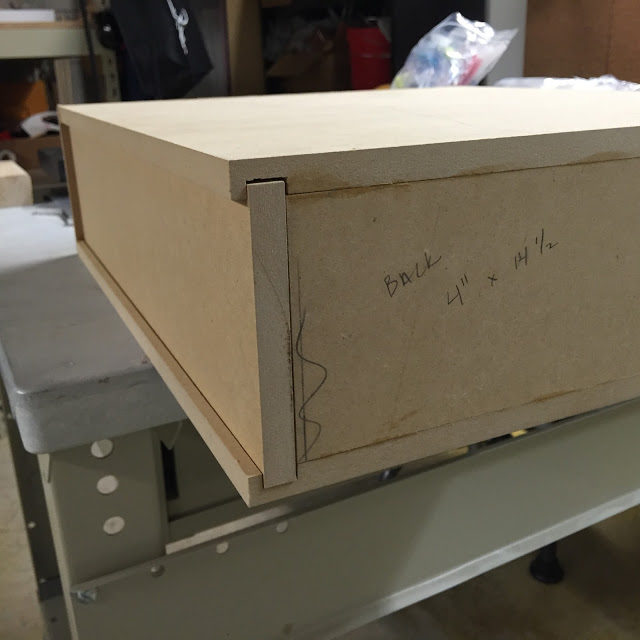
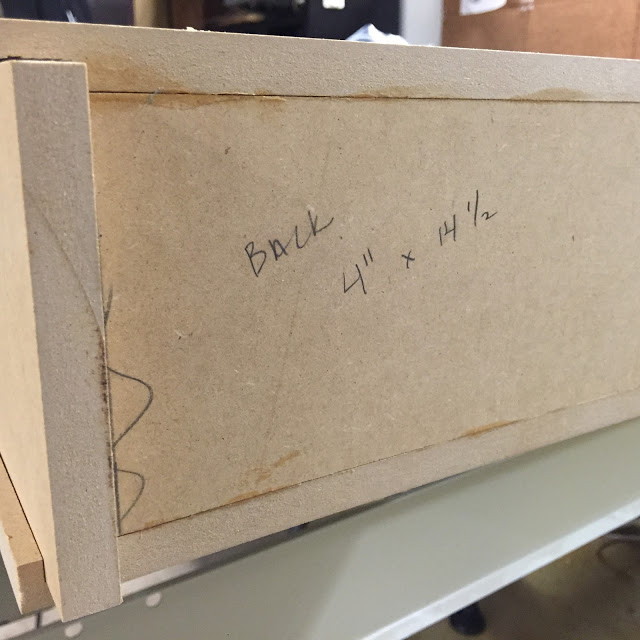
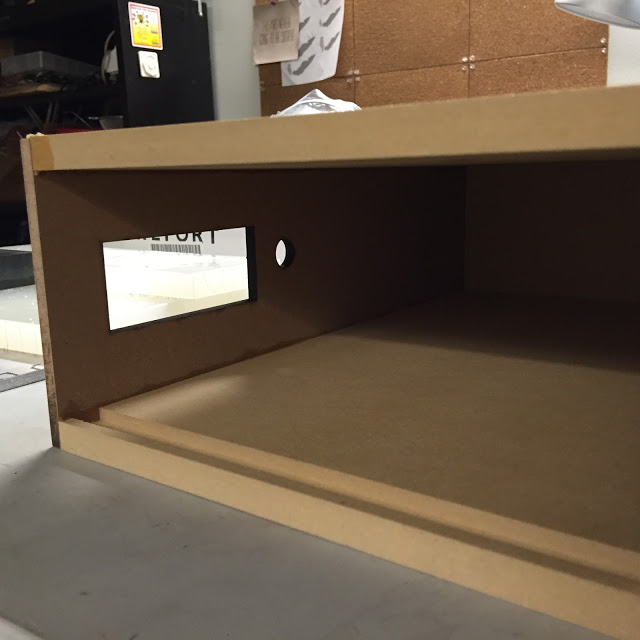
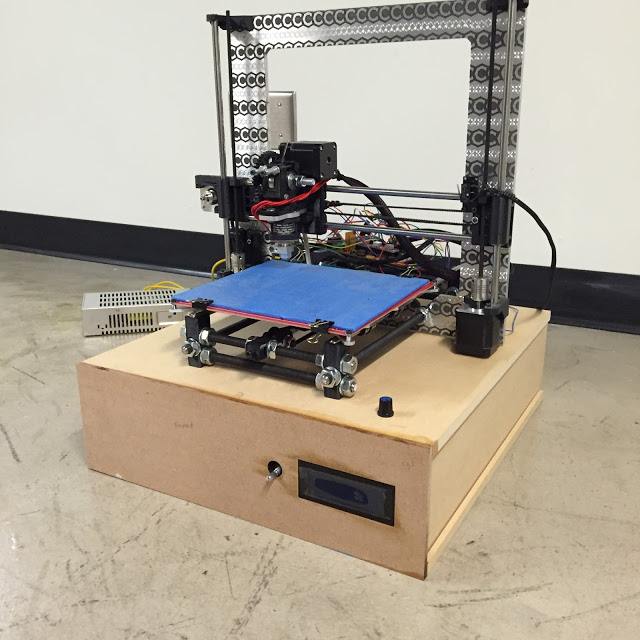
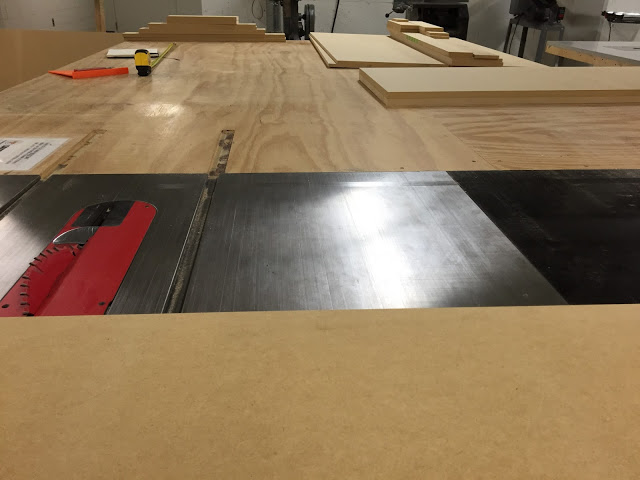
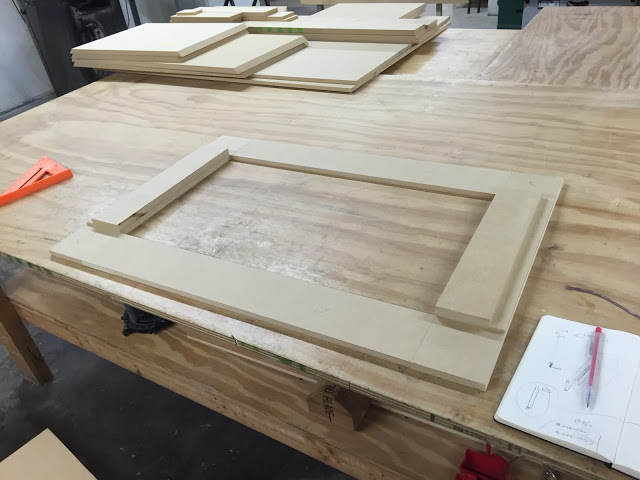
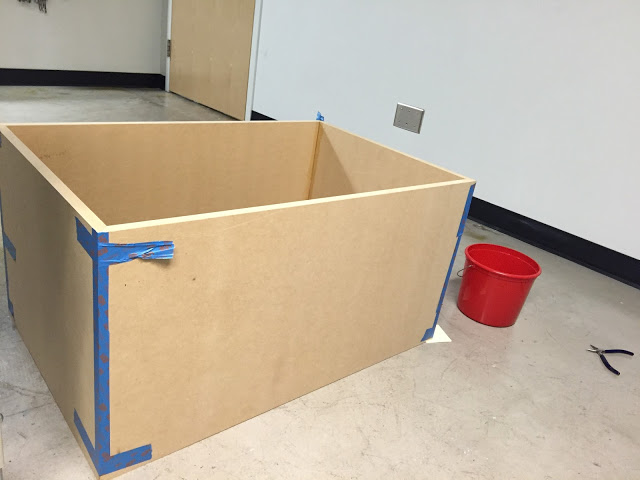
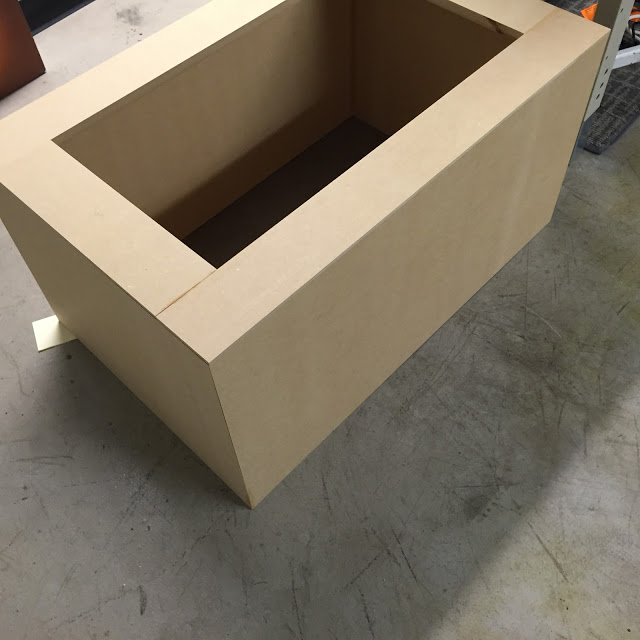
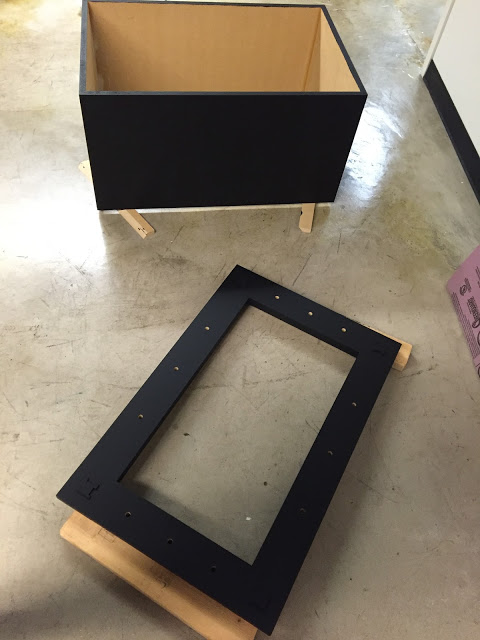
I made a box out of MDF to house the electronics for my 3D Printer. I started with some rough sketches, cut the 1/2" MDF on the table saw and then the 1/4" on the laser cutter. Here's what I've got so far:
It took a lot of trouble shooting to get the alignment just right.
Both of the sides slide out for easy access to the electronics.
Eventually I will paint the box after drilling a few holes in the top for the cords to go through.
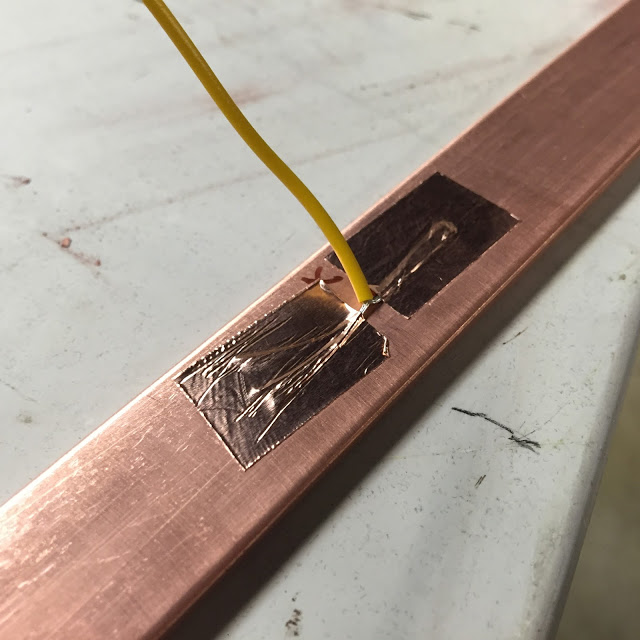
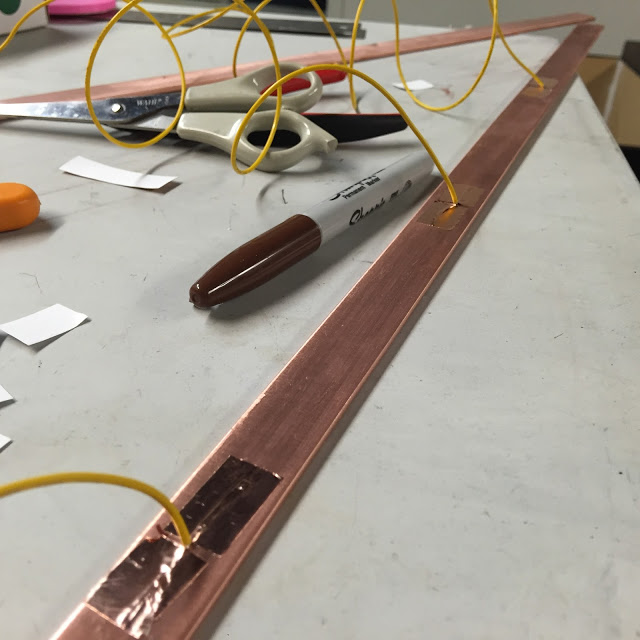
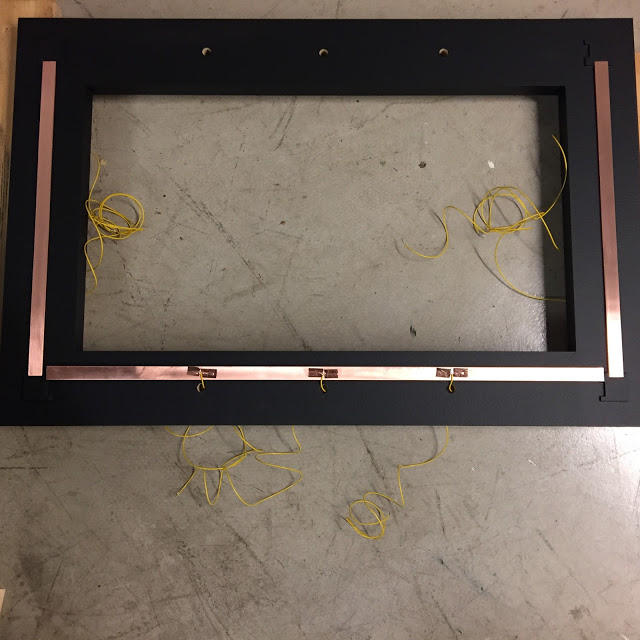
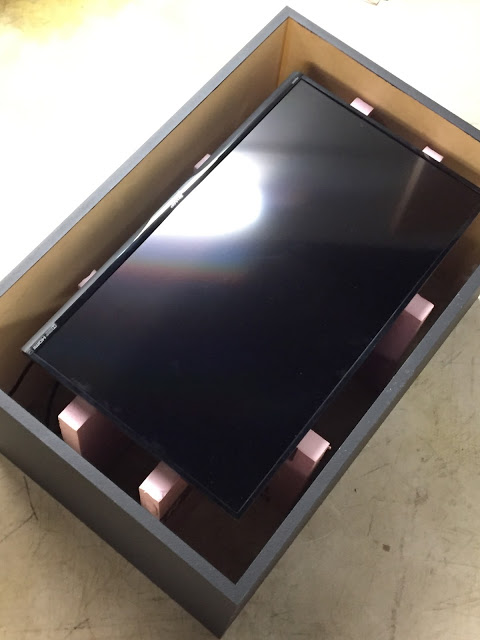
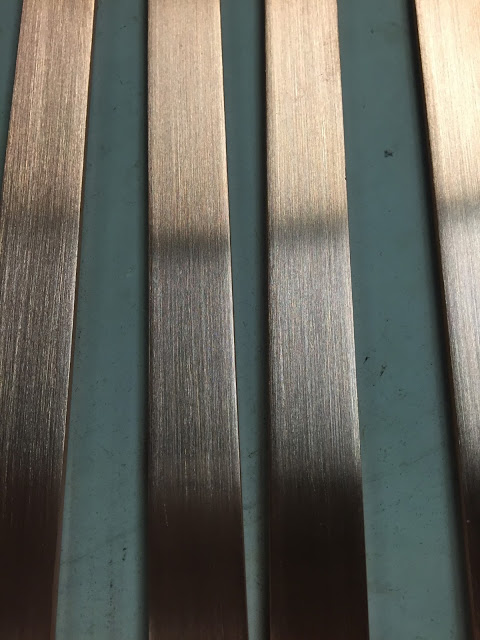
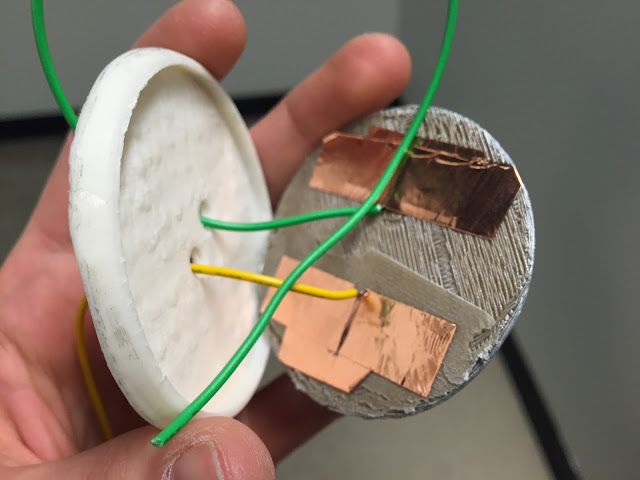
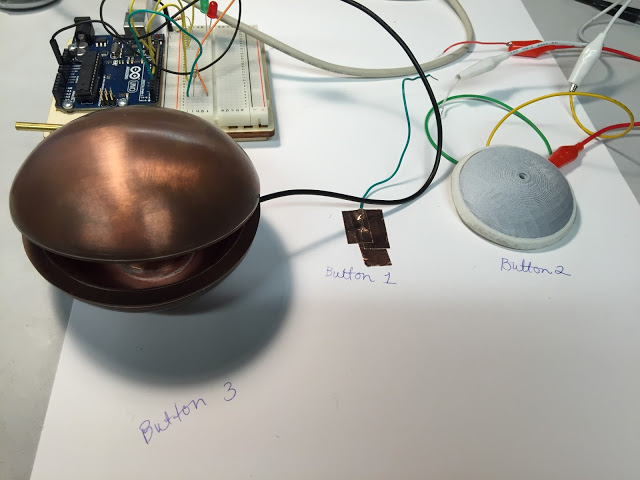
Here are some more images from the construction of the project I made for Interactive and Multimedia Art. I used this 1/8" x 3/4" copper stock to make the "buttons" for the project. They are all wired up to an Arduino. I ended up running a ground plane of steel just below each copper strip too. I built a foam stand for the TV to rest on.
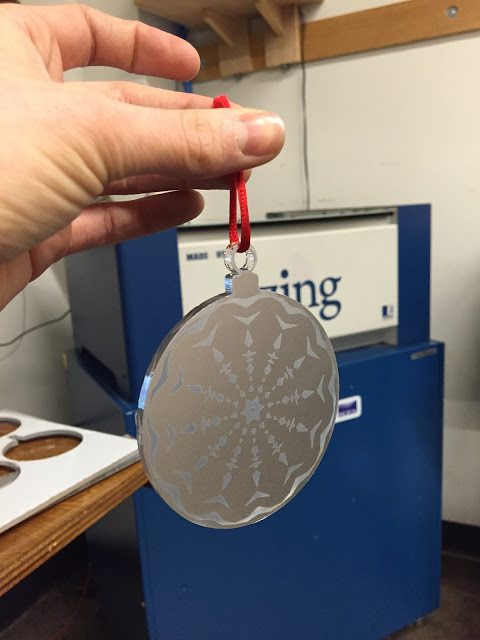
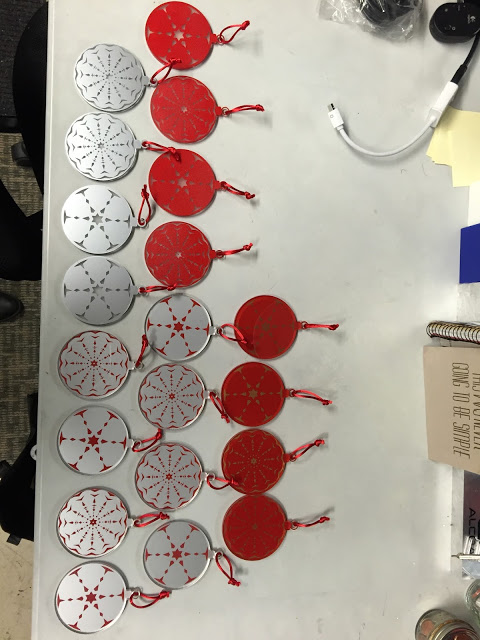
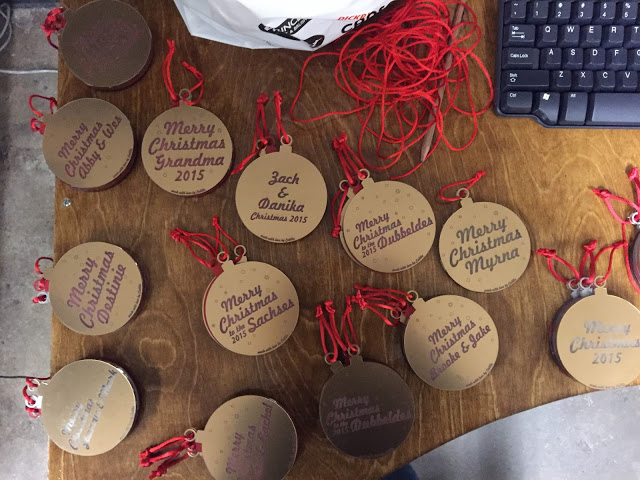
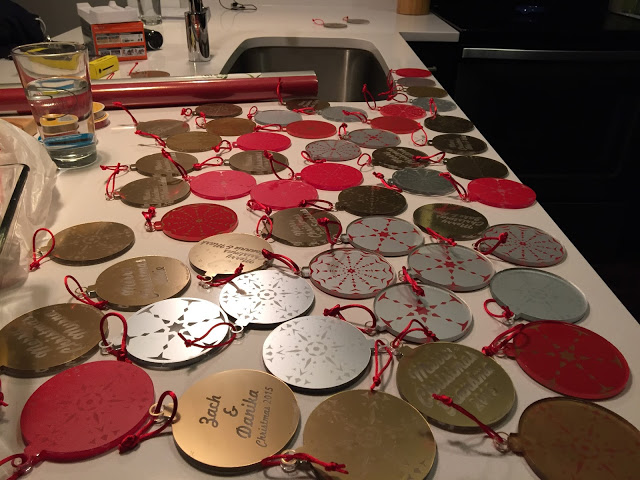
Every year I try to make at least 50% of the gifts I give and usually it consists of all jewelry for the ladies in my family. This year (for many reasons) I decided to make 100% of the gifts I gave; everyone was given laser cut ornaments. I designed 3 ornament patterns in Rhino, spray coated clear acrylic, engraved the patterns on the painted side, cut them out, and hung them from a red cord. Every package came with 3 inside; one customized to the family or couple, and two patterned.
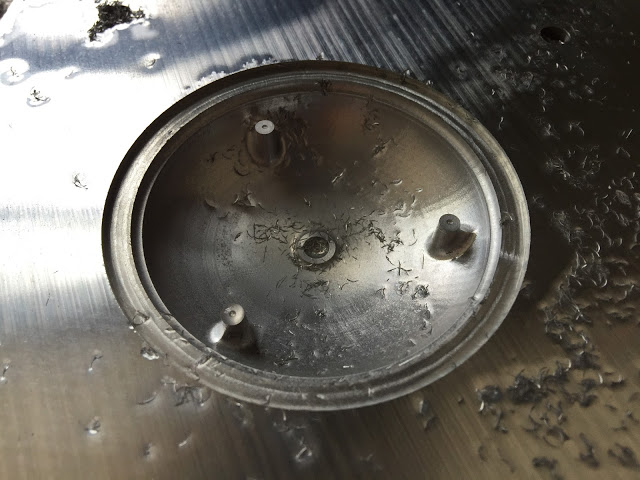
The funny part about this was that the idea came from a huge (at the time) disappointment in the studio earlier in the fall semester... This was during a week where I was sleeping about 3 hours a night, staying late in the studio and then waking up at 4AM to go back to the studio to make sure I was able to use the equipment I needed to use. I was working on CNC milling a piece of aluminum for the iAm project and I had spent about 3 hours on the piece when I accidentally ran a drill mill straight through my perfectly milled but now destroyed part... The first thought was "If I would have slept an extra three hours, would this have happened?" (I know the mistake was bound to happen sooner or later, but I couldn't help but wish I was still sleeping.) I didn't let it shake me, I just loaded up another piece of aluminum and started over. I later texted a picture to Tom with a sad face and he said "I'll give you $100 if you carve in "Christmas 2015" and put a string on it." It made me laugh. It wasn't a half bad idea ;) ... and it reminded me to make space for the creative mind even in moments that test your strength and endurance.
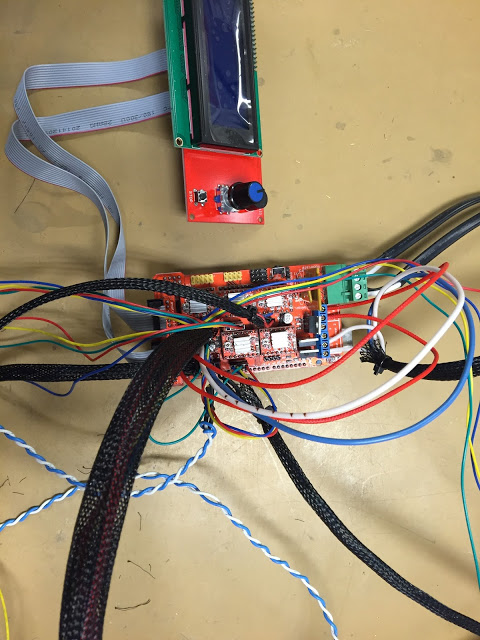
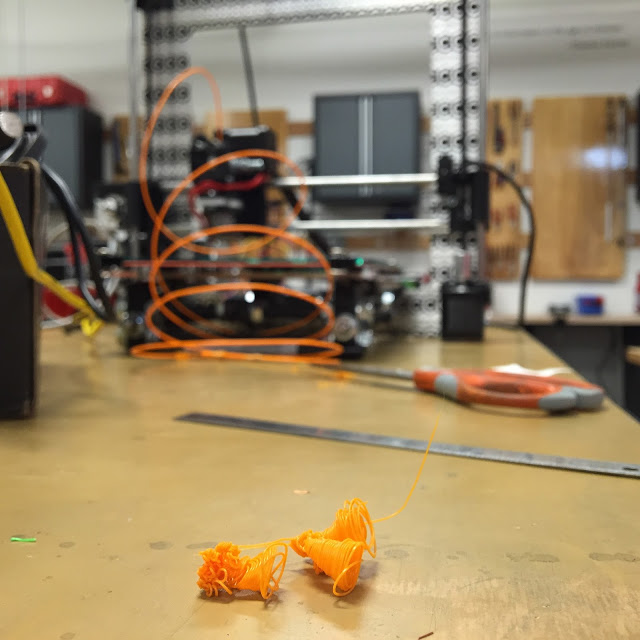
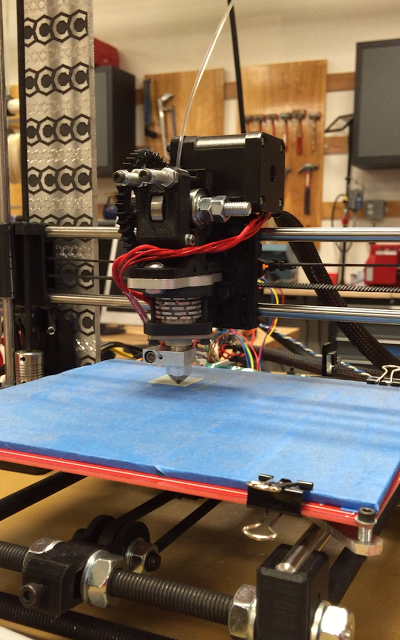
It's been a while since I've posted about (and worked on) my prusa i3 progress... Last week I made it my goal to make it work before the new year. I did pretty good. Duncan helped me trouble shoot and customize the code to get it working. It's extruding PLA really nicely, the code just needs to be tweaked a little more for location and distance information. After the final code adjustments, I'll be making a box to hold all of the electronics and LCD screen and SD card reader.
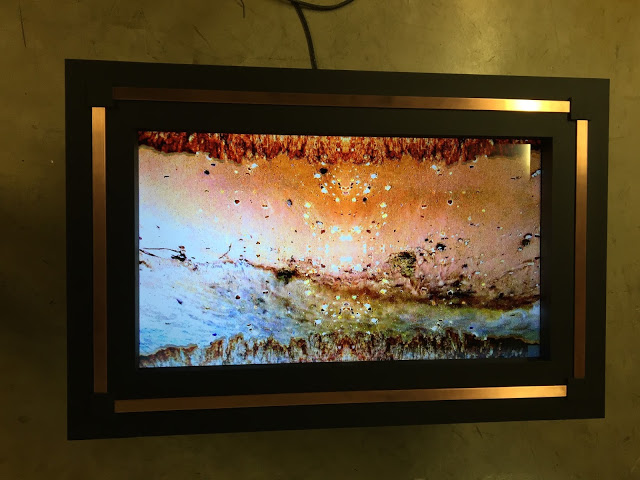
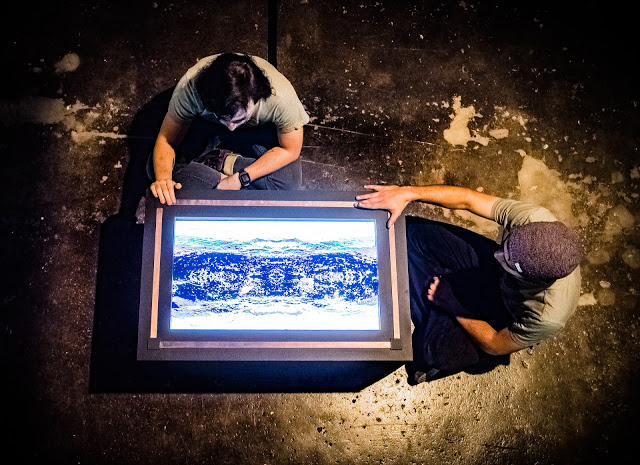
I am manipulating a few images of water that I recorded out at Atwater Beach last week for my final project in Interactive and Multimedia Art. I've been doing some writing about the work, so I'll just post that here too (below)... I'm not sold on the video presentation yet - so I'm not posting any video documentation until that's better under my control. To see the work live, check out Arts Tech Night at Kenilworth Square East on Wednesday, December 16 from 6PM - 9PM.
Bound by Periphery
is an interactive art object that explores aspects of peripheral awareness
through human presence and touch. Upon approaching the object, the viewer’s
presence and proximity are sensed; this reveals a moving image on a screen
resting face up on the gallery floor. By crouching down and physically
exploring the frame of the video, the imagery begins to change; the water
imagery becomes clear, colors increase in saturation and the sound of waves and
wind becomes evident. Through presence and an acute awareness of the boundaries
of the object, the viewers experience becomes more dynamic and descriptive. In
this way, Bound by Periphery explores
various states of being contained and containing physically through objects as
a metaphor for the mind. A container holds a screen, holding a sequence of
video frames, playing over time. While screens can contain an endless amount of
data, this object is restrained to the frame of the video. The video frame only
allows us to experience what is in view, limiting our field of vision, but upon
exploration of the periphery, the focus becomes clearer and transforms. By
placing emphasis on the physical presence of the body on the edge of the
object, the viewer is offered an incentive to explore, to relieve themselves of
tunnel vision, to soften focus and play.
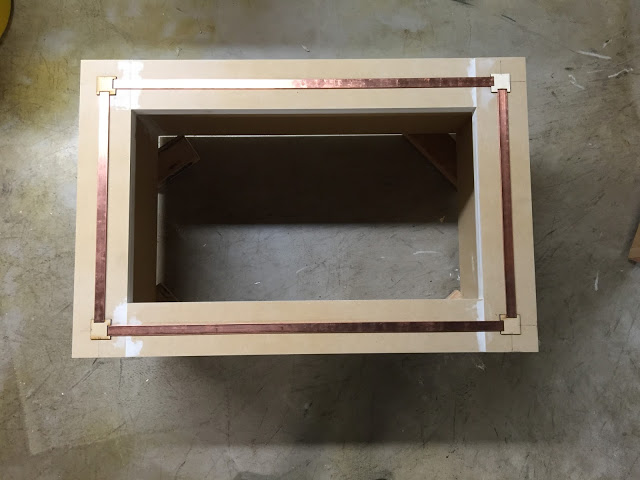
I've been working on an interactive object for my Interactive and Multimedia Art class... Here's a few images of the structure I've been creating to hold the TV over the weekend. I'll have some videos playing on the screen and then you will be able to manipulate the videos by sliding your fingers across the copper strips mounted to the surface of the frame.
I had never done any angled cutting on the table saw so it was a bit tricky to get the right measurements at first, but with a little experimentation, I got exactly what I was looking for. It's really satisfying to work with wood, you can get such precise results relatively quickly if you have the right tools.
I cut out a slot to inset the top frame into the top of the box structure. I needed to keep it hollow so that I can fit the tv, electronics, and laptop inside.
On a recommendation from Broc, I decided to just use glue and tape to construct the pedestal. This worked good from what I can tell. He said this is the way a few professors on campus construct all of their pedestals, so we'll see if it stands the test of time and the wear of Arts Tech night!
I sanded out the overlaps with a little wood filler, to disguise the seams. Laser cut some corner strips (WOAH - DIGI FAB and HAND FAB - UNITED!)
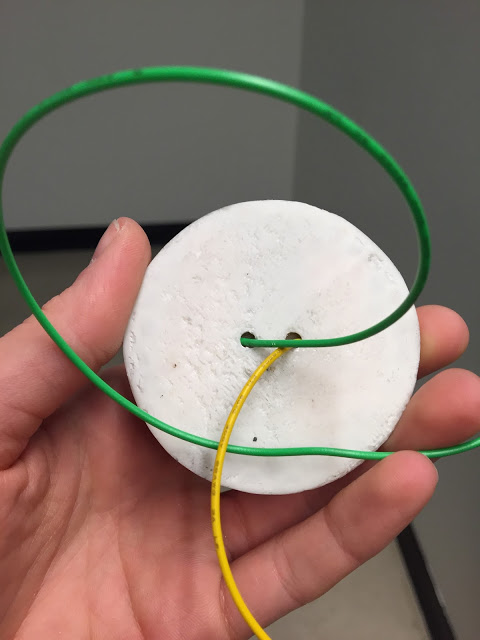
Drilled the holes for the wire to go through and made sure to attach the laser cut pieces to separate the four "buttons."
Finished the copper strips with a 150 grit sand paper. I will have to seal these with a spray acrylic to regulate the capacitance.
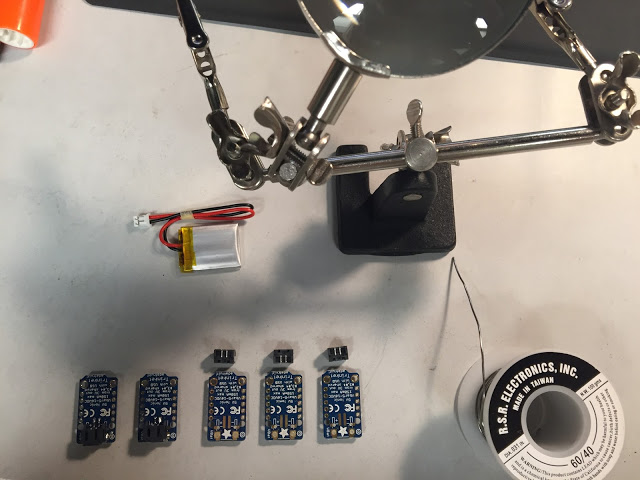
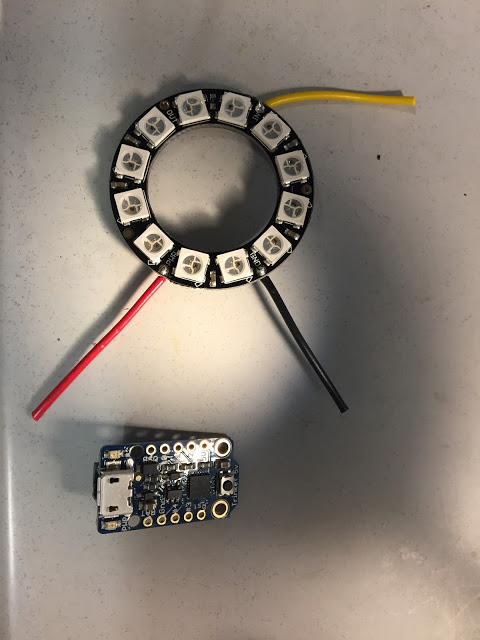
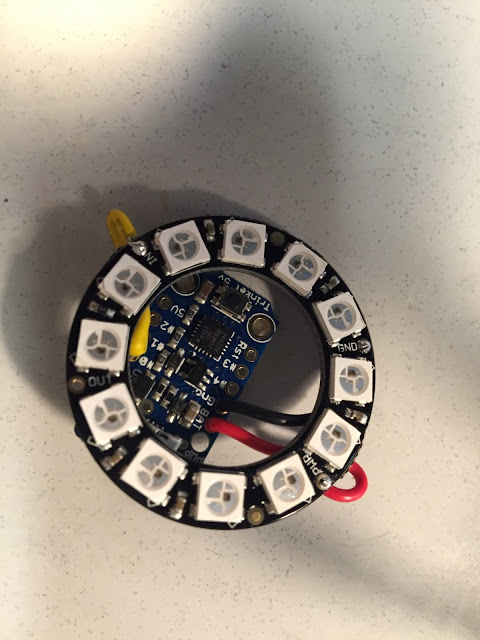
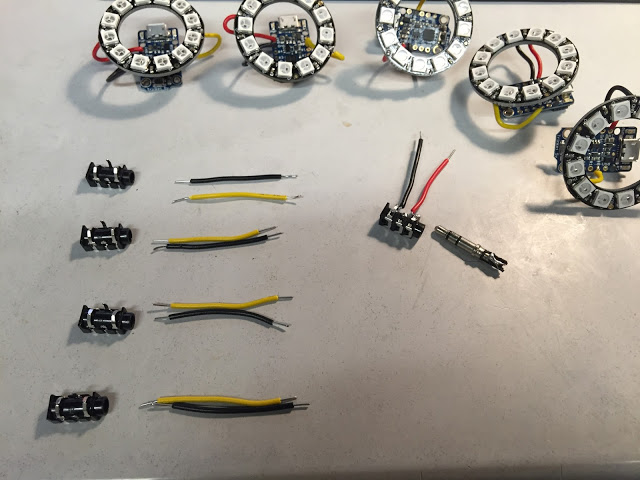
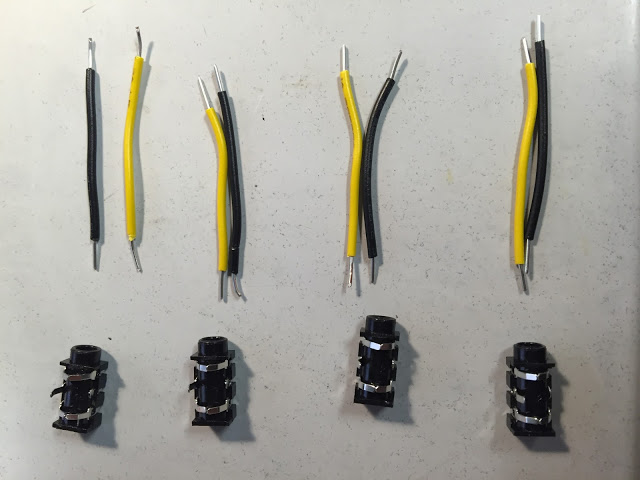
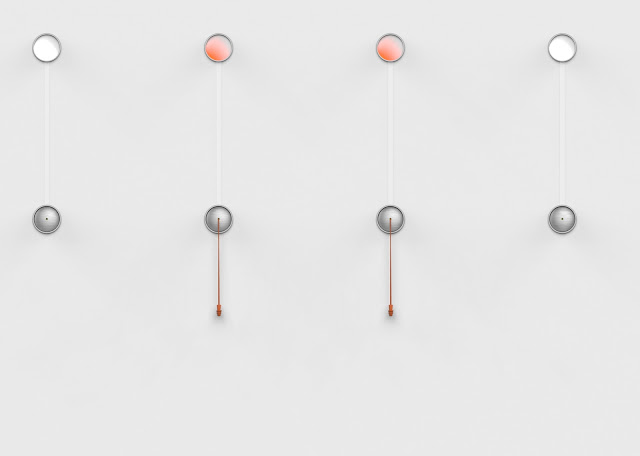
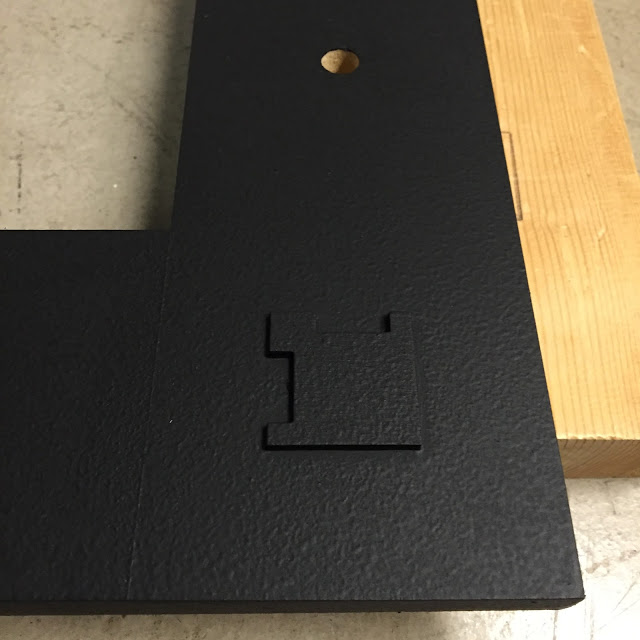
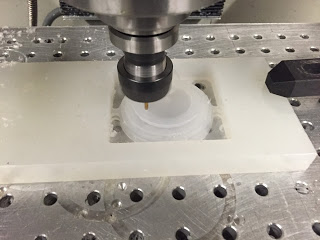
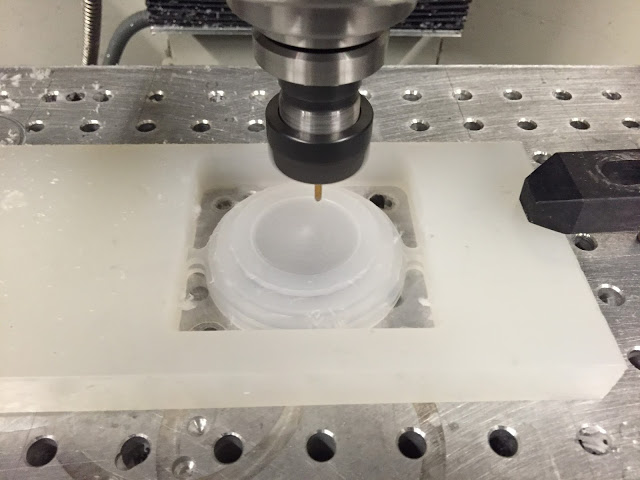
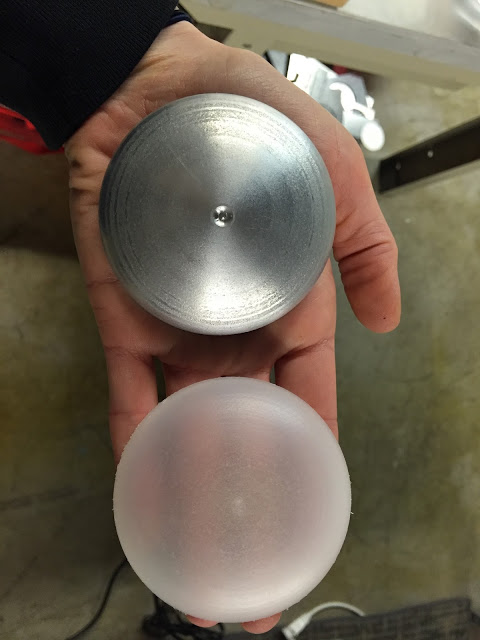
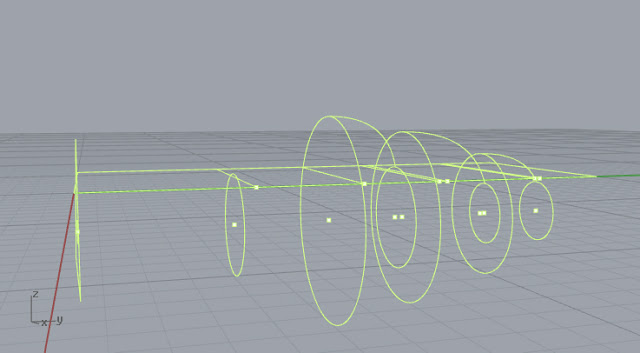
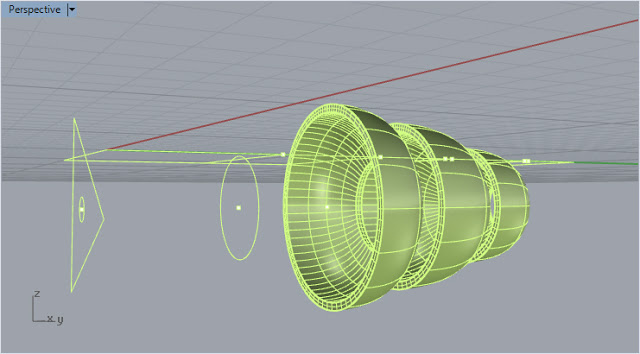
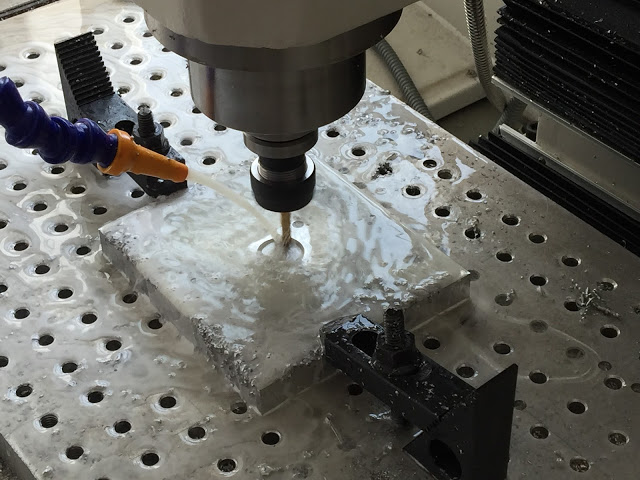
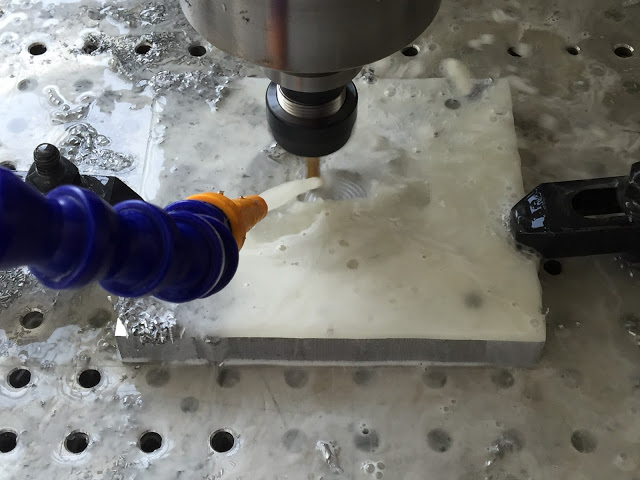
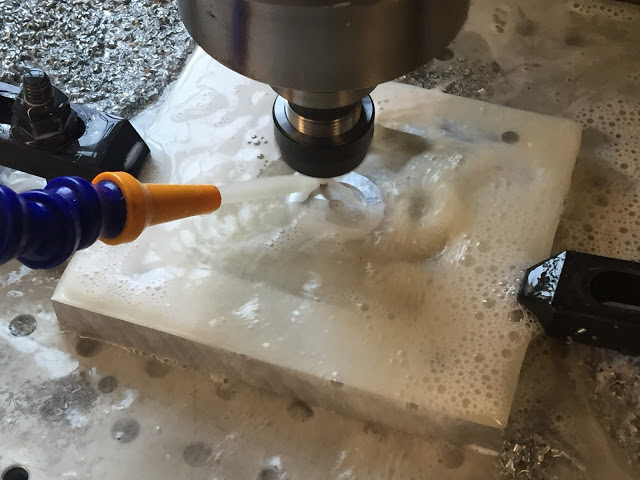
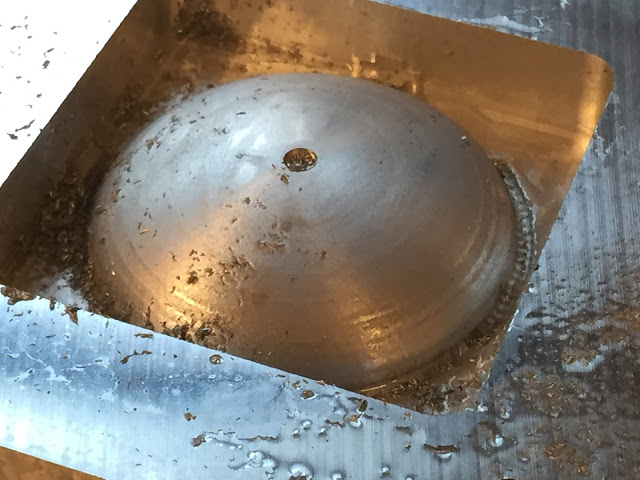
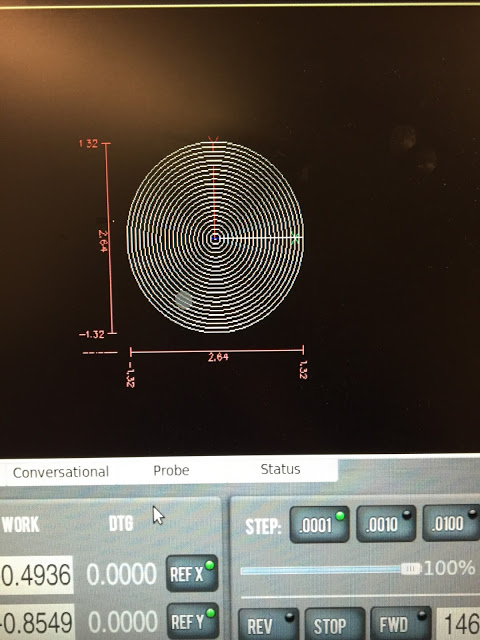
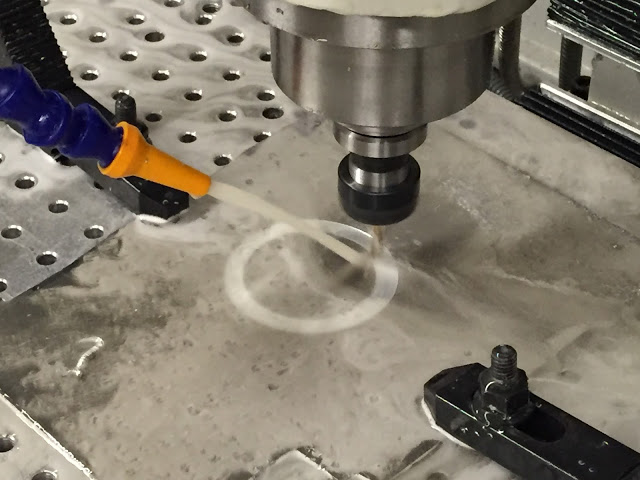
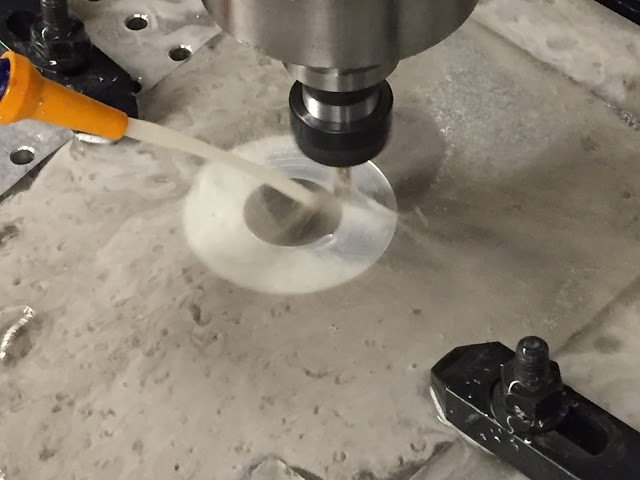
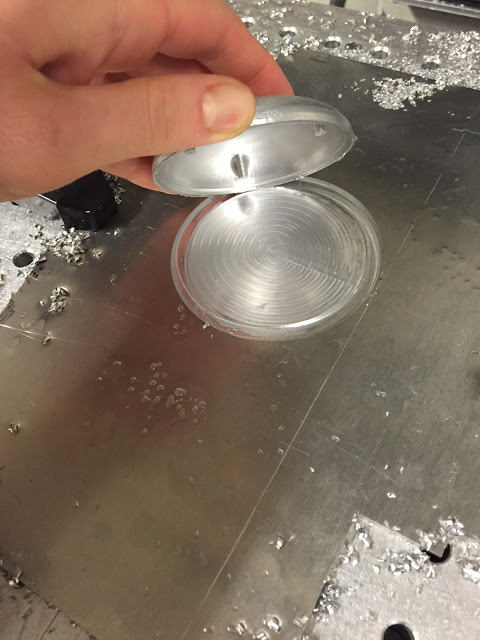
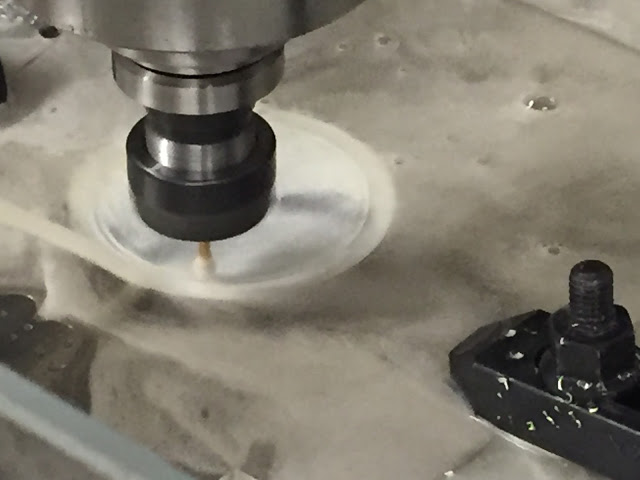
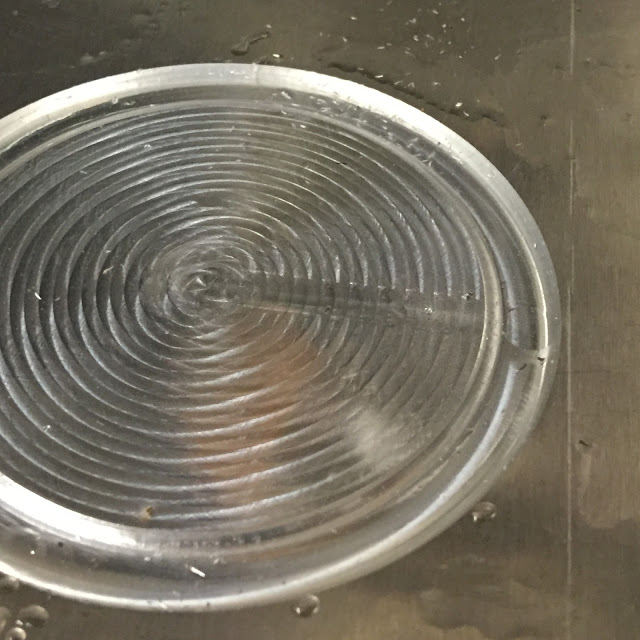
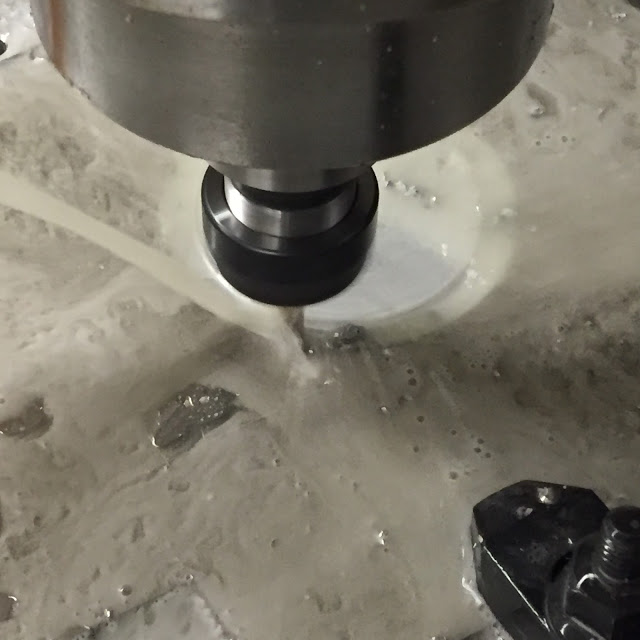
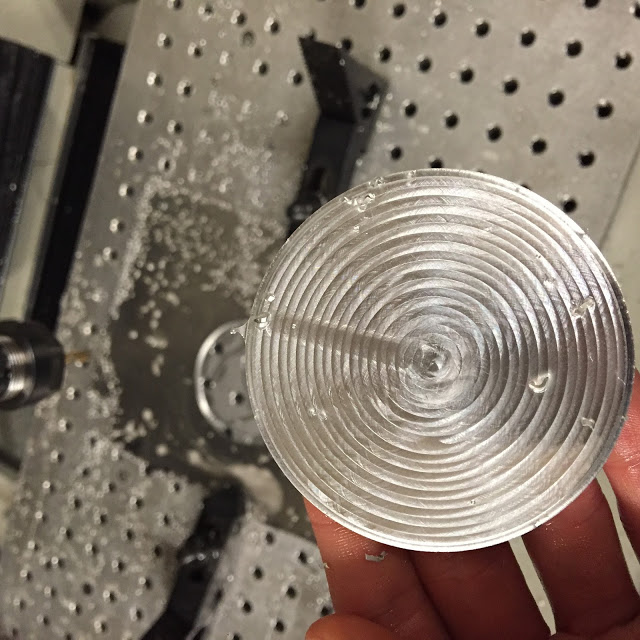
This weekend I machined a version of the iAm light out of polypropylene. I ran into a few issues with the break-chip drill operation, but luckily nothing detrimental. This series of operations only takes about an hour and a half, a significantly less amount of time than the aluminum versions of this shape (5 hours per piece, yikes!). I'm going to test out sandblasting on the back of the light to see if that diffuses the light a little more. I've got a 12 neopixel ring, trinket, and battery that all goes inside, so I'd like to be able to frost the dome a little more, so that the electronics don't distract. I've been thinking about the color of light I'd like the object to emit, and I think I've decided on hues of orange to go with the plugs. I'm really having a lot of fun with this project, all of the materials and all of the components are making it challenging to finish quickly, but I think taking my time with some of the decisions will pay off in the end product.
I've been working on a high-end and a low-end packaging design for the iAm project's plugs. The "high-end" version will be 3D printed and then sealed in a vacuum formed case once the design is finalized. The "low-end" version will be laser cut out of a thinner plastic and engraved with the lettering. I see the high-end version of packaging being part of a set for purchase - socket, case, light and light case, vinyl tape, wires, battery, instructions, and the plugs. I see the lower end packaging being used in gallery spaces or public spaces and offered for free if the viewer is willing to participate in the experience of iAm.
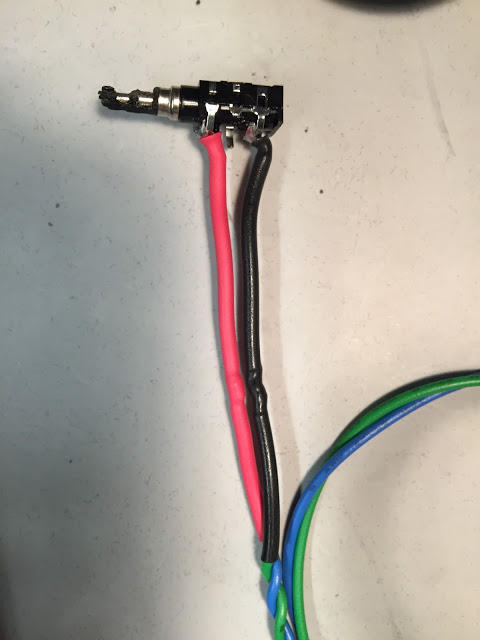
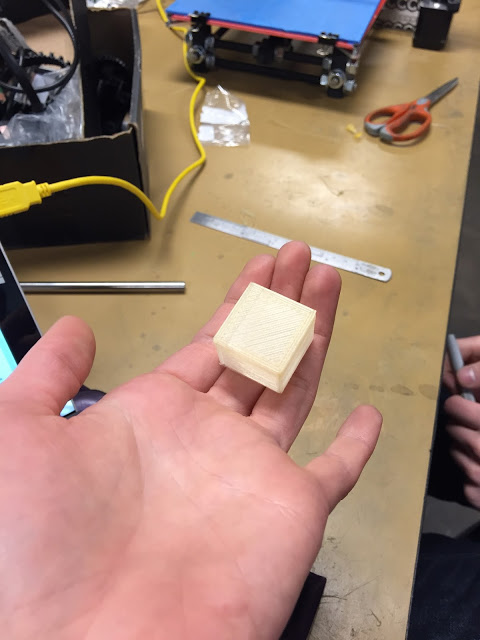
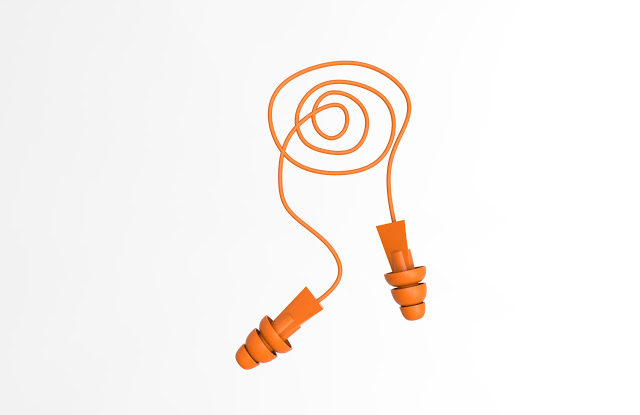
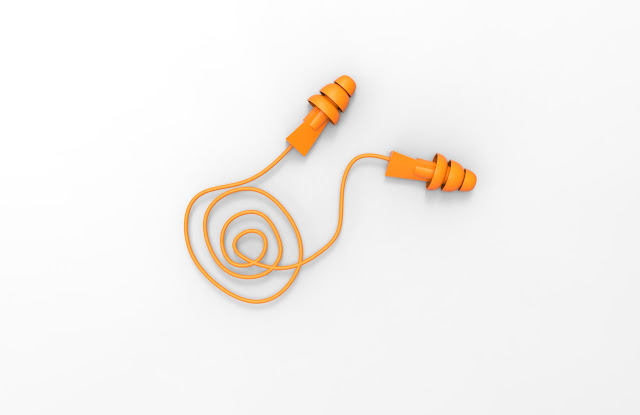
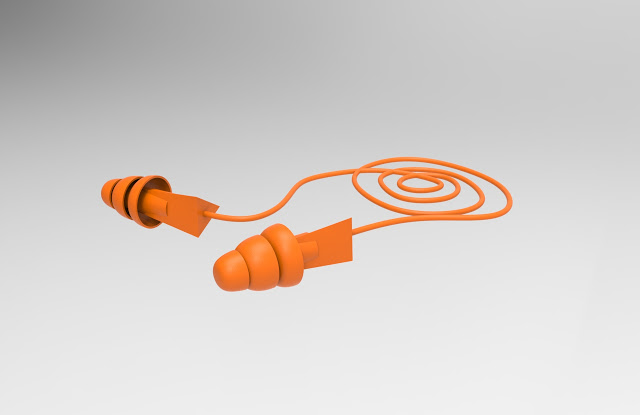
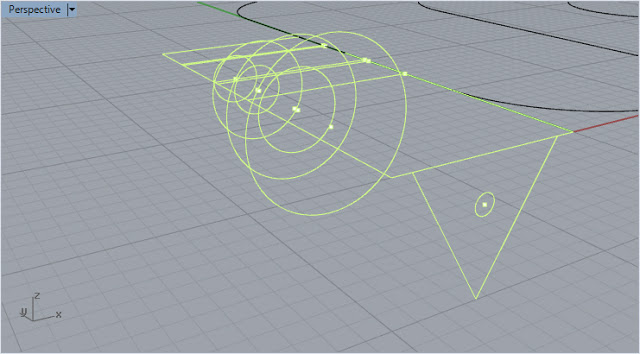
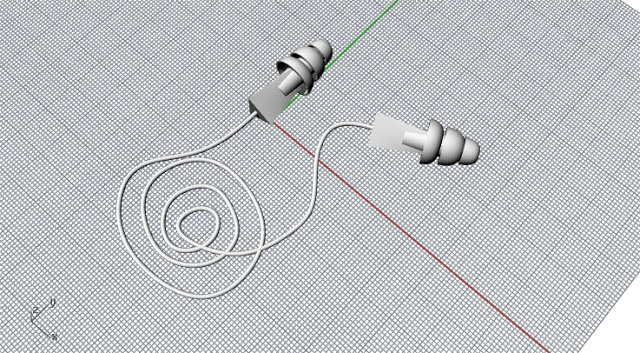
I've been designing around these ear plugs for the iAm project. I decided after I modeled them to release them on GRABCAD because there are currently only two ear plug models on there. I think this file is valuable because I've designed it specifically for the Tasco Tri-Grip Reusable Ear Plug that I've been buying through the Ear Plug Superstore. I like it when models I find online are specific to actual products available for purchase.
Below are images documenting the creation of the ear plug.
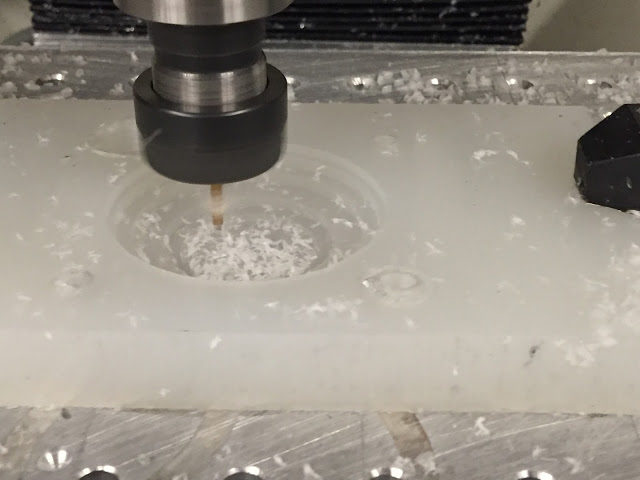
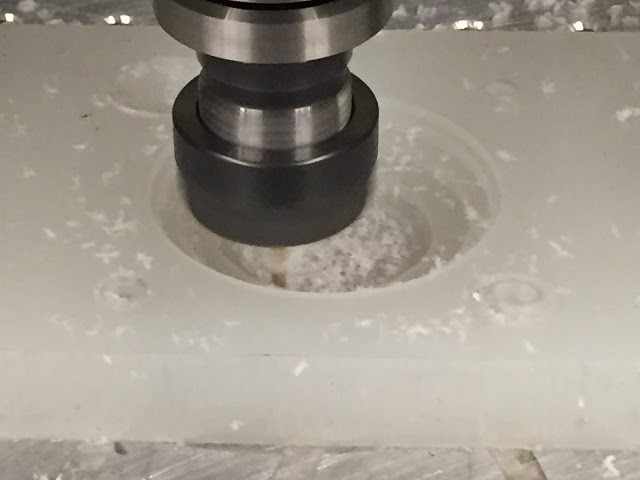
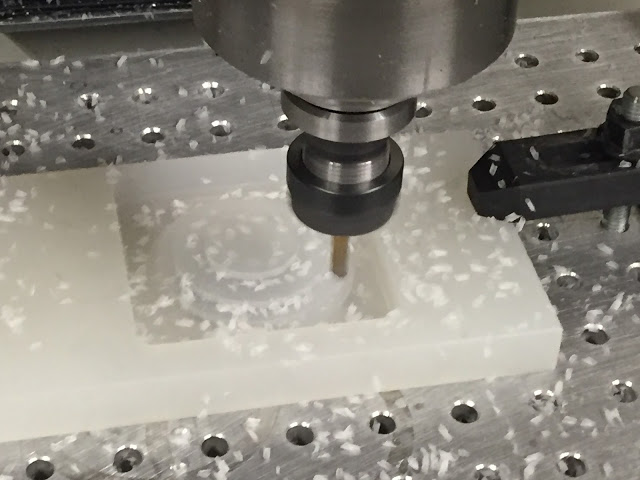
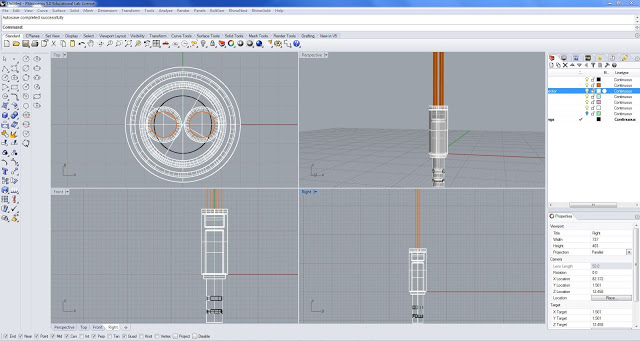
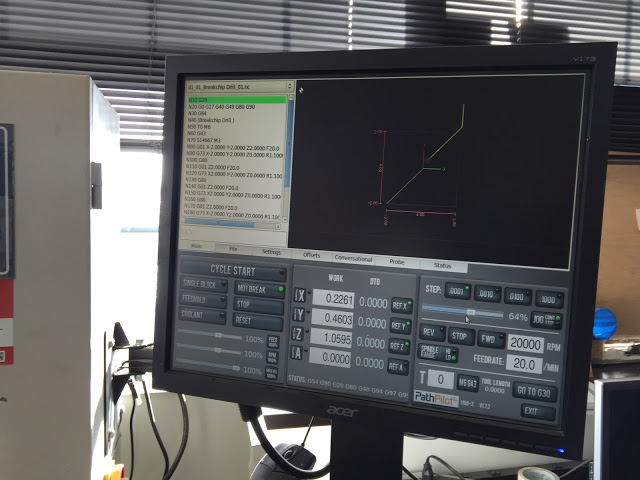
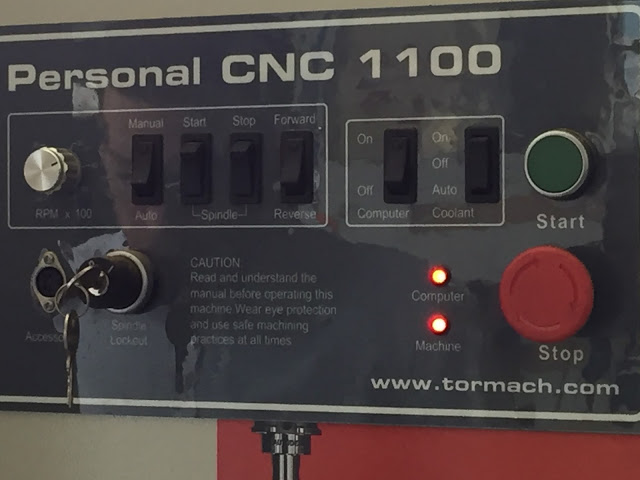
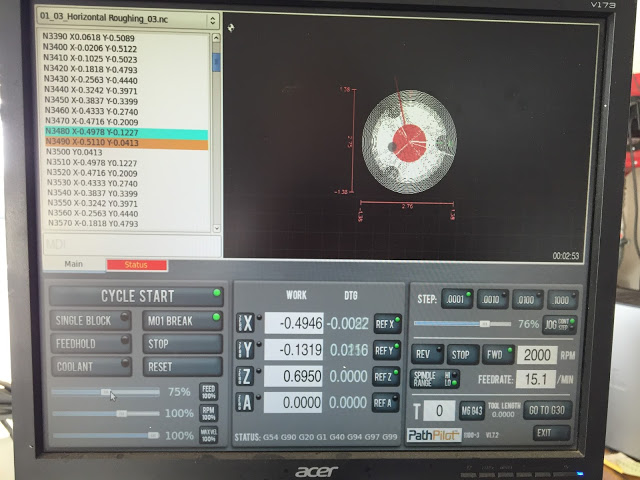
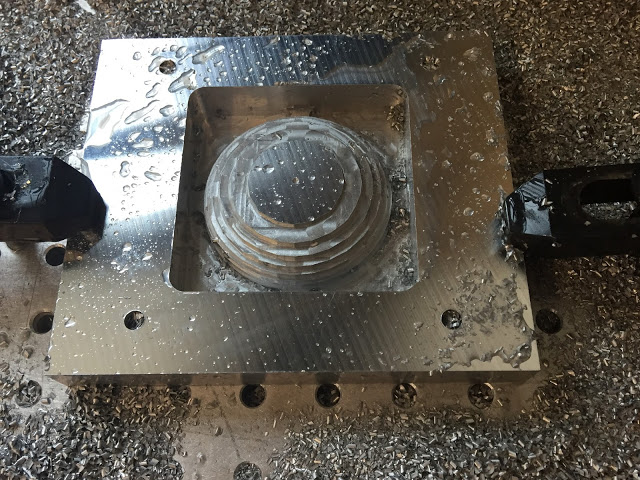
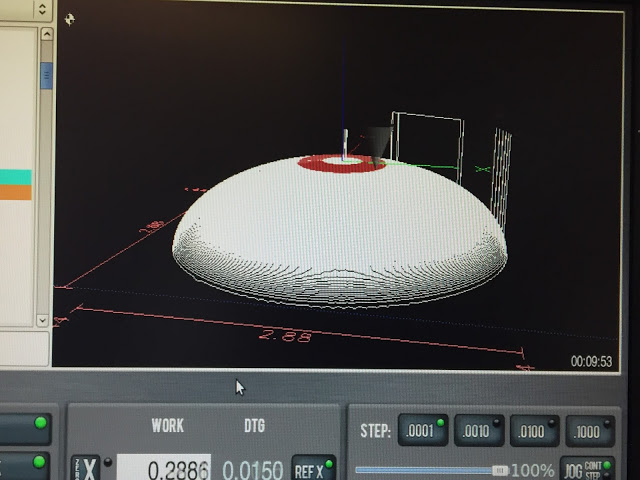
Frankie showed me how to use the tormach with pathpilot last week. He helped me mill the top portion of iAm, and then over the weekend I wrote the code and milled the bottom half. The tolerances between the top and bottom are just right - makes me super happy!!! I will finish assembling this next week.
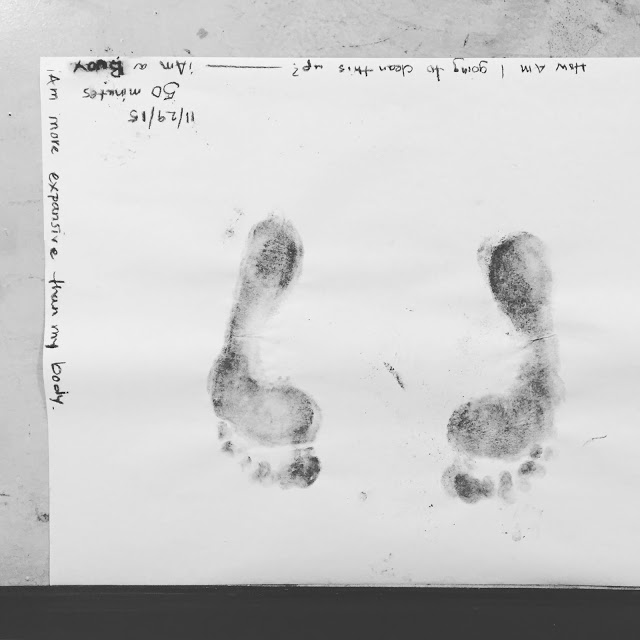
When I came up with iAm, I hadn't considered its actual use to be part of the project, but today I am starting to feel different about its function. On multiple occasions, from members of my graduate committee, other professors, classmates, and visitors to my studio, I've been given the suggestion to place "more directives" near the iAm socket, such as footprints. I've never been entirely into this idea of footprints because it reminds me of childhood experiences at the zoo and museums... But while the footprints in the museum did make the adventure of locating the Tyrannosaurus skeleton more suspenseful and thrilling, those feelings have never been what I've been aiming for with iAm object itself. I want iAm to be a boring object, so the directives must be more subtle. It is my hope that this will allow the adventure, thrill and suspense to be something that can occur in the viewer experience. With all of this being said, I was, however, curious about the stance a viewer might take near iAm when being used. So, today I decided to take a piece of newsprint, some uncompressed charcoal and use iAm. Keeping in mind people may spend varying amounts of time at the object, I set an alarm and decided I would do a 25-minute standing meditation plugged into iAm. So, I set up a video timelapse on my iPhone, rubbed my feet with charcoal, stood up, and plugged into iAm. Immediately upon plugging myself in, I start to follow my breathing and posture, like how I start a normal meditation and then the first thought pops up - I think "How am I going to clean this up?" Eventually, I was able to let this thought go, and remembered that I should just simply enjoy this beautiful 25-minute break from worry, thought, the past, and the future. My body began to relax, and I started to notice that with my inhales and exhales my body was moving ever-so-small-ly towards and away from the wall. "iAm a buoy." I was tethered, connected, secure, and comforted by the distance between my body and the wall. The wave of experience could not knock me from this place because I was designed to float, to be anchored, to be a symbol. (Wow, who knew 'being a buoy,' could be so powerful?) I didn't anticipate this, but my alarm didn't go off. I ended up standing comfortably at iAm for 50 minutes before coming out of my meditation, knowing that what I had experienced was enough to satisfy me for today.