Design for Digital Fabrication - Student Work - Vinyl Tattoo

Art277 - Design for Digital Fabrication
Vinyl Tattoo

For this project students were asked to look to tattoos as inspiration for creating body adornment. They started with sketches, converted those into Rhino curves, and then output the design to the vinyl cutter, cleaned up the sticker and then stuck it on the body/clothing.  


iAm - sockets

A couple weeks ago I started experimenting with plasti-flex, the material I am casting the iAm sockets out of. This part is currently functioning as an interface with the wall, a transitioning material. The initial mold was created out of a 3D printed prototype and some left over Oomoo rubber. I wanted to test out the plasti-flex so when I heard someone in the studio had some extra rubber, I just quickly grabbed the test print and a Tupperware to make a test mold. The makeshift mold allowed me to quickly test the colors and flexibility of the material. The fit turned out really nice. 
I've since re-designed and machined a new socket piece for the final mold and have poured some ReoFlex30 over it. I should have some really nice sockets once this mold is ready to be used. TBC


Stand alone? iAm

After rendering the pieces on the wall, I started to wonder what it would look like if they were all mounted onto a stand alone steel frame... I like how minimal the wall version looks compared to this... I wonder what this would look like suspended from the ceiling vs. coming up from the floor. The desert shot makes me chuckle. 


IMA Final Project - Part 2


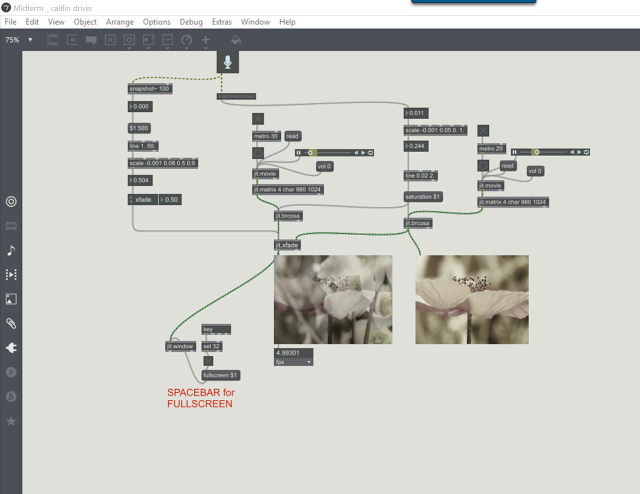
I am manipulating a few images of water that I recorded out at Atwater Beach last week for my final project in Interactive and Multimedia Art. I've been doing some writing about the work, so I'll just post that here too (below)... I'm not sold on the video presentation yet - so I'm not posting any video documentation until that's better under my control. To see the work live, check out Arts Tech Night at Kenilworth Square East on Wednesday, December 16 from 6PM - 9PM. 


Bound by Periphery 
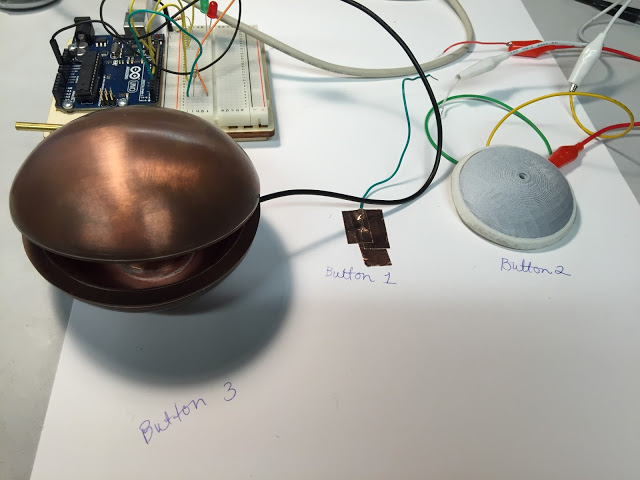
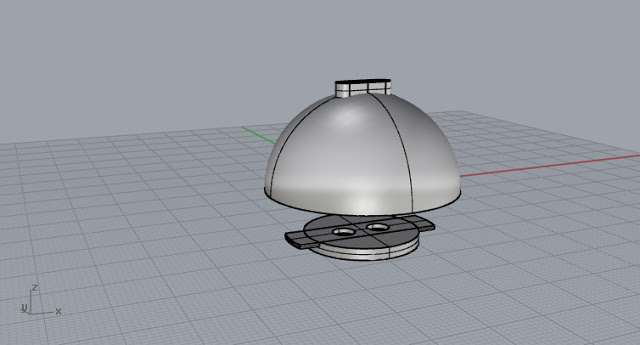
is an interactive art object that explores aspects of peripheral awareness through human presence and touch. Upon approaching the object, the viewer’s presence and proximity are sensed; this reveals a moving image on a screen resting face up on the gallery floor. By crouching down and physically exploring the frame of the video, the imagery begins to change; the water imagery becomes clear, colors increase in saturation and the sound of waves and wind becomes evident. Through presence and an acute awareness of the boundaries of the object, the viewers experience becomes more dynamic and descriptive. In this way, Bound by Periphery explores 
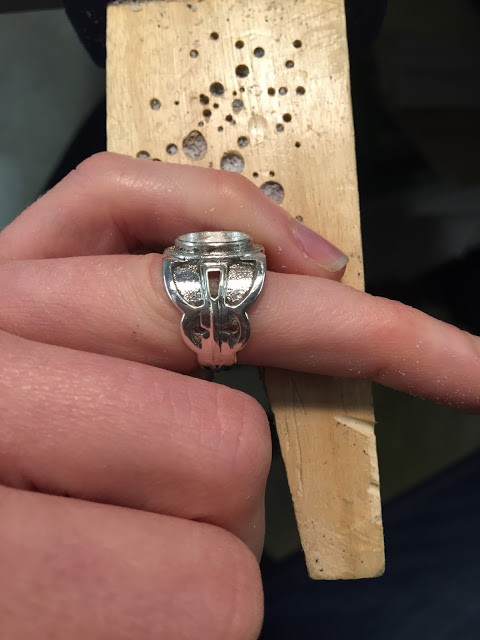
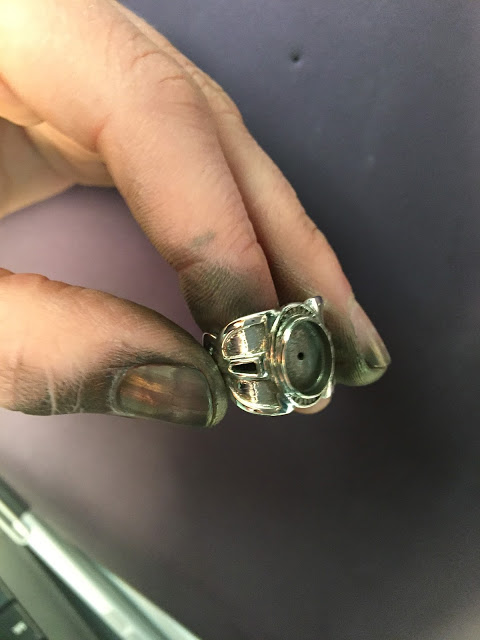
various states of being contained and containing physically through objects as a metaphor for the mind. A container holds a screen, holding a sequence of video frames, playing over time. While screens can contain an endless amount of data, this object is restrained to the frame of the video. The video frame only allows us to experience what is in view, limiting our field of vision, but upon exploration of the periphery, the focus becomes clearer and transforms. By placing emphasis on the physical presence of the body on the edge of the object, the viewer is offered an incentive to explore, to relieve themselves of tunnel vision, to soften focus and play.

iAm Light milling

This weekend I machined a version of the iAm light out of polypropylene. I ran into a few issues with the break-chip drill operation, but luckily nothing detrimental. This series of operations only takes about an hour and a half, a significantly less amount of time than the aluminum versions of this shape (5 hours per piece, yikes!). I'm going to test out sandblasting on the back of the light to see if that diffuses the light a little more. I've got a 12 neopixel ring, trinket, and battery that all goes inside, so I'd like to be able to frost the dome a little more, so that the electronics don't distract. I've been thinking about the color of light I'd like the object to emit, and I think I've decided on hues of orange to go with the plugs. I'm really having a lot of fun with this project, all of the materials and all of the components are making it challenging to finish quickly, but I think taking my time with some of the decisions will pay off in the end product. 


Plug Packaging v1

I've been working on a high-end and a low-end packaging design for the iAm project's plugs. The "high-end" version will be 3D printed and then sealed in a vacuum formed case once the design is finalized. The "low-end" version will be laser cut out of a thinner plastic and engraved with the lettering. I see the high-end version of packaging being part of a set for purchase - socket, case, light and light case, vinyl tape, wires, battery, instructions, and the plugs. I see the lower end packaging being used in gallery spaces or public spaces and offered for free if the viewer is willing to participate in the experience of iAm. 


IMA - Midterm Progress

For my midterm project in Interactive and Multimedia Art, I am creating a projection that will respond to amplitude. It was my hope that this would encourage use of speech, and inspire people to engage in conversation with others around them. So far, my patch is working really well when you blow into the microphone array on my Surface (see at the end of video below), but when you speak and blow into the USB microphone the results are much more subtle (beginning of the video with hello). 

I am acknowledging that the imagery does not directly connect to my other work's way of creating awareness in the viewer, but I do see a direct correlation between the change of the video and voice/breath - a positive correlation. I just don't know how to make it relate more to technology in same why my other work, iAm is. I have thought about having the video imagery be faces, that are reacting to conversation... Maybe that would work better and relate more to human - human interaction. 

Sheila Ring - Finished - it's about time!

So, I finally finished up the ring to bracelet redesign. I am super happy with how the whole process turned went - from designing my first 3D modeled ring, to using a casting service and then post-processing myself. I definitely would get other objects cast in silver through Shapeways. While the cost was only $50.00 to get the design cast in silver, I did spend a considerable amount of time designing, cleaning up the ring, finishing, and setting the stone... so if I had to price out the piece for production, I would probably need to sell this particular ring design starting at around $175.00 to make a profit.  $50.00 for casting, 3 hours for post-processing labor per ring @ $20.00/hr and packaging, plus %60 mark up for profit, with design hours being paid for after the first 2 sales. Compared to a company like Skydog, price is right on par... And their paying rent in LA, which means their jewelry is a steal - GO SHOP NOW!


IMA - Mouse Tracking - Interactive & Generative

A couple weeks ago, I made this "Drawing Bot" for Interactive and Multimedia Art. I was feeling in the mood to make a video of it. Take a watch if you'd like.
I wanted this project to have an uncontrollable erasing component, so I programmed a bunch of metro objects with random numbers to draw partial circles over more circles to act as an eraser. I also wanted the shapes of the mouse drawing to change, so I made all the LCD's have different marks and colors. It's cool and fun for a sec.. kind of like Smash Mouth.

iAm - samples - installed

I've been working on sketching a new idea... Thinking about how to make arrangements to increase body awareness in the viewer. I am working with proximity, sensory deprivation, and the possibility of being near other people, to increase awareness in how we interact with objects and other people in our everyday life. The samples were designed in rhino, 3d printed, some were spray painted to mimic a final finish, mounted on the wall, and each given a pair of ear plugs.  


iAm - samples

I've been working on some sample pieces for a project involving a wall-mounted dome shape. The mechanism I designed was inspired by an artwork I had the opportunity to install for an alumni show I helped organize over the summer by Lucy Derickson. I really liked how it seamlessly allowed the work to hand directly on the wall... Making the mechanism unnoticeable. Not sure if it's the right solution for this piece, but it was fun to make... More pictures to come.


Interactive and Multimedia Art - Exploration: Bang Bot

For our first small exercise in IMA, we were asked to create a "Bang Bot;" write a software program in max that can be initiated with a "bang," or push of a button, using a selection of additional MAX objects that have been introduced so far... Here are a couple screen shots and short videos (please don't waste your time watching them all the way - unless you're reeeeeaaaalllllyyy into it, some of the color combinations are really great) that show my process from start to finish....

All of the objects controlling one circle, this is eventually duplicated and the metros are varied for the 7 different circles that present in the final video animation/software... 

I eventually figured out that you can leave your patcher overlapped, but then rearrange the objects how you want them presented in Presentation mode.... Kind of like having patcher be the code behind the interface or presentation of your code/software. SO the sliders here are all overlapping but then in the Presentation they are all over the place... see video exploration 2 for clarity. 


A bang to initiate all of the bangs through a load message object. 


AND the final product... I could have kept on going and going with this... But you know...


Compact Progress - Neoprene Update

So my neoprene samples finally dried fully in the 3D printed mold... and they look like deflated cheesecakes! I will clean up one to fit in the battery insulator to test it's function... I'm also going to design a 3D printed mold for pouring plaster, and then pouring neoprene into the plaster.